
…it opens up a realm of possibilities.
Please allow me to introduce The Door. Just a regular, antique wood door. With a really funky glossy stain (the white patch is wood filler, ready to be sanded). My client, Cheryl, is getting ready to move into a new home and wanted something ‘unique’. She wanted to think ‘outside’ of the box with her decor for the new house. (Cheryl, is so my type of client). Yes, indeed. I like the outside of all boxes.
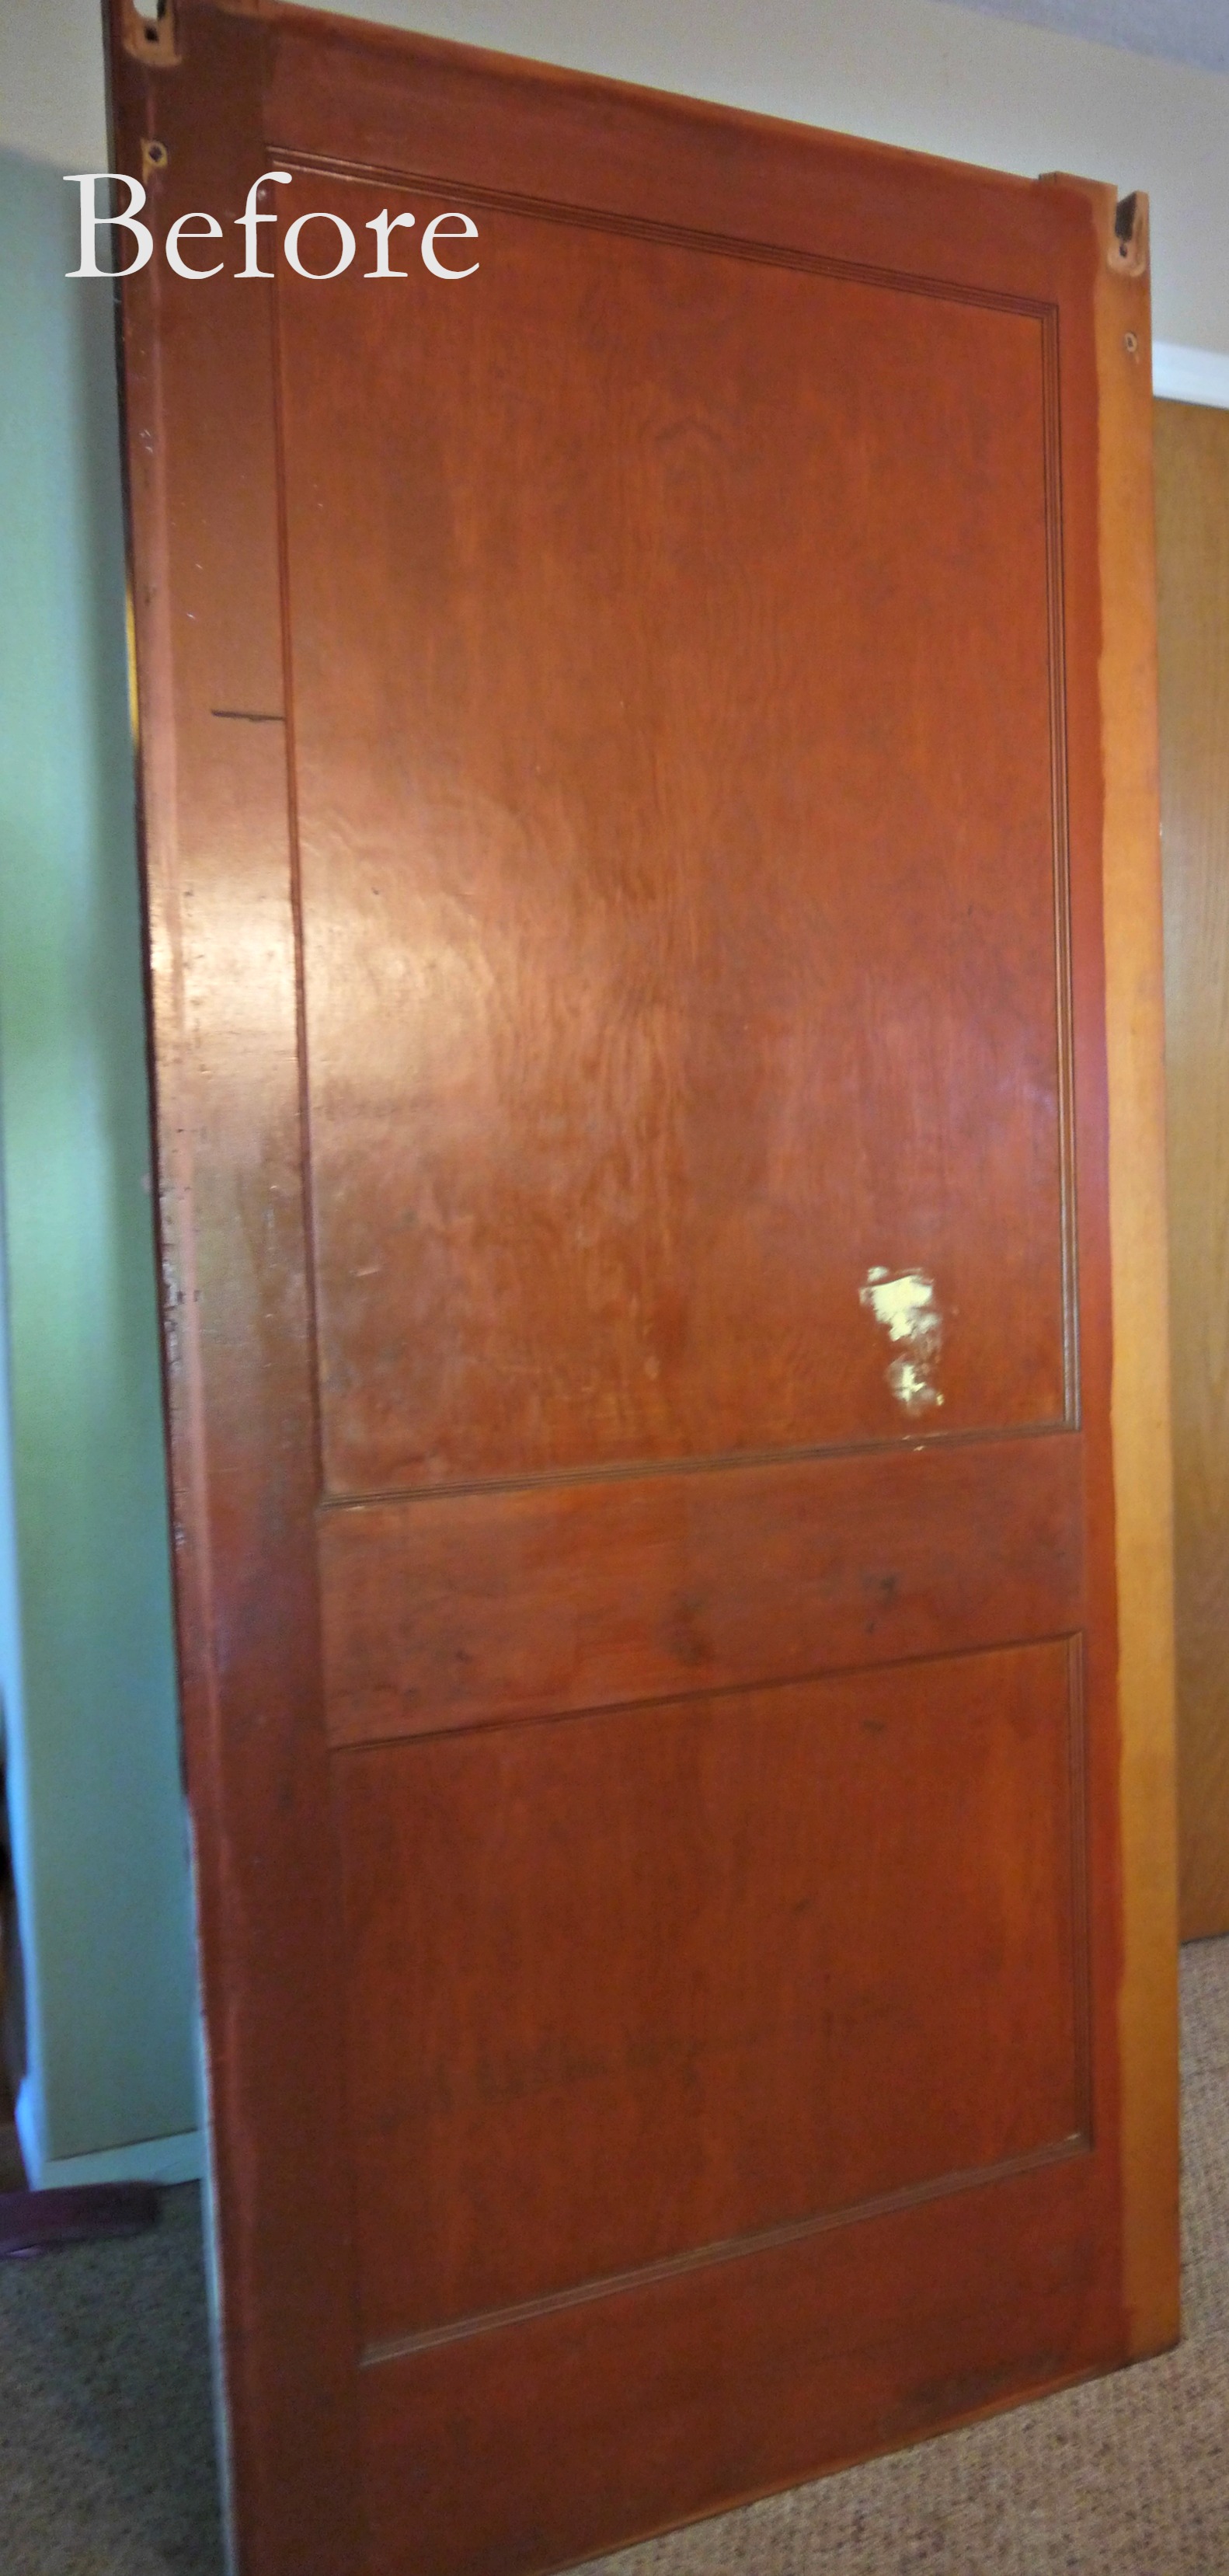 We met one afternoon to talk about her vision for the door. It’s a great door, don’t get me wrong: Solid, solid, solid (unlike the hollow core ones of today). And it would look great the way Cheryl wants to use it (installed with antique barn hardware, working as a sliding door for a downstairs closet). But it needed something to make it special. Something to make it stand out, to truly be a custom piece.
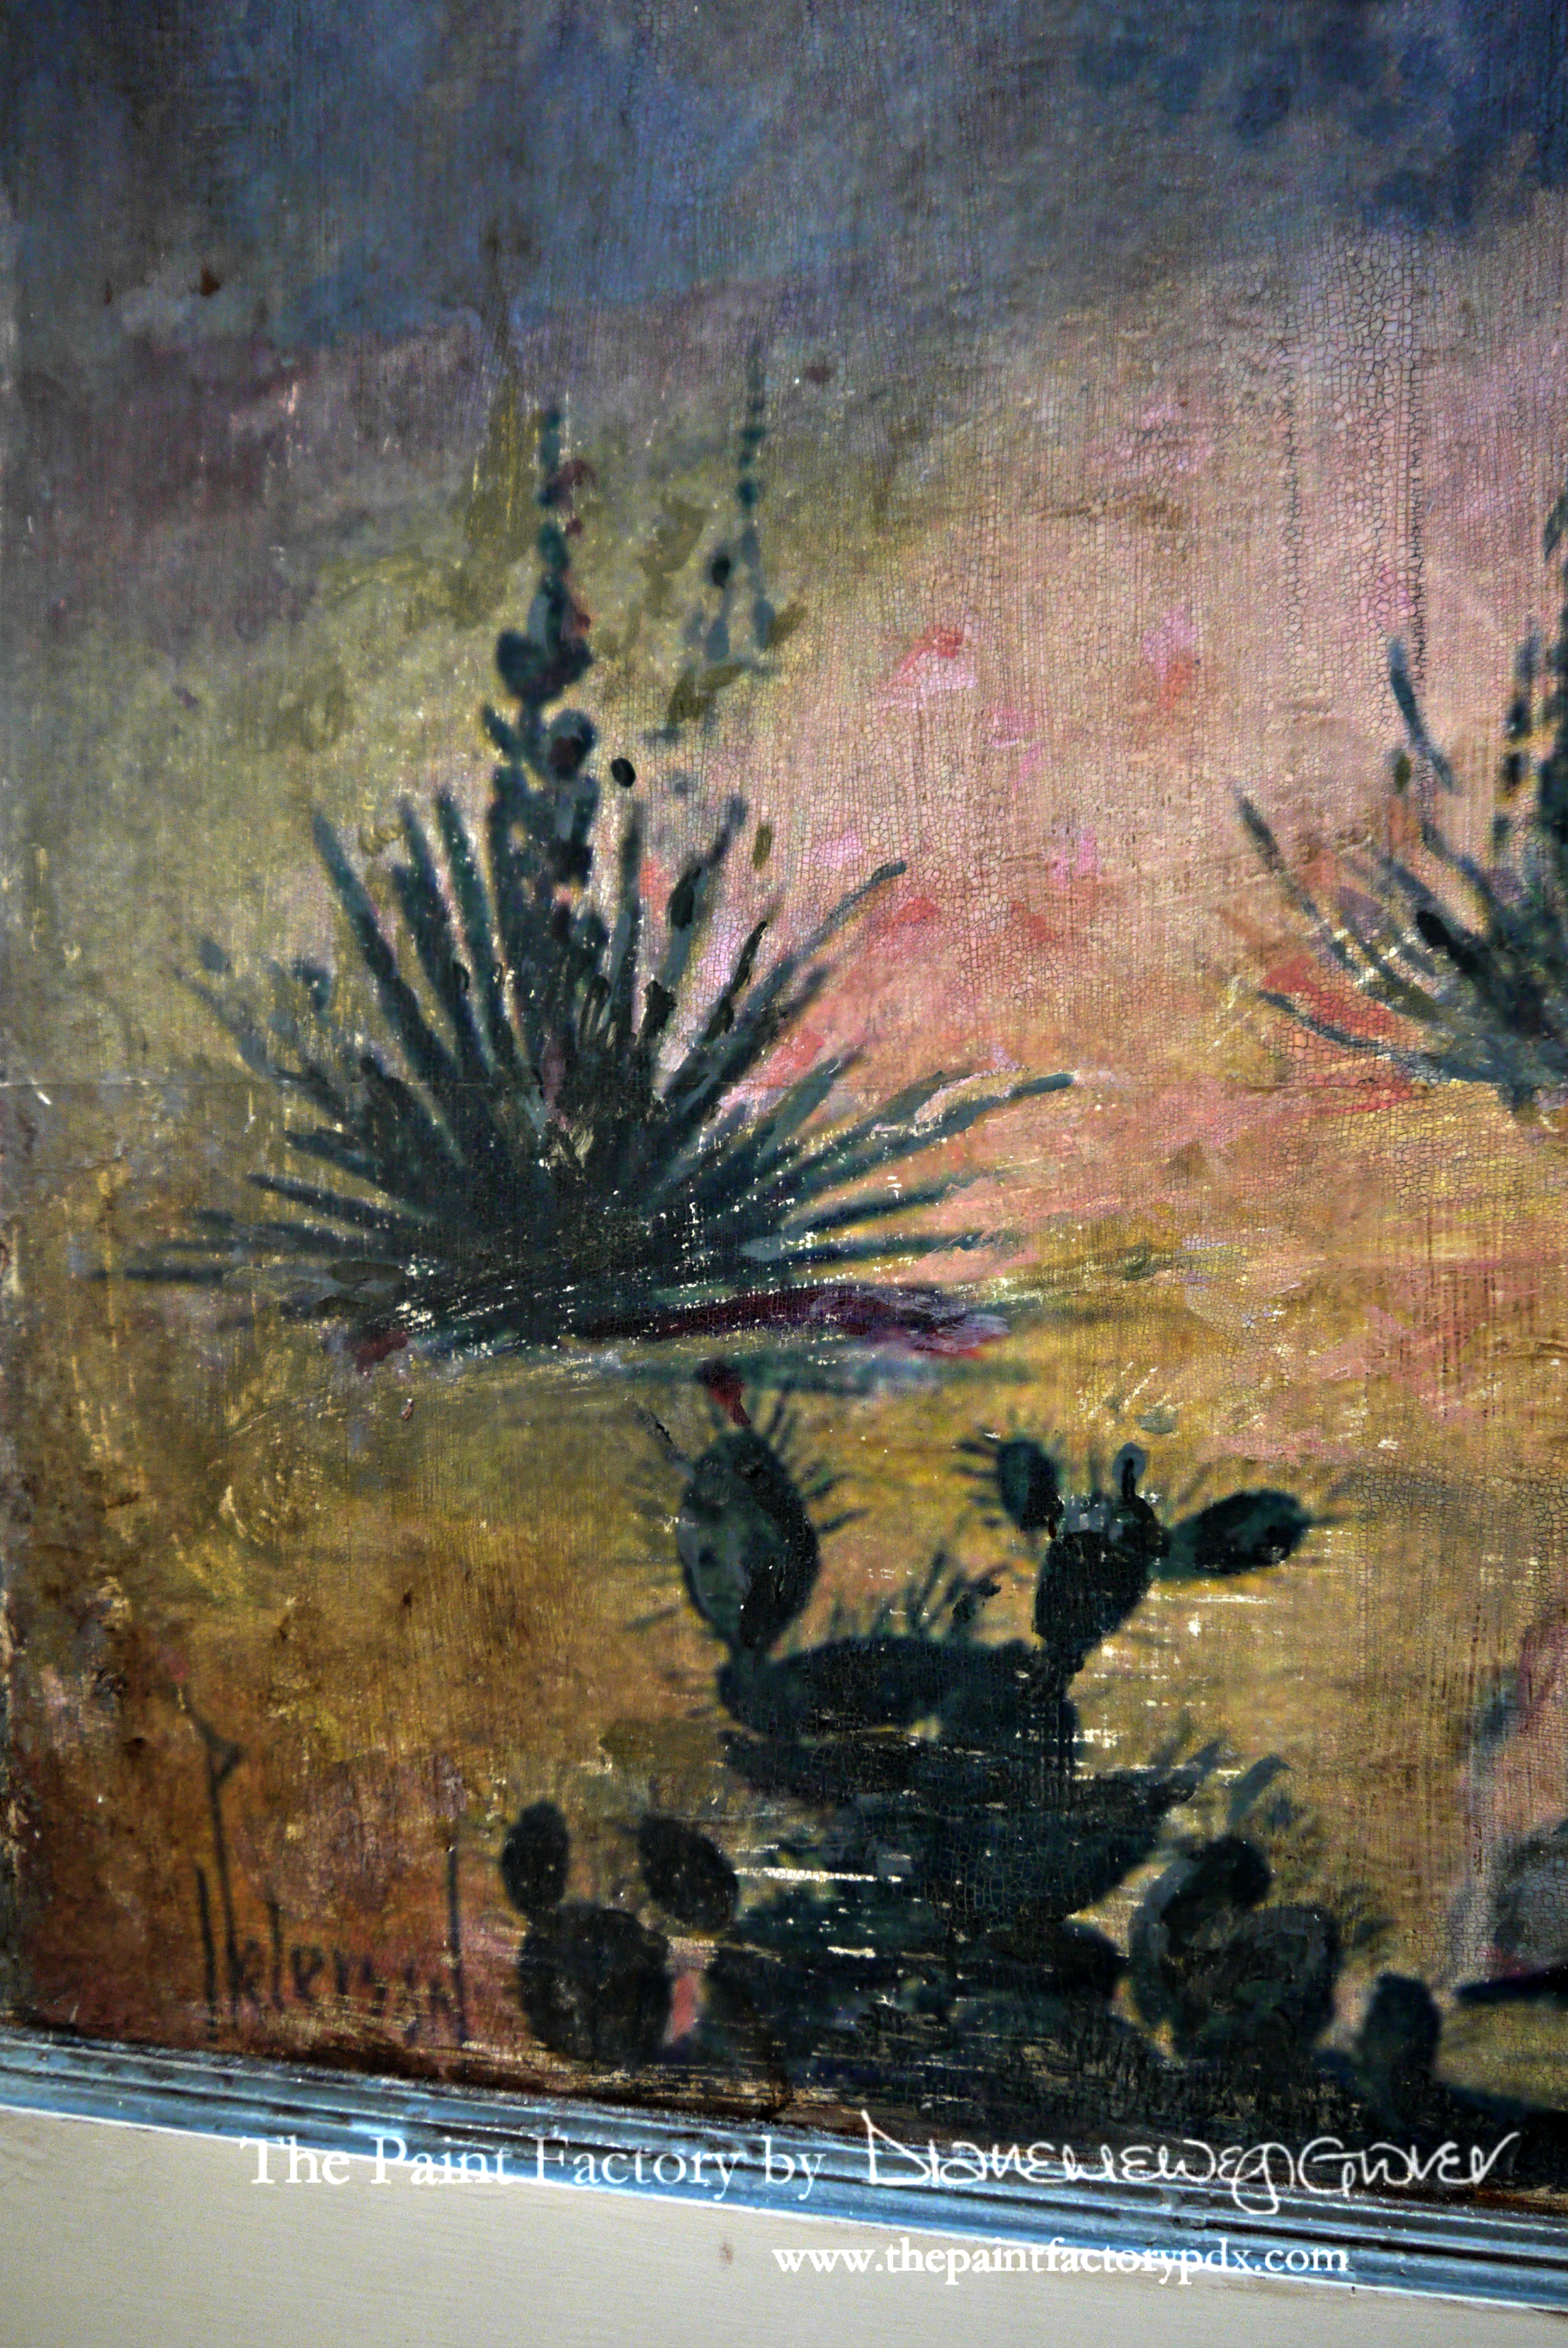
The original idea was to have Flaming June on to the top portion of the door, with a quote in the bottom area. In theory, it would have been beautiful. Most of you know how much I love Flaming June. 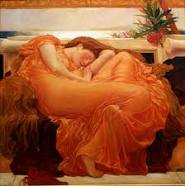 But it’s easy to see that it wasn’t going to work on this door. Drat. To fill the entire space of the top portion, we would have had to enlarge the image greatly, and then we would have ended up doing a serious cropping job on June.
Truth be told, it would be a sin – a crime – to crop June. No one crops June, least of all, me.
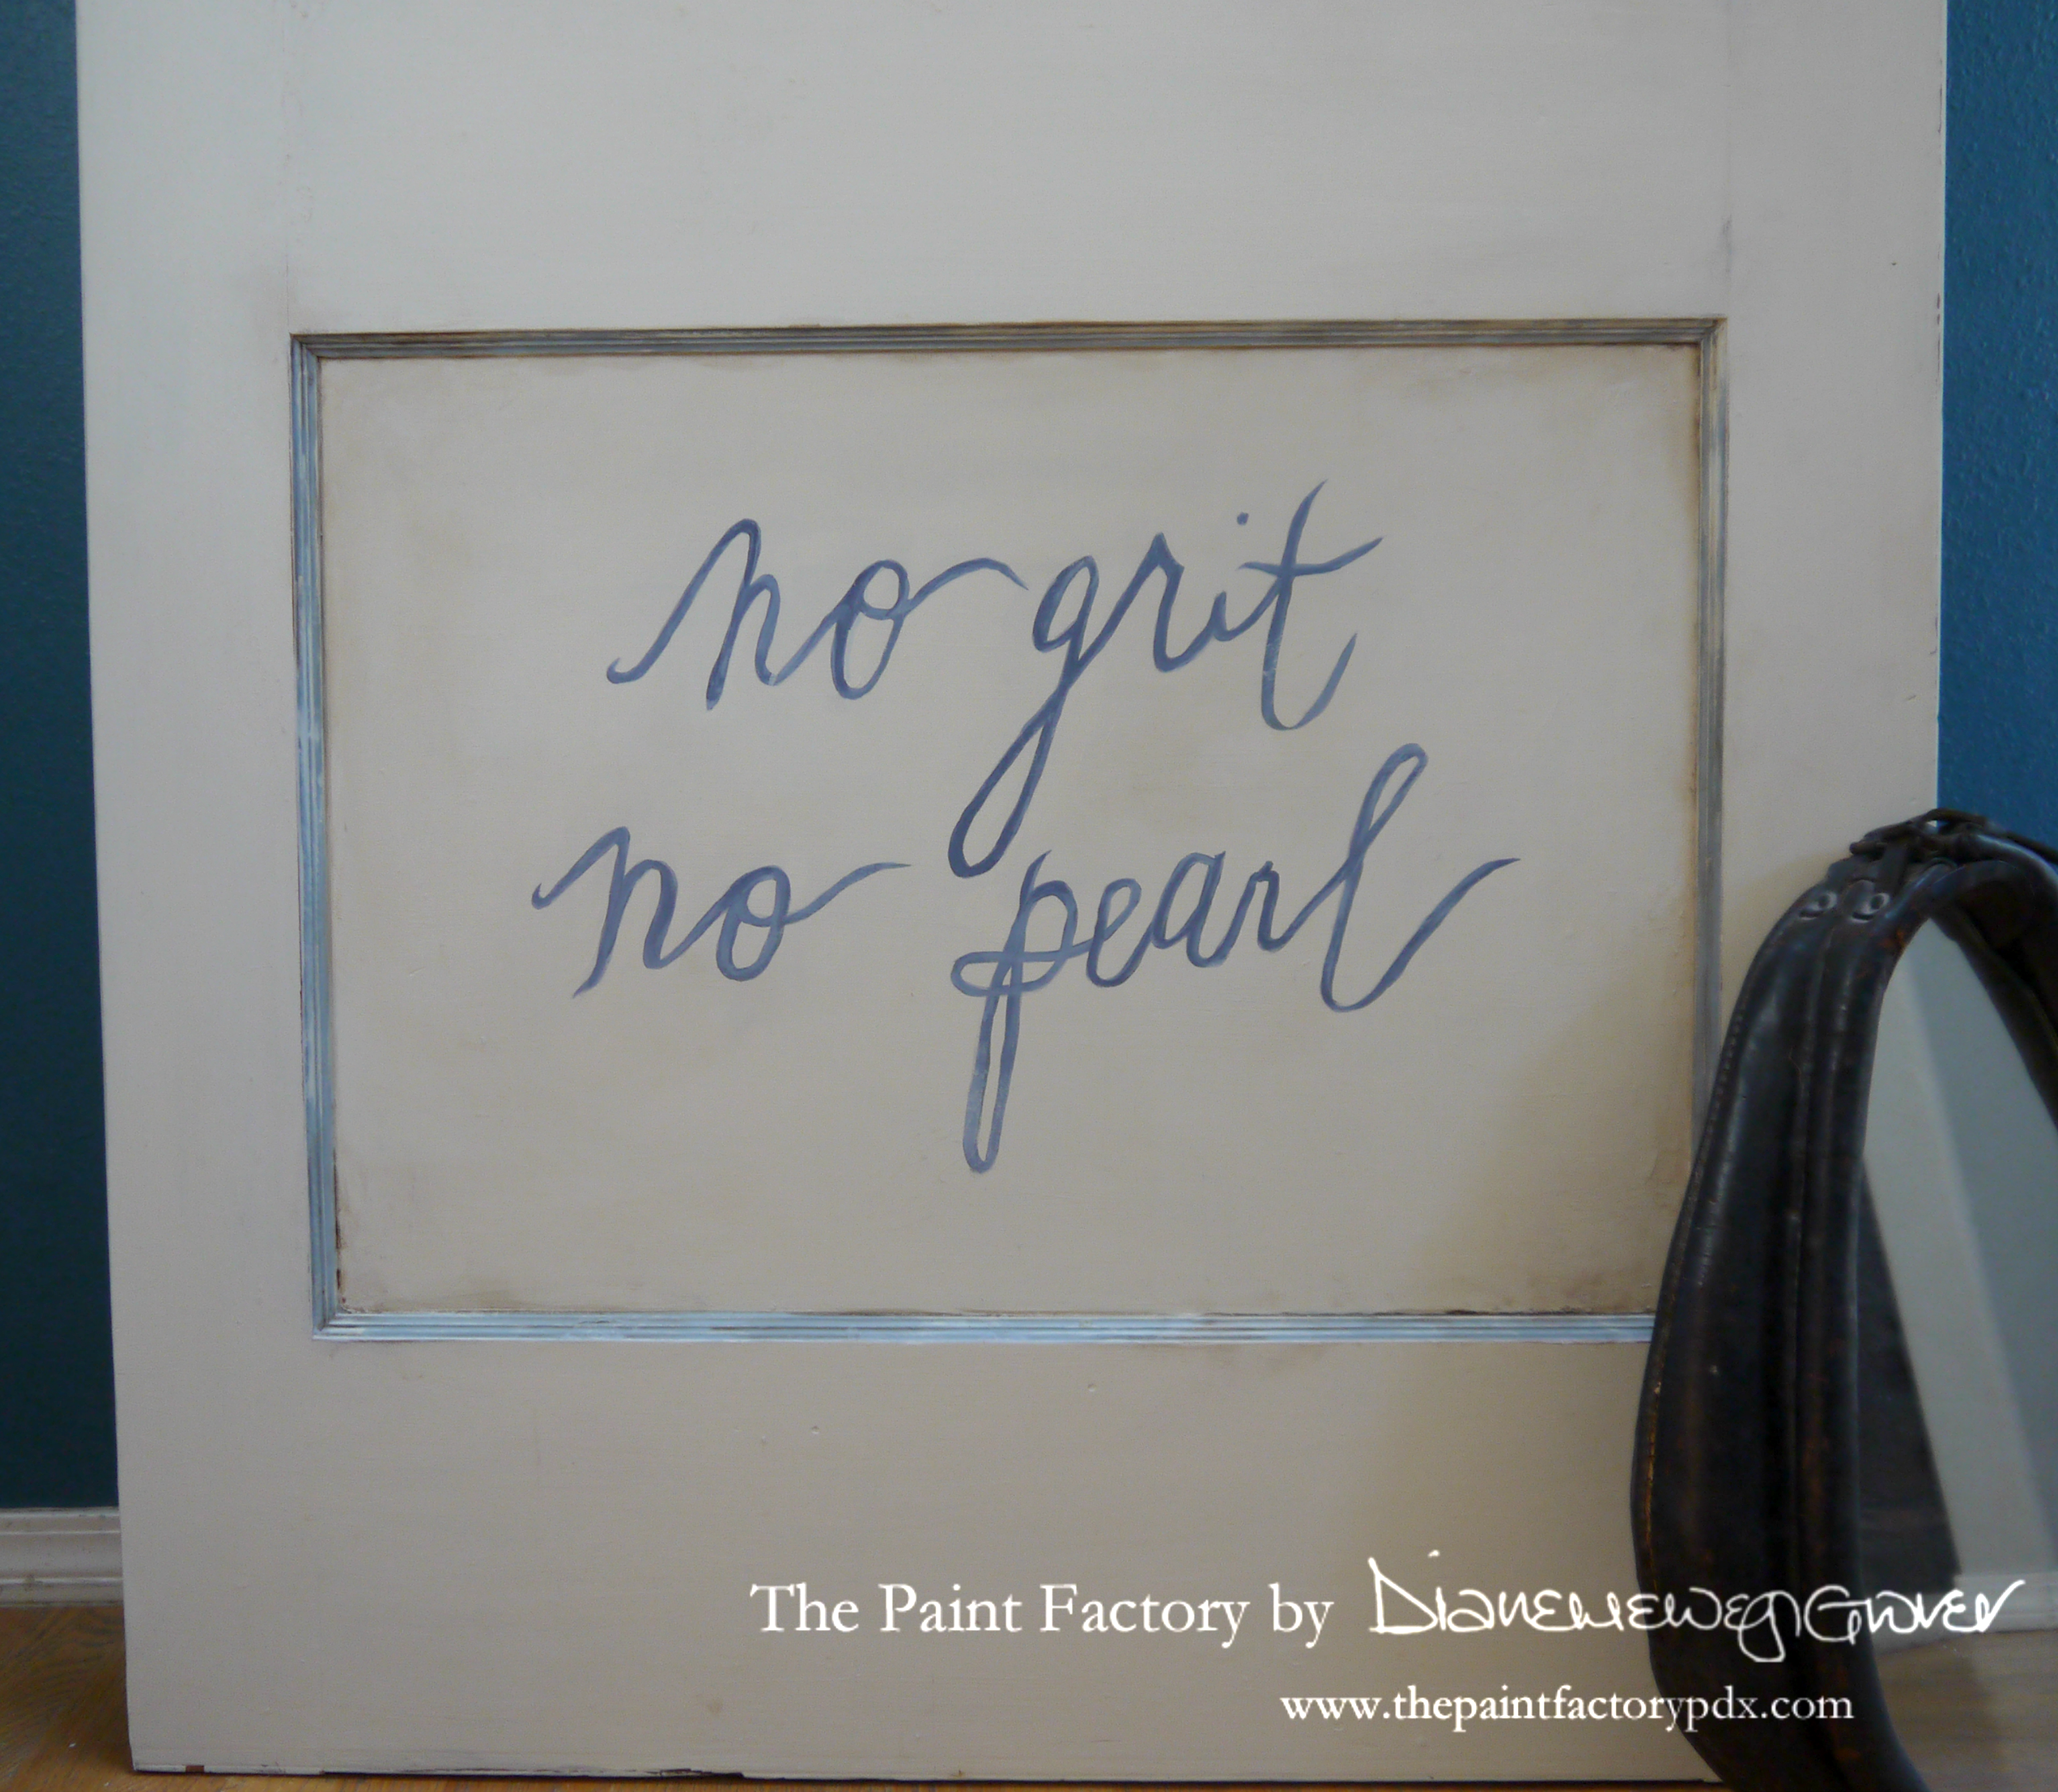
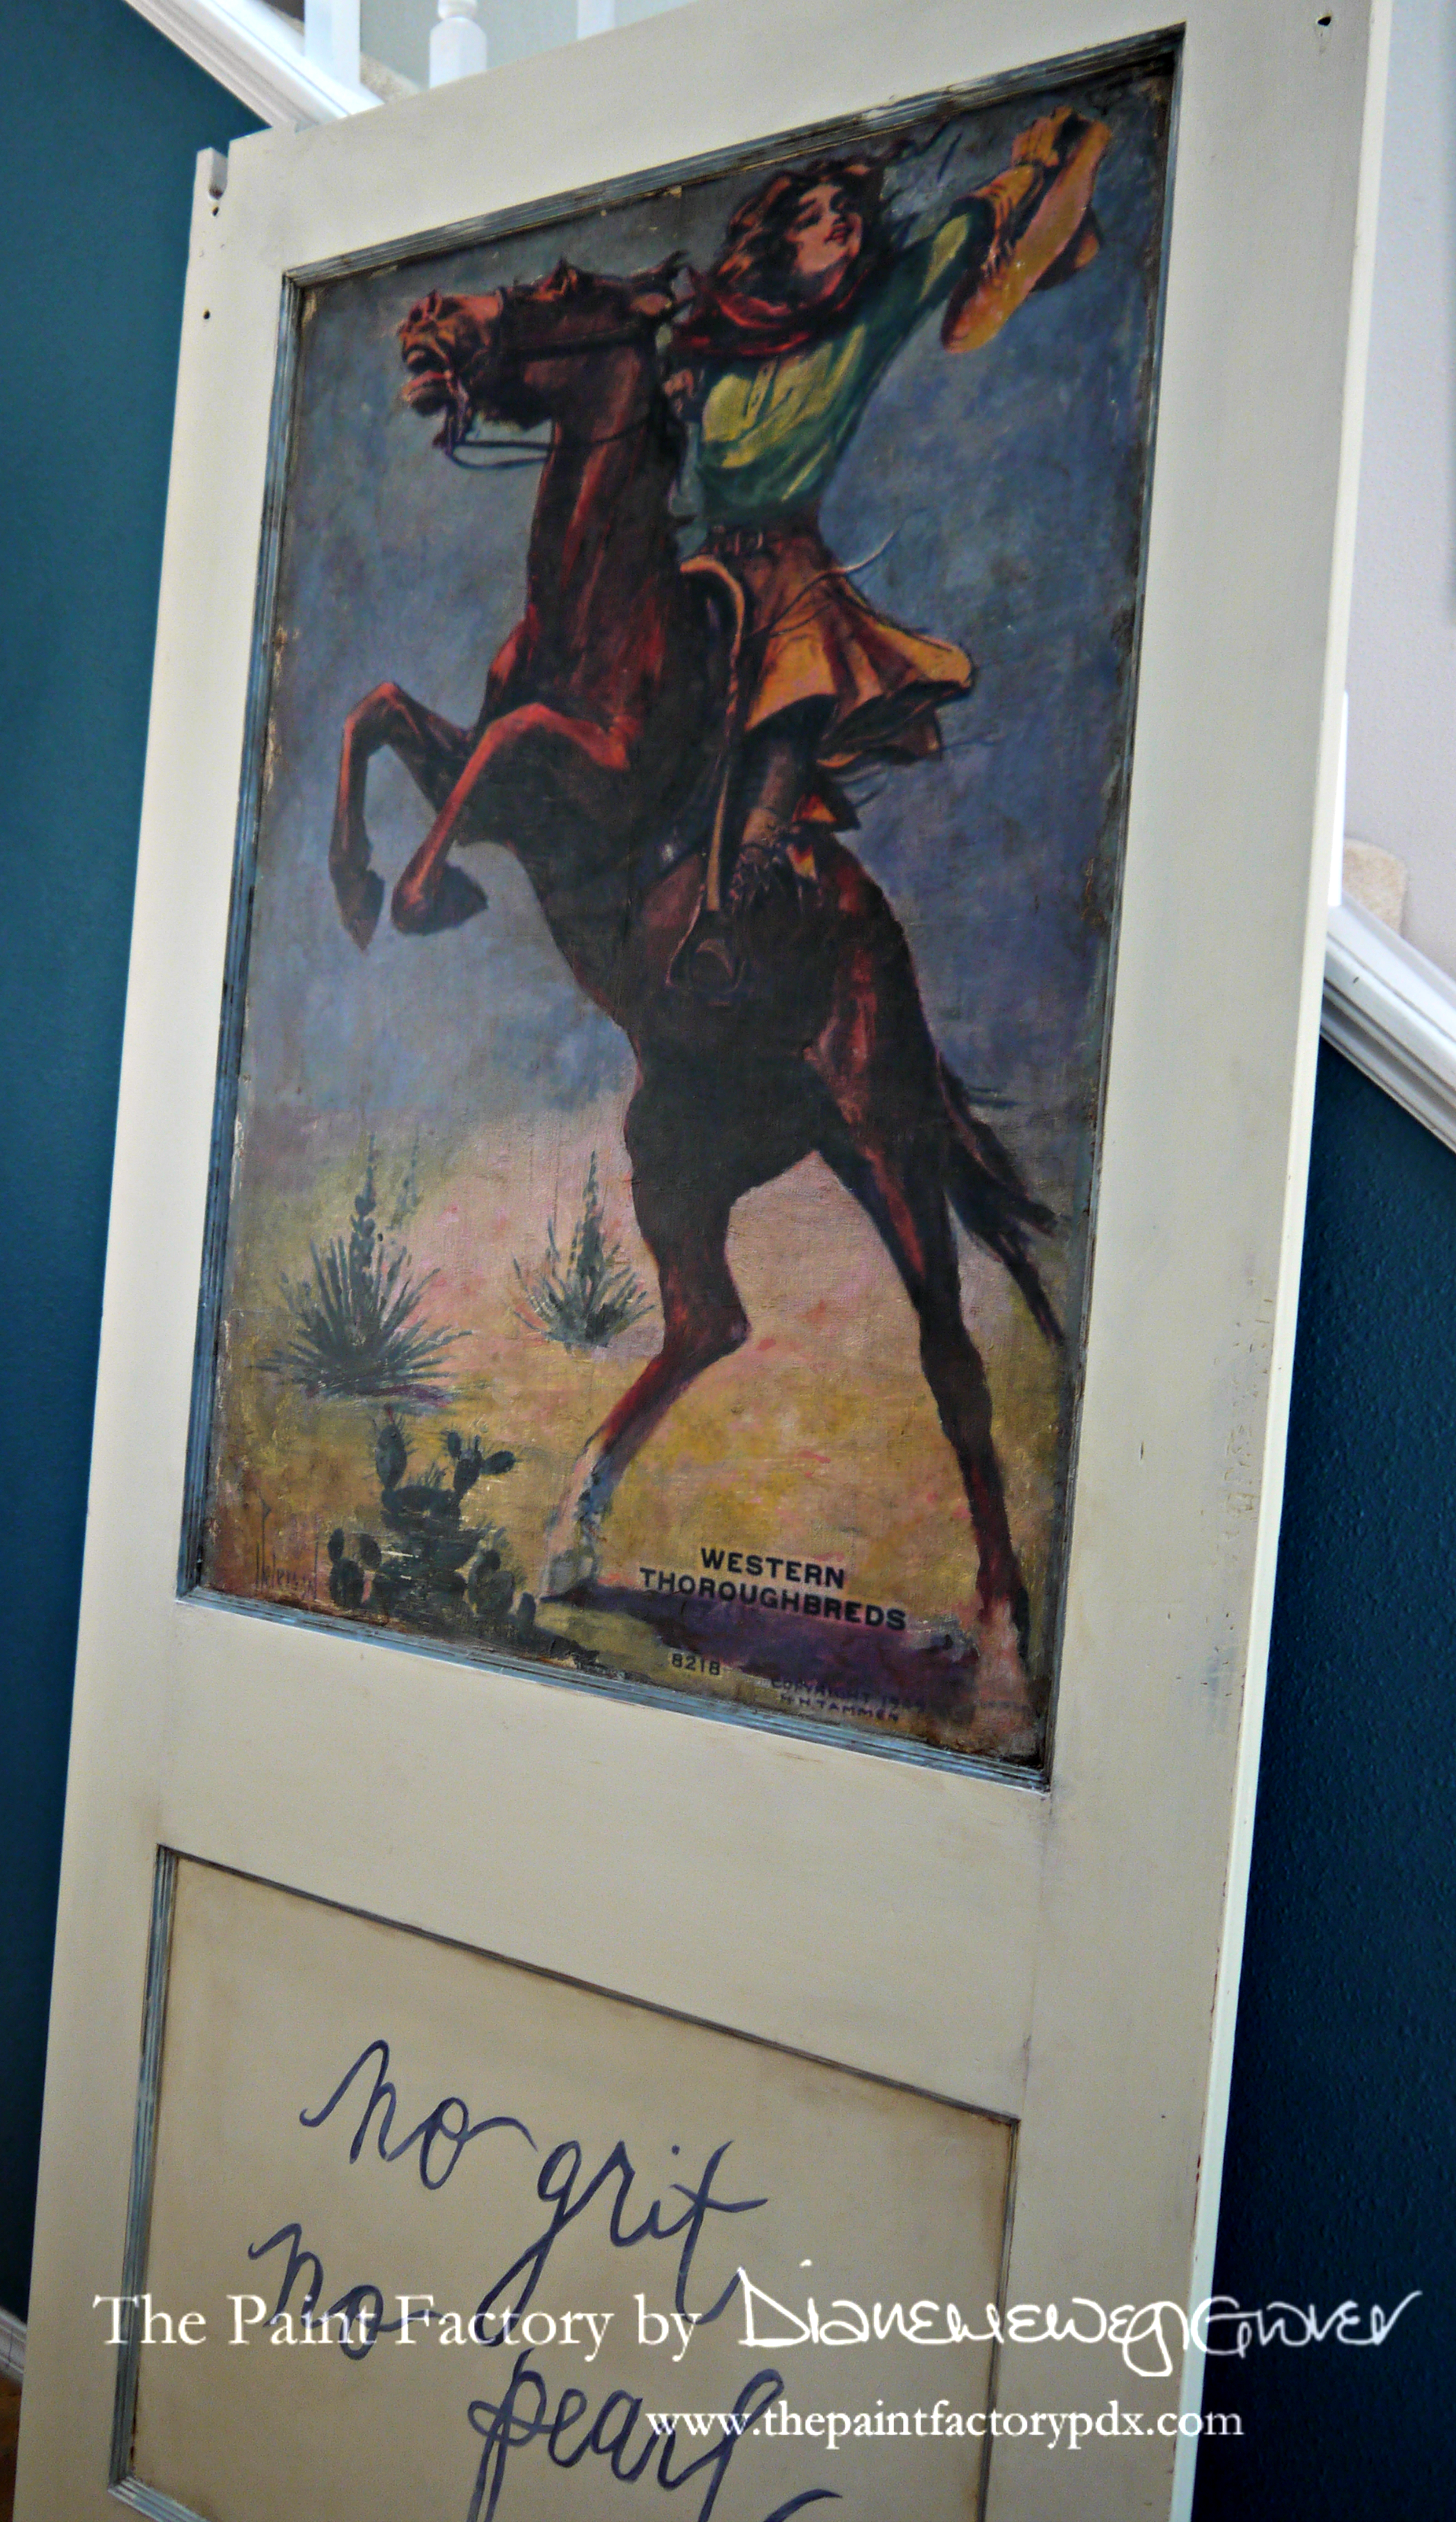
So, Cheryl went looking for another image, with text to match. This time she was going for the ‘old glam’ look.
A strong woman, who dares to be feminine.
True beauty.
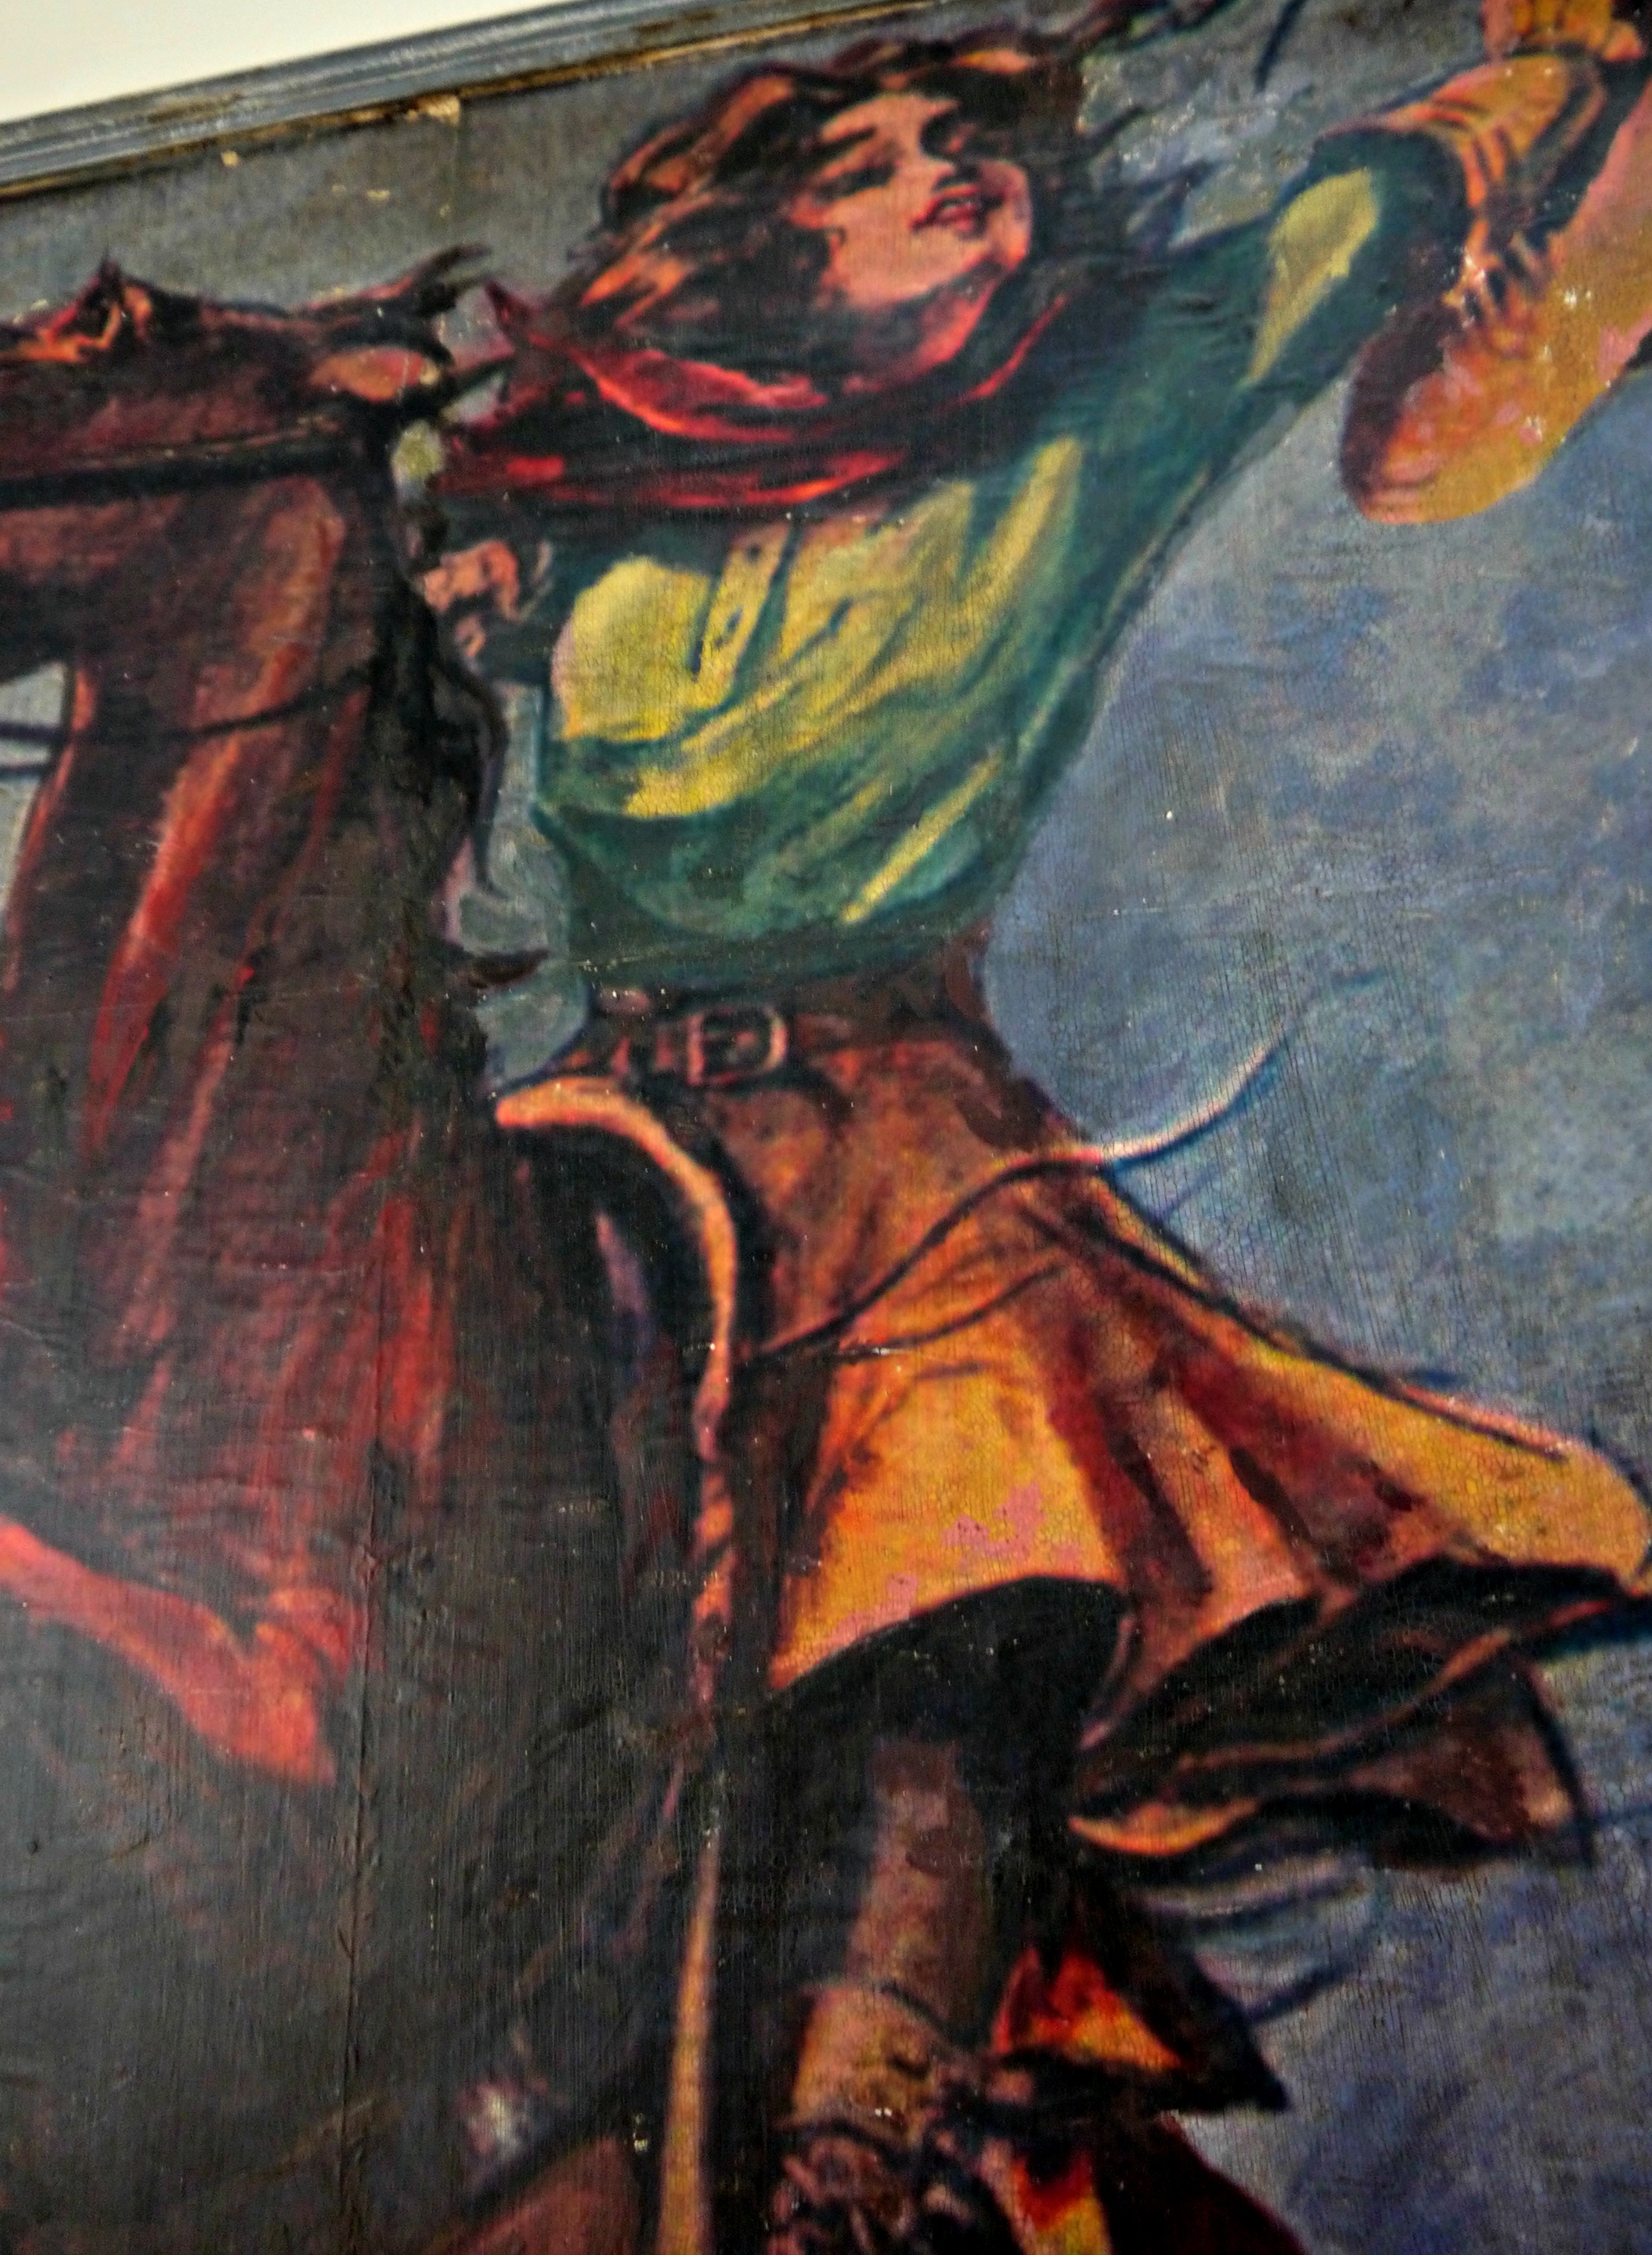
Cheryl gave me the image, and the text and then basically handed everything else over to me. Full trust in the creative process. Such a relief, I can not lie. It is so freeing to know that your client trusts your instincts on their piece. Even though I say I love to do custom work, I really don’t like working within strict parameters. I need some freedom because, invariably, half way through the process – things change (or at least when I’m concerned, they do). And it would be a royal pain in the you-know-what, to have to call a client every few minutes to get the OK on something.
We both agreed that the surrounding panels of the door should be pretty neutral. Although this door was going to be installed in a new home, I also had to believe that if ever she moved – the door would be going with her. So – let’s play safe. Besides, I didn’t want the paint color to fight with the image. Sometimes less really is more. And I also didn’t really want to go crazy with distressing. It needed to look old, and original to the door and honestly, I don’t think sanding gives an authentic look. I prefer to use texture, and shade to give the aged look.
I am having a little love affair with the new Pure and Original Classico paint. For this project I used this palette: Neutral Ground for the door, and a mix of Oxford Blue and Majestic Cloth for the trim and the text.

because I like to give myself extra work because I used a glaze I would need to seal it anyway. Plus, there is also the possibility that at some point, the door could be relocated to another area. Time to go the Boy Scout route and 
Dib dib dib, dob dob dob
Enter Pure and Original Dead Flat Eco Sealer I’ve been waiting a long time to use this (said the Actress to the Bishop). I love the idea of having a truly dead flat finish to my pieces. I wouldn’t necessarily use it every time on every piece; but it’s exciting to have another option available for your finish. And it’s lovely stuff. I applied two thin coats of the Eco Sealer and I love it. I think I was expecting a matte/flat feel to it – but it’s actually really nice and smooth. It just looks dead flat. Perfecto.
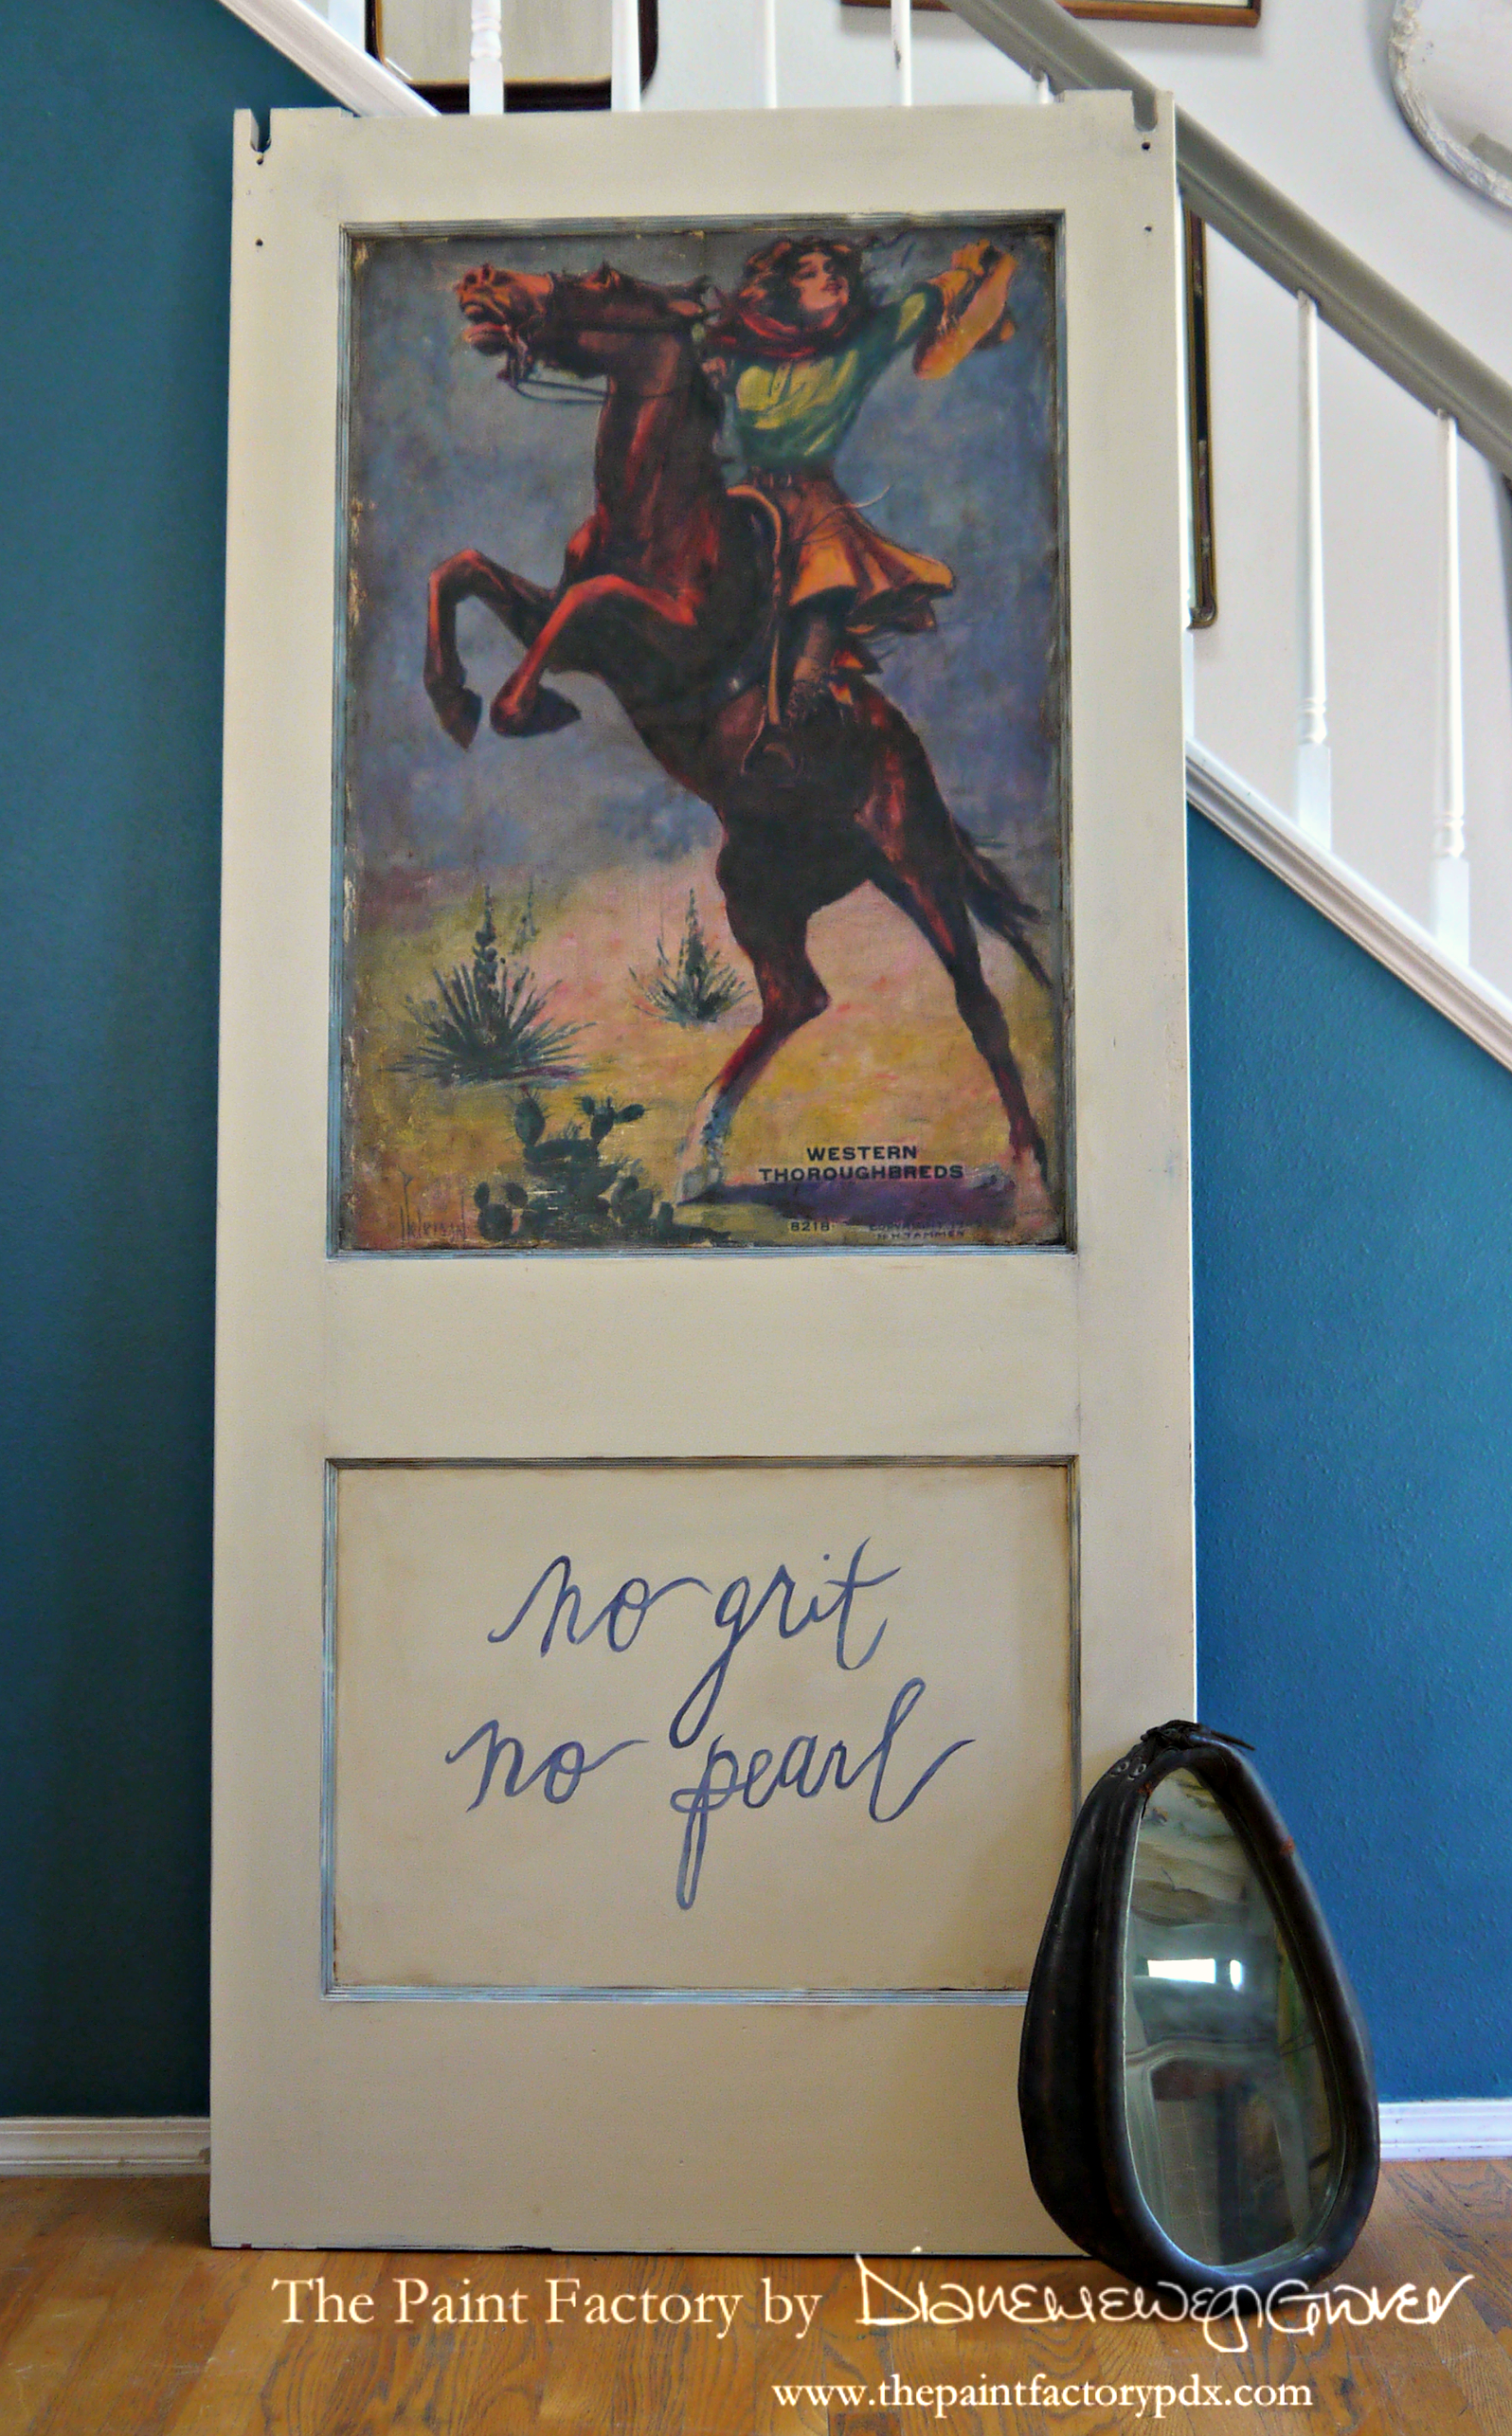
Such a great saying!
The door gets picked up next week. To be installed in Cheryl’s new home.
And it seems a little poignant that, at least for Cheryl and her family, one door is truly closing.
BUT
A completely new one is sliding WIDE open!

Yee-Haw!
{insert catchy ending phrase here}
Diane aka The Paint Factory
I love it! It will look amazing in her new home!
Oh Diane, what a happy client Cheryl is going to be…………….as usual your biting humor comes through as perfect as your creative process (long O on process). I am using long O on process and progress since I think we should all speak with a little more dignity. You have given me the courage to try image transfer on my office door. It is a cheezy hollow core, white chipping paint, and you have convinced me to try out some of this marvelous paint ( i get paid tomorrow and my husband is gone for 6 weeks earning extra $$). Now to find an image that is more vertical………if you have any suggestions or guidelines on ratio vertical to horizontal let me know. I finally found my GF transfer gel that I bought over a year ago, never opened, so now I need to refresh myself on your image transfer tutorial. Thanks again for such an entertaining post, blog, or drivel whichever you are calling it these days!!
Thank you, darling 🙂 Do you mean Artisan Enhancements transfer gel? This was an image that Cheryl found on Etsy, believe it or not. I just bought it and downloaded the image. It’s the first time I’ve done that. I usually like to have the hard copy, I’m just old-fashioned that way. But it worked out great. What vibe are you going for, with your door?
Yes artisan enhancements, now I know why I couldn’t find a tutorial on YouTube except for Java gel. I am having a hard time figuring out how to get to your back issues in your blog, specifically the image transfer one….. Can you send a link to just that one? Thanks, and any advice on ratio horizon/vertical on image?
It should be under Tutorials Allison. If you can’t find it, let me know. What do you mean about ratio? Just measure the space that you want to cover, it’s best to look for a horizontal image to fit into a horizontal space and vice versa. If you take the image to a copy center they will be able to show you on the computer what your image would look like with the measurements you provide them. Then you can decide where you want the tile seams to go.
That door is wicked pissah as we say in Massachusetts!
Love you artistic post, the doors are amazing, love if you stop by my Fabulous Friday Party
Thanks Maria
http://www.simplenaturedecorblog.com
Thanks for checking the blog out, Maria! I’ll swing by tomorrow to check out your party 🙂
Love what you are able to do. Please let me see more of your incredible work. I may be interested in table tops and an interesting wall. Thanks
Hi Merit
Take a look at my facebook page. I post most of my pieces there. http://www.facebook.com/thepaintfactory