

When we bought the house, we knew that all three bathrooms would need to be remodeled. Although all three were functional, each had its own set of challenges – and I’m not necessarily talking ‘aesthetic’ challenges. Whenever you mention terms like ‘kitchen renovation’ or ‘Bathroom remodel’ dollar signs just float up into the air. Gone. Puff. Still, we fell in love with the place and figured that we’d just make a project list and tick the projects off, one by one, slowly over the coming years. No rush. No pressure. Let’s just enjoy the space for a while. And we did, for a while.
To give you a little history of the place; the main house was built in 1935, but over the years (as owners have come and gone) additions have been made and design choices have been put in stone (or cement). Although from the front, the house looks like a small Cape Cod, it actually has three stories.
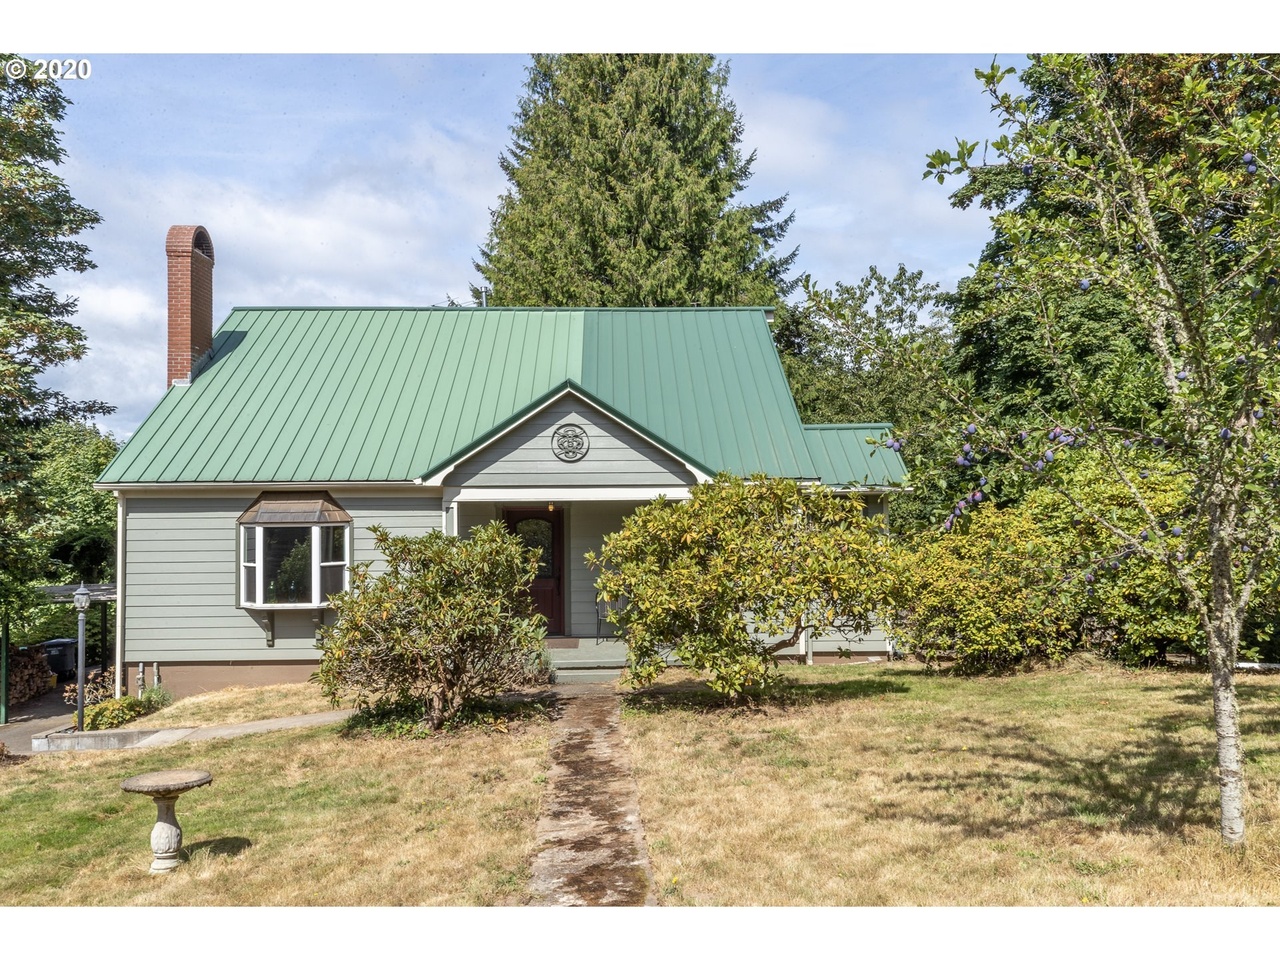
The lower level consists of a basement (where I generally paint) and an attached studio apartment. The apartment space is really a cool little place: it has its own entrance, kitchen, and bathroom. In an ideal world, I would love to see this being used as an Airbnb. At the moment, it’s used only when the kids come and visit (one in Boston, one in Victoria, B.C.) and they don’t come as often as this mom would like them to (but that’s a different show). During Covid times (and still to this day), my husband will use the space as an office. The extra square footage is a welcomed addition to the home. And I relish the option of making a small income from renting it out from time to time. Although, in all transparency, there’s a long list of work that needs doing to it, and a husband that needs persuading this is a good decision. We are a long way off from seeing that dream come to fruition.
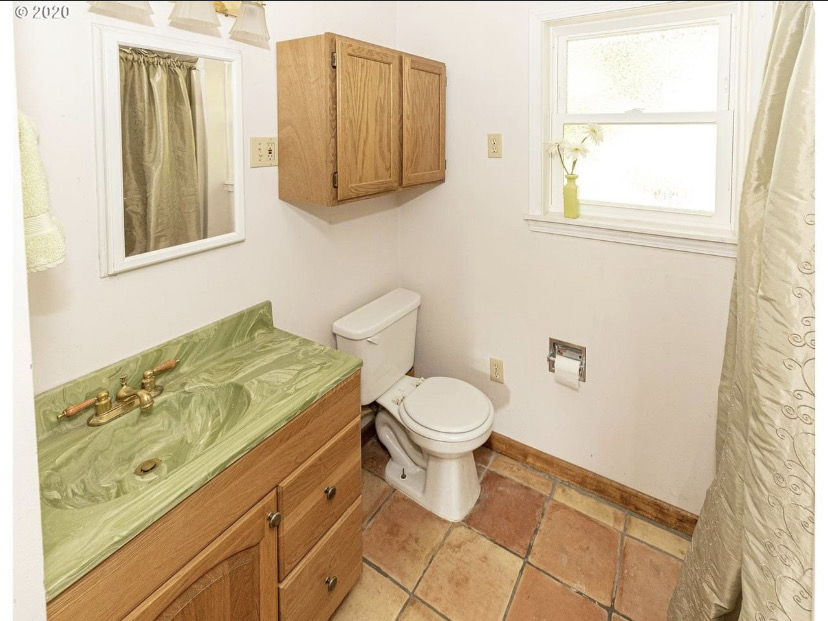
Because the lower level bathroom is so infrequently used we decided that it would make sense to remodel this one first. The logic behind this was address the needs to this one, then when it comes time to remodel the main bathroom we could move downstairs and not feel completely untethered. If work takes longer on the main bathroom that first anticipated, it would be no problem for us – we would have a bedroom and a newly-refinished bathroom to use. Here are a few photos to give you some insight to what the bathroom looked like. (The first one, below, is taken off the realtors page. Clearly, this photo was ‘staged’ as evident by the flowers in the window!!). On a side note, I wonder why they decided to have three electric outlets around the toilet? I can’t quite figure that out. We removed one completely, moved one on the back wall to a more functional area, and repositioned the lower one (by the toilet seat) to the back of the toilet (at some point, we intend to install a bidet seat and the electrical outlet will be needed).


When you work with older homes with multiple additions, there are times when you almost have to do reverse engineering to try and figure out why certain design choices were made. Were the decisions based on finances, need for simplicity, or just a basic ‘this is how I like it’? The bathroom was a strange beast. And not only were some things jarringly wrong with it, we also had a tight budget to work with; again, this isn’t our main bathroom – meaning money spent here was money being taken away from the other larger bathrooms upstairs. One of the major concerns (trust me, there were several) was that the shower and all of it’s piping/drainage etc were ABOVE ground; meaning that you literally had to step up to get into the shower. It was bizarre. And worrying.
My husband was more than a little anxious about looking under the shower, fully expecting that we were going to open up our own Pandora’s Box. Once our plumber and contractor looked underneath, they realized that ‘probably‘ what happened is that the bathroom originally started it’s life as a simple toilet and sink plumbed onto a cement slab. At some point, the shower was the add-on; and rather than excavating the cement to allow for the needed plumbing to go underground, they just decided to put it all on top of the cement – thus having to step up into the shower. It wasn’t awful news (it could have been so much worse), and it allowed us the option of installing a new bath/shower -to code- and giving us a little more head room. But still, you know, every decision comes with its own added cost.
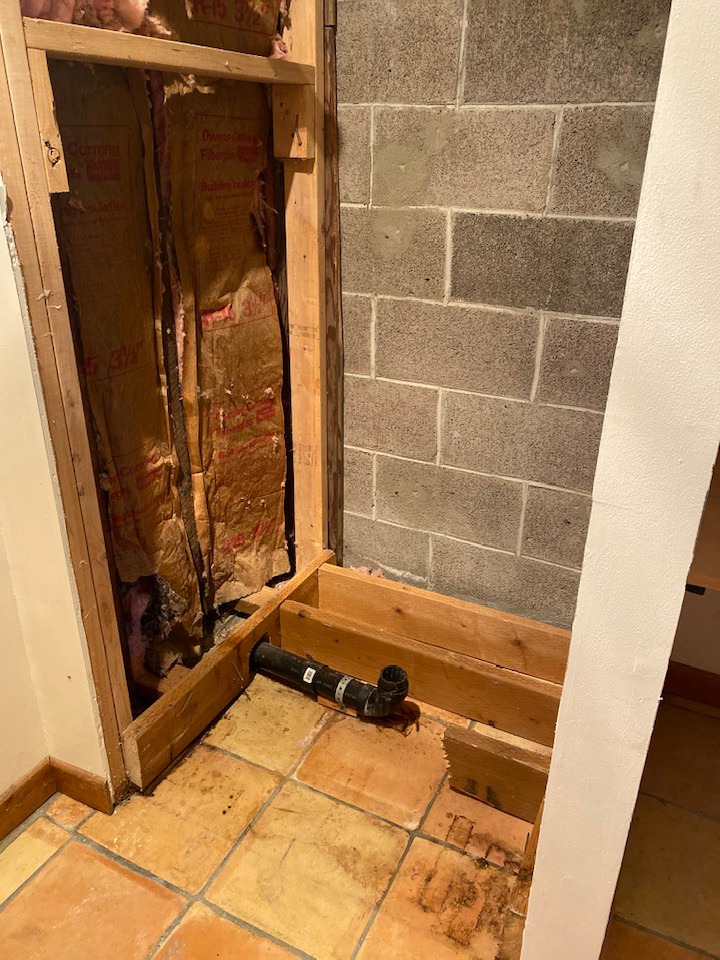
Other challenges were duct work that couldn’t be moved (largely due to expense) and the major plumbing. Moving the existing plumbing was a big fat NO. I understand the reasoning behind it, but boy did I really want to refigure the floor plan!! Everything staying in its original place was a big non-disputable factor in the design plan (thank you, husband). Another oddity in the bathroom is that the toilet was literally kindergarten size. Not quite sure why.

Although it’s a reasonably sized bathroom, space was at a premium because it had to function as a bathroom AND a dressing room. While I love that the apartment has a full wall of windows (truly, it’s a lovely feature), it takes away options of where you can place furniture – the only workable area for a dresser was in the bathroom itself. Obviously the previous owners had used the space in a similar fashion, because half the floor was terra cotta tile (which I’m sure were beautiful when they were first laid) and the other half was carpet. Once we’d removed both the tile and carpet, we quickly realized that the floor sloped by a good 1-1.5 inches. Crikey, another additional cost.
I’m not an interior designer. Not even close. I just like what I like, and my ‘mood board’ lives in my ever-changing brain. So I’ll say that the design of this bathroom ‘evolved’, and it really helped being here when work was being actively done. My lovely contractor was always willing to stop what he was doing, and listen to that day’s new ideas! Did we budget for new cement to be poured to deal with sloping floors? We did not. Did we think that all of the plumbing behind the walls would need to be completely replaced? We did not. Stuff that you can’t see, took away from monies that could have been spent on things that you can see. It can be a cruel and harsh world in the land of home improvement.
I’d like to say that this is a budget-friendly bathroom remodel. While I like the idea of going high-end (going for the quality opposed to the name brand, if you get what I mean), it’s often not practical or affordable for us (or as my husband would likely say ‘it’s not fiscally-responsible’). We had a few things that we really wanted: A bath AND a shower; this was the most important thing for us and something we didn’t want to give up. Granted a custom tiled shower could have looked very lovely, and given us a feel of more space – but, for resale, people (young families) like homes with bathtubs. I probably should point out here that as much as I love this home, I don’t see it as our ‘forever’ home. If it turns out to be that, well GREAT! It’s a fabulous home. But, truthfully, I don’t think we have ever bought a home believing that. We’re both people who have traveled and are always open to opportunities, so I/we like the idea that, if something exciting comes our way we’ll be open to it. And then we’ll move accordingly. This approach to life heavily influences our design plans, and because of that, we always factor in the ‘resale’ element of everything. Plus, I’m now at the age whereby I know I can make any house a home. But I digressed, going back to the need for a bathtub – if I can get the apartment into an Airbnb rental, because we live near lots of hiking/biking trails, I think that the allure of soaking in a bathtub at night after a day of strenuous activity will be welcomed by our visitors. We installed a shower kit in the last home, with a handheld shower head – and I highly recommend it, it makes cleaning the shower/bath tub so much easier. This is the kit we used this time. We also opted for a porcelain enameled tub because I like a tub to have some weight to it, plus because we were on the ground floor we didn’t have to worry about additional weight etc.
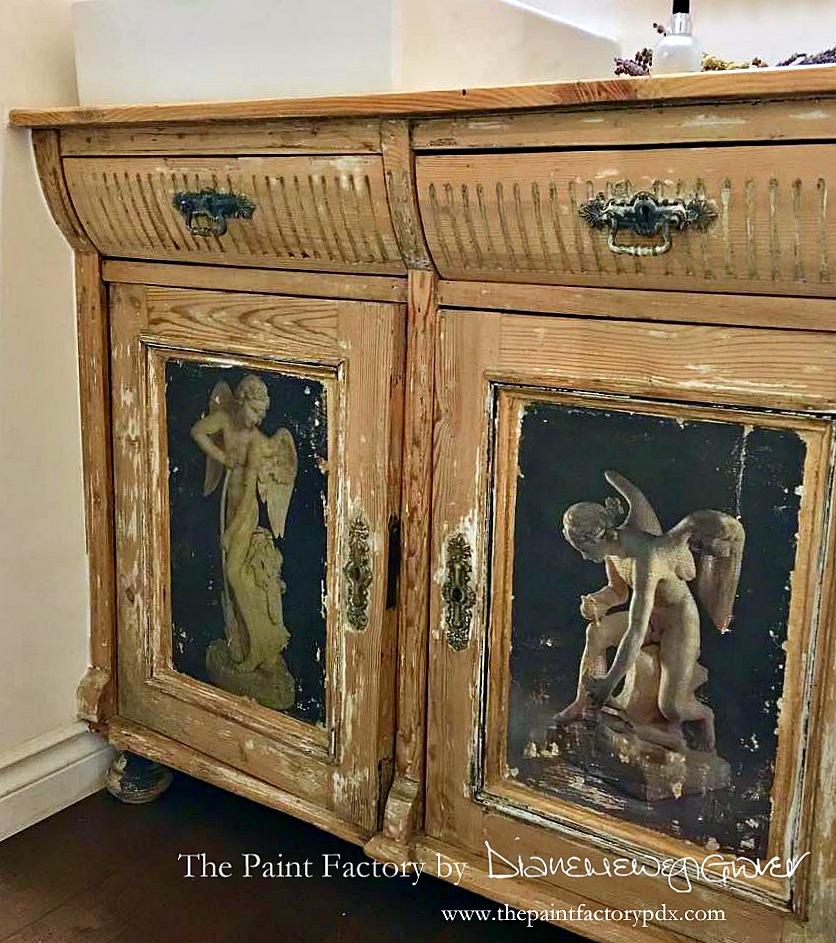
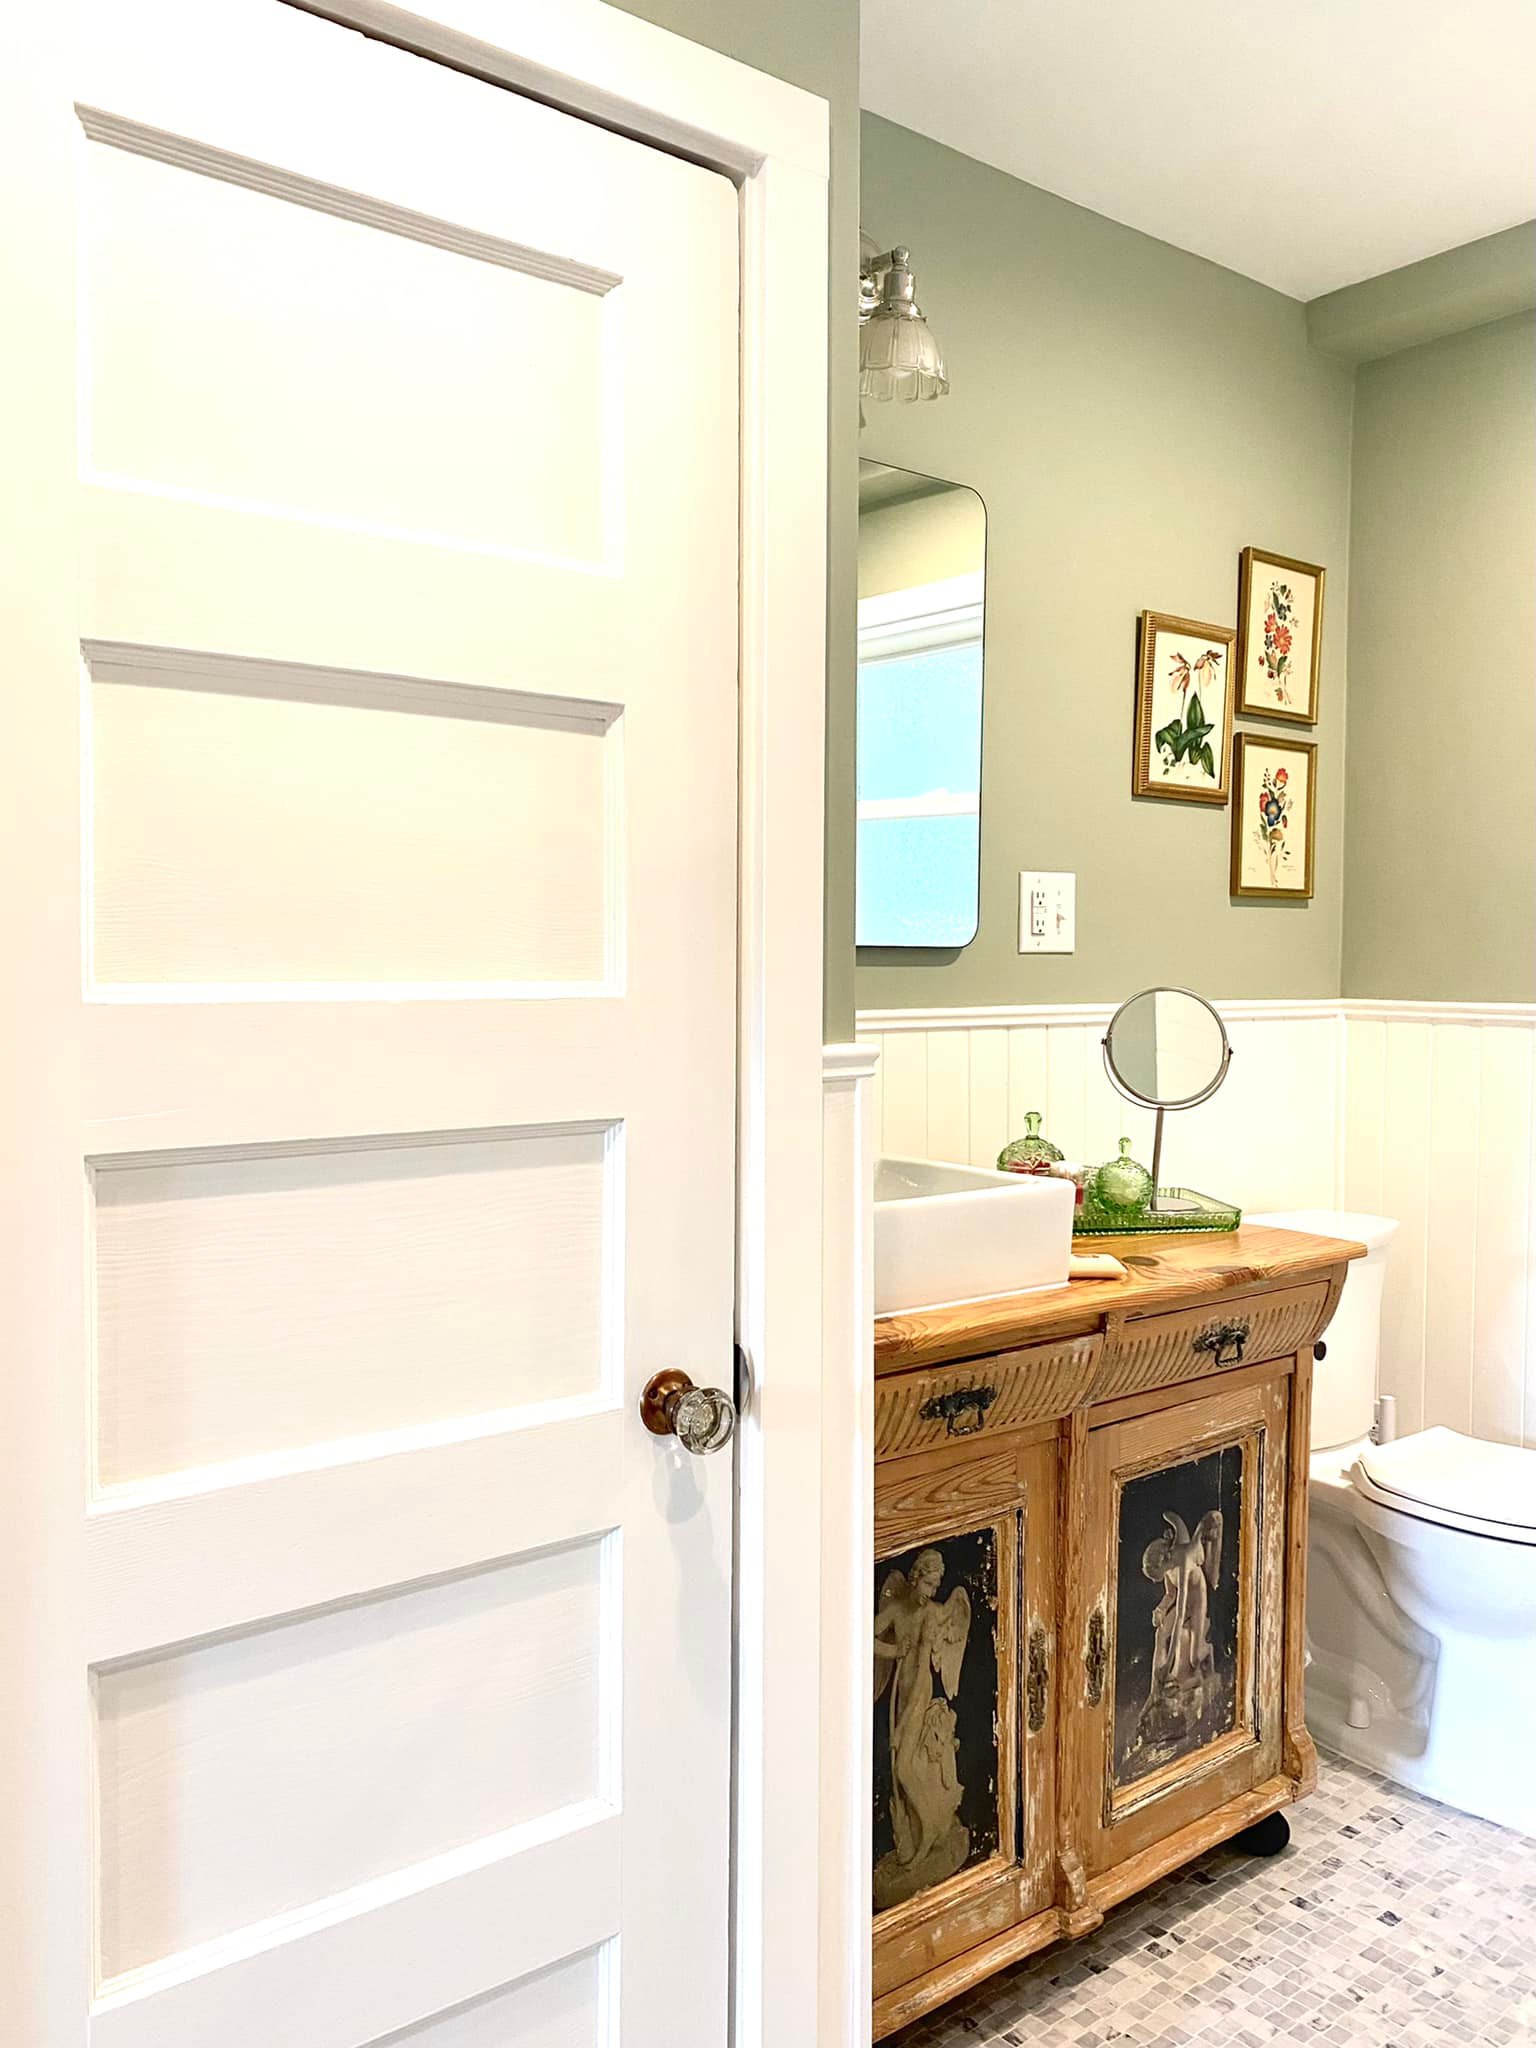
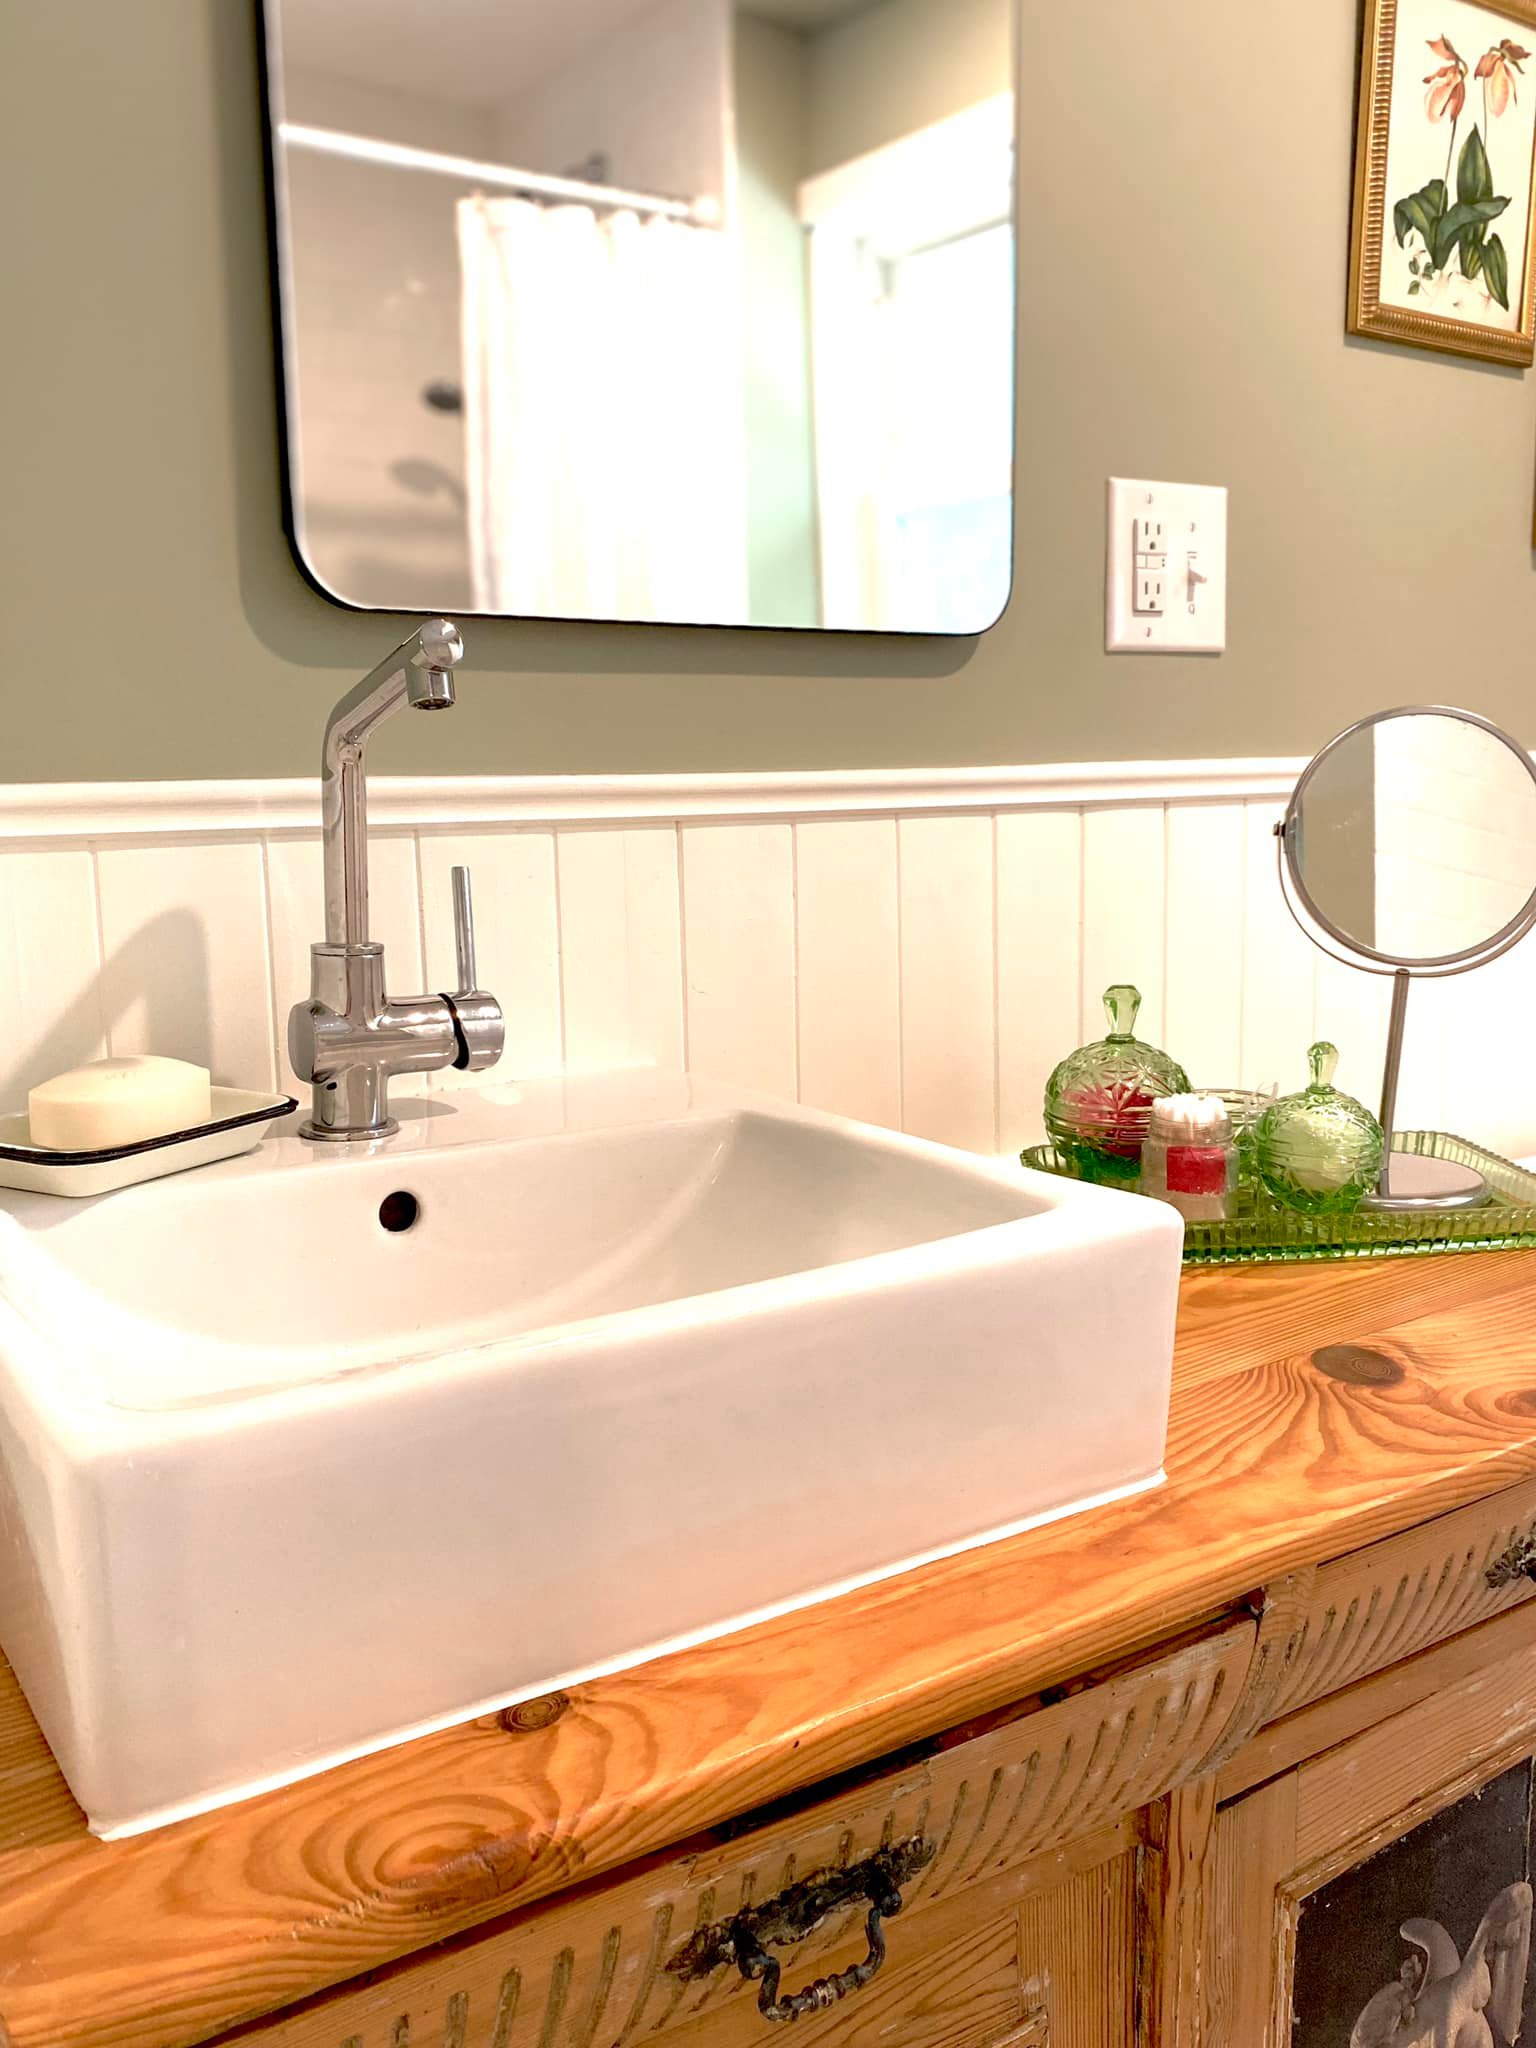
The second thing that I absolutely had to have was my old vanity. If you remember, I refinished this old English pine cabinet in my old house. We retrofitted a sink (from IKEA) into it and I loved it, it got so many compliments. When the new owners of the house did their own renovations, they very kindly (such a generous gesture) contacted me and asked if I’d like to have the vanity back!!! The world is full of kind people, I tell ya!! I obviously jumped at the chance. I will go for old, solid furniture anytime over new made-in-China ones (regardless of the brand names). The only drawback to using this vanity was that it was a little bigger than was ideal for our current space. I didn’t care. I would work around it. In order to accommodate it I had to take away some of my closet space – a small price to pay.
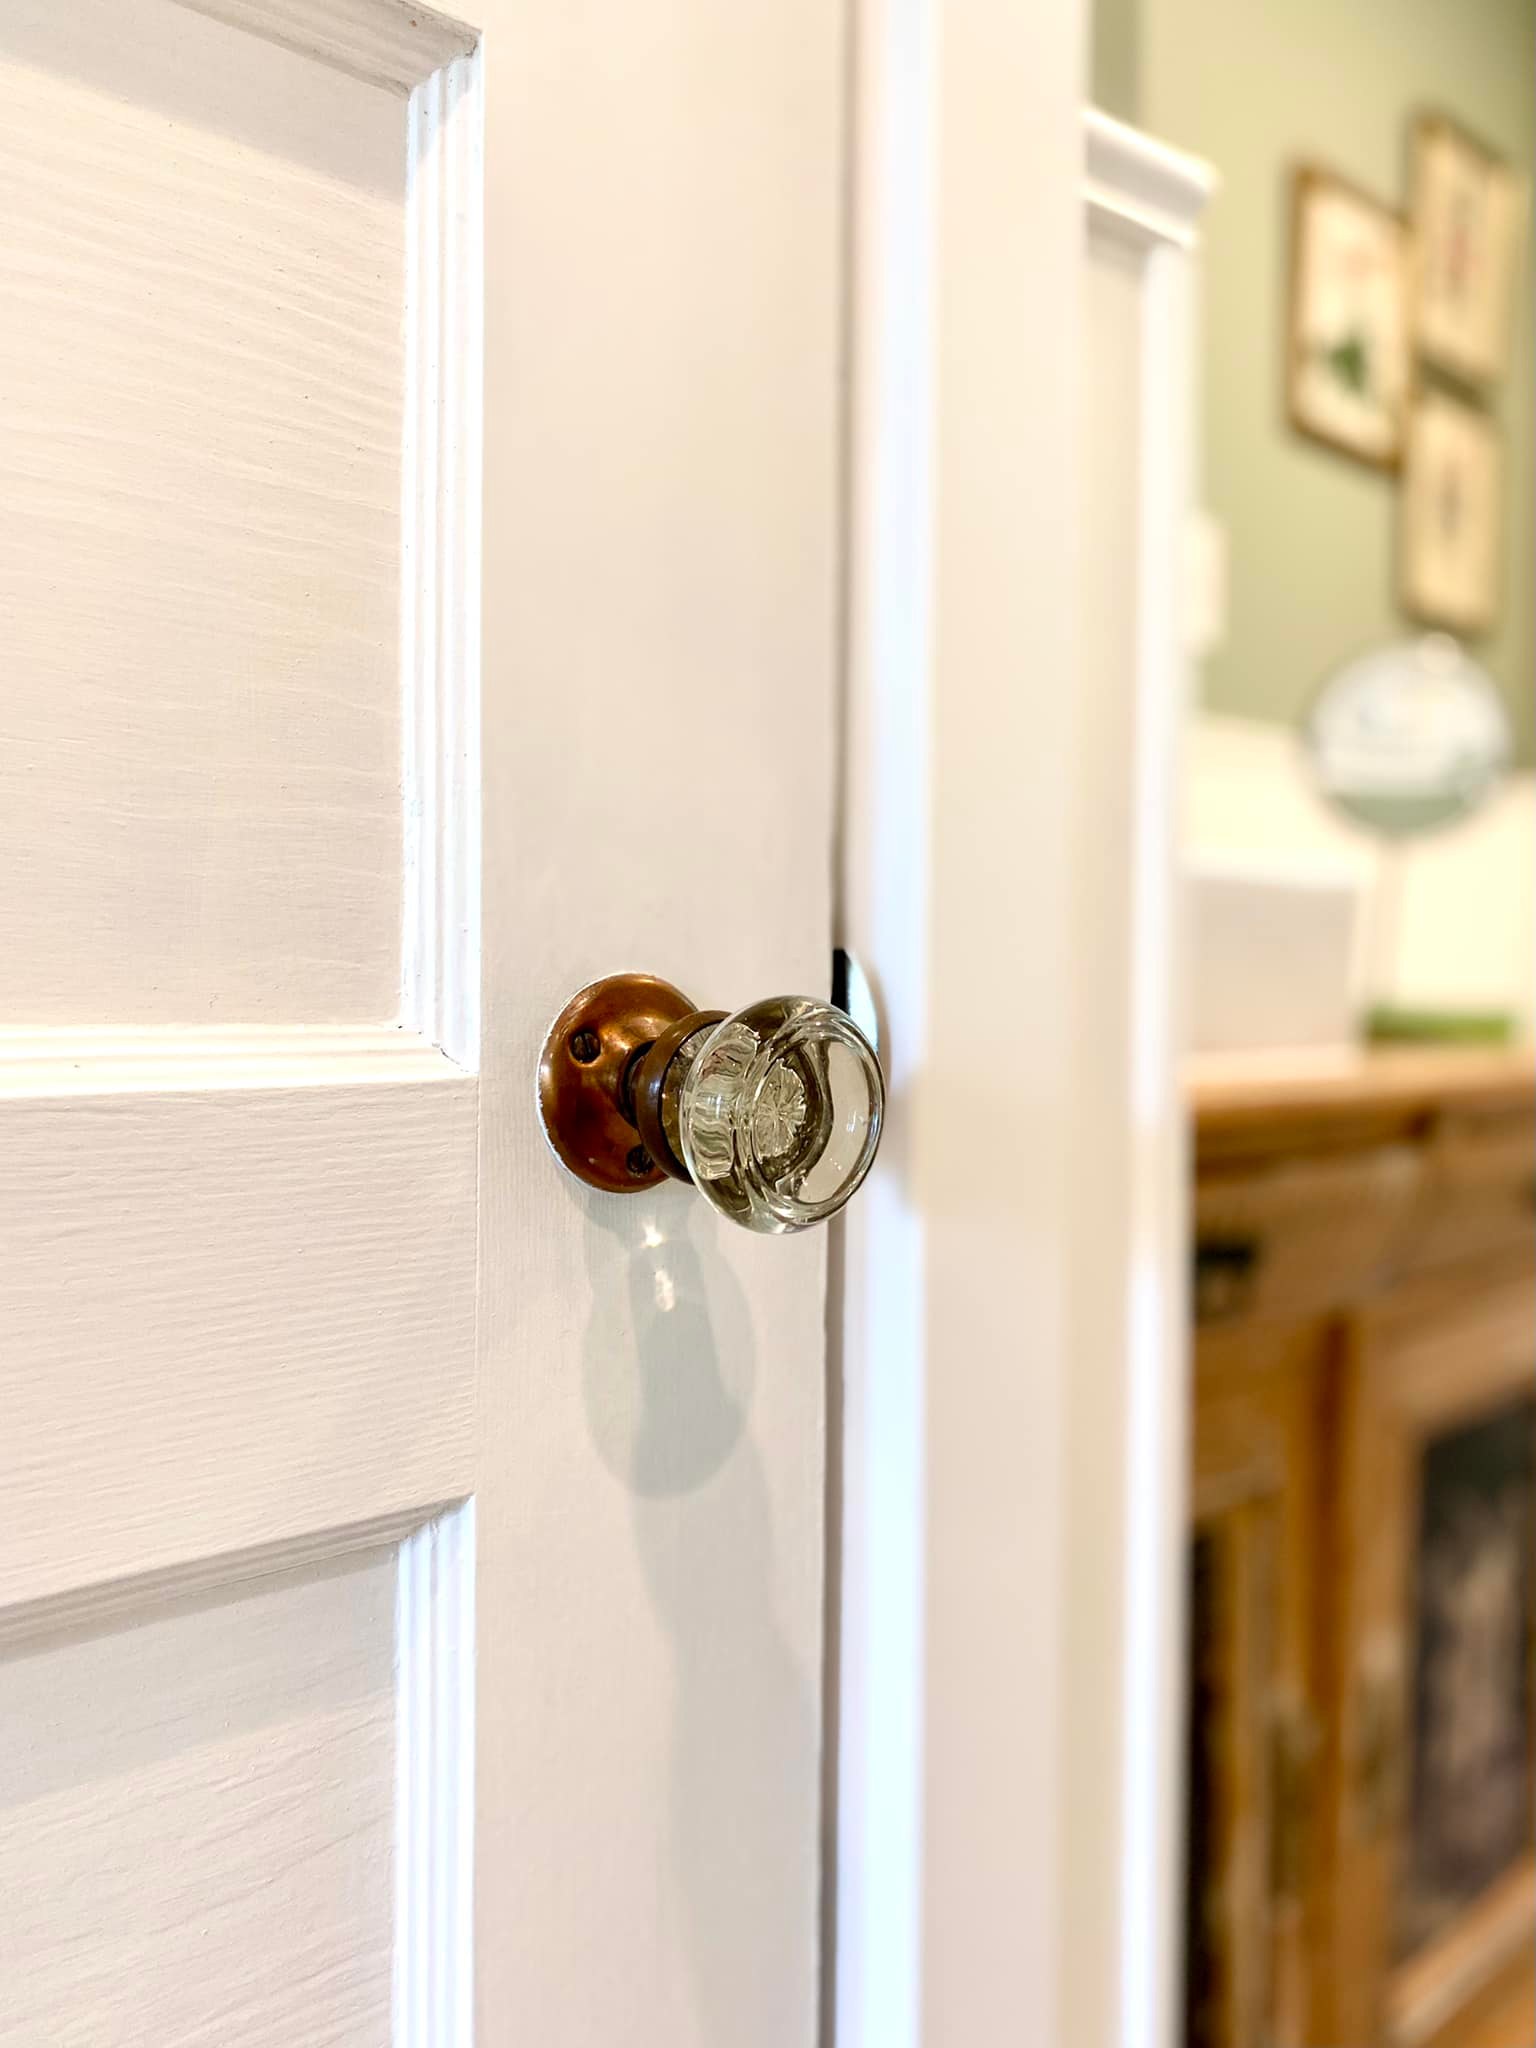
And actually, it turned out fine because, while trying to figure out the dimensions for the closet I found a vintage door at a local salvage business. Again, going back to my love/desire to use old or vintage pieces stumbling upon this old beat up, lead-paint ridden door was a great find! Solid core with the original glass handle and a complete steal at $25!! A few coats of primer to seal in the lead, two coats of paint and it looks just fabulous!!
The light fixture is a new Schoolhouse Electric fixture (that, for some weird reason, I found at Hippo Hardware in Portland, for $50), and matched it with a vintage glass shade that I purchased at Hippo for $9. The rest of the lighting was purely functional, standard recessed lights. I am also a great proponent of medicine cabinets!! I’m pretty sure this is the one that we bought and I really like it. It has a border to it, meaning that the silver won’t get chipped (which has happened in past medicine cabinets). It’s also a dupe for a West Elm medicine cabinet at twice the price.
The protruding duct work was always going to be problematic. Seriously, if I had the funds I would have rerouted it and it would be banished from sight. But, I live in a real world. So, it had to stay put. Originally, we had decided to just drywall it in. Simple. Both my contractor and husband said it would be fine – it’s just going to look like a box on the wall, it will be fine Diane. Ugh.

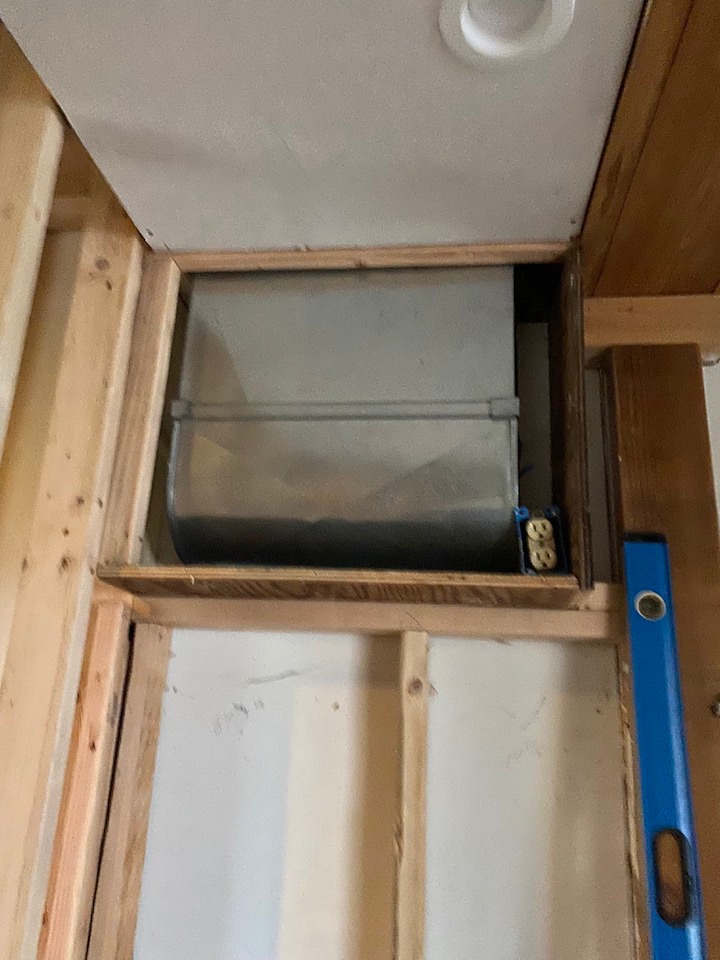
In my mind, it would be a drywall ‘box’ that would really end up bothering me. While I understand the concept of trying to discreetly ‘hide’ something, often it only ends up highlighting it. If I couldn’t successfully hide the duct work, I’d have to get creative and make it some kind of feature. What with, you ask? Why, with a stained glass window!!! I have several of these windows. In the old house, I had them hanging in the gazebo but in this house there’s nowhere to hang them, and I actually did come close to selling them on FB marketplace. Again, tons of lead paint that I primed, scraped, and repainted. A little reglazing and it was good as new, decidedly in better condition!
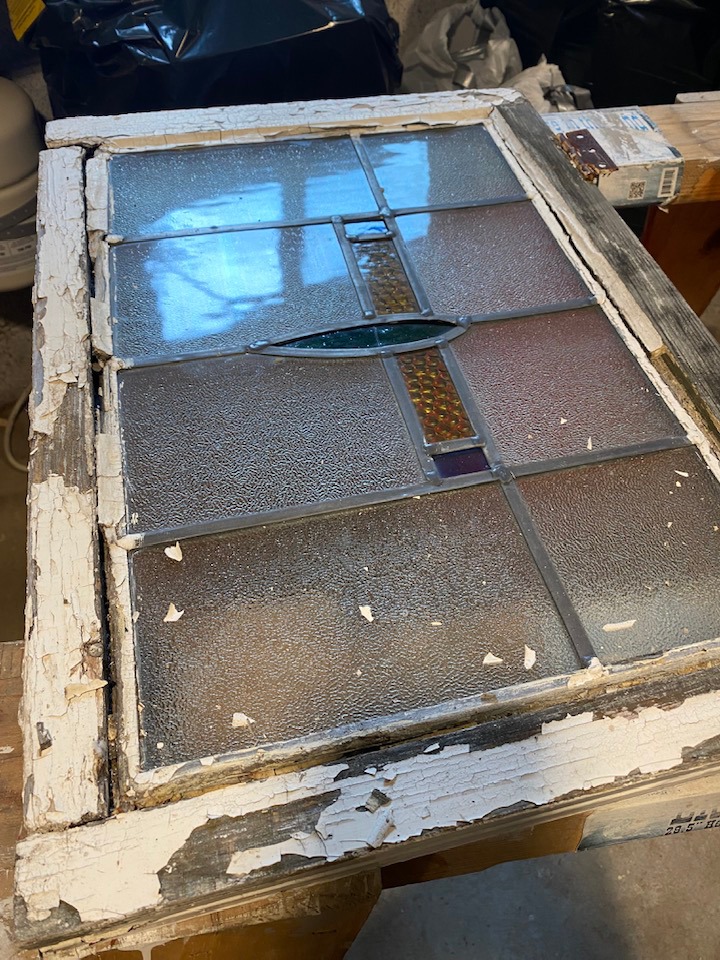
It may not be for everyone, I admit it. BUT – I personally feel that created a little bit of interest in what, otherwise, would have been a jarring non-descript box of drywall. It gives me another chance to add a vintage piece to the room, and makes it feels more like a cozy room than a sterile bathroom.

Given that I paint furniture for a living, I don’t paint everything. I actually much prefer a balance of painted and stained wood. With this mahogany flamed dresser, I knew I couldn’t improve on the finish so I cleaned it up and waxed it. From the get-go, I never wanted the bathroom to look newly refinished, rather I wanted it to look as though it had always been that way – in keeping with the country setting. We had to remove walls and put up new walls, and so this allowed me to get rid of the old orange-peel textured walls (seriously don’t like those), and ask our contractor to do a relatively smooth (not perfect, I don’t want perfect) finish on the top of the wall and then do a simple pine beadboard detail on the base to anchor the walls.
Now to the paint colors!!! The house is on a 2.5 acre lot surrounded by mature trees, and it’s in Oregon. So immediately I knew that I wanted to try and bring the outdoors inside, and that would mean (to me) using a beautiful soft and fresh green.
I’m not one for knick-knacks, but I do have a few things that I knew would work well with the color scheme.
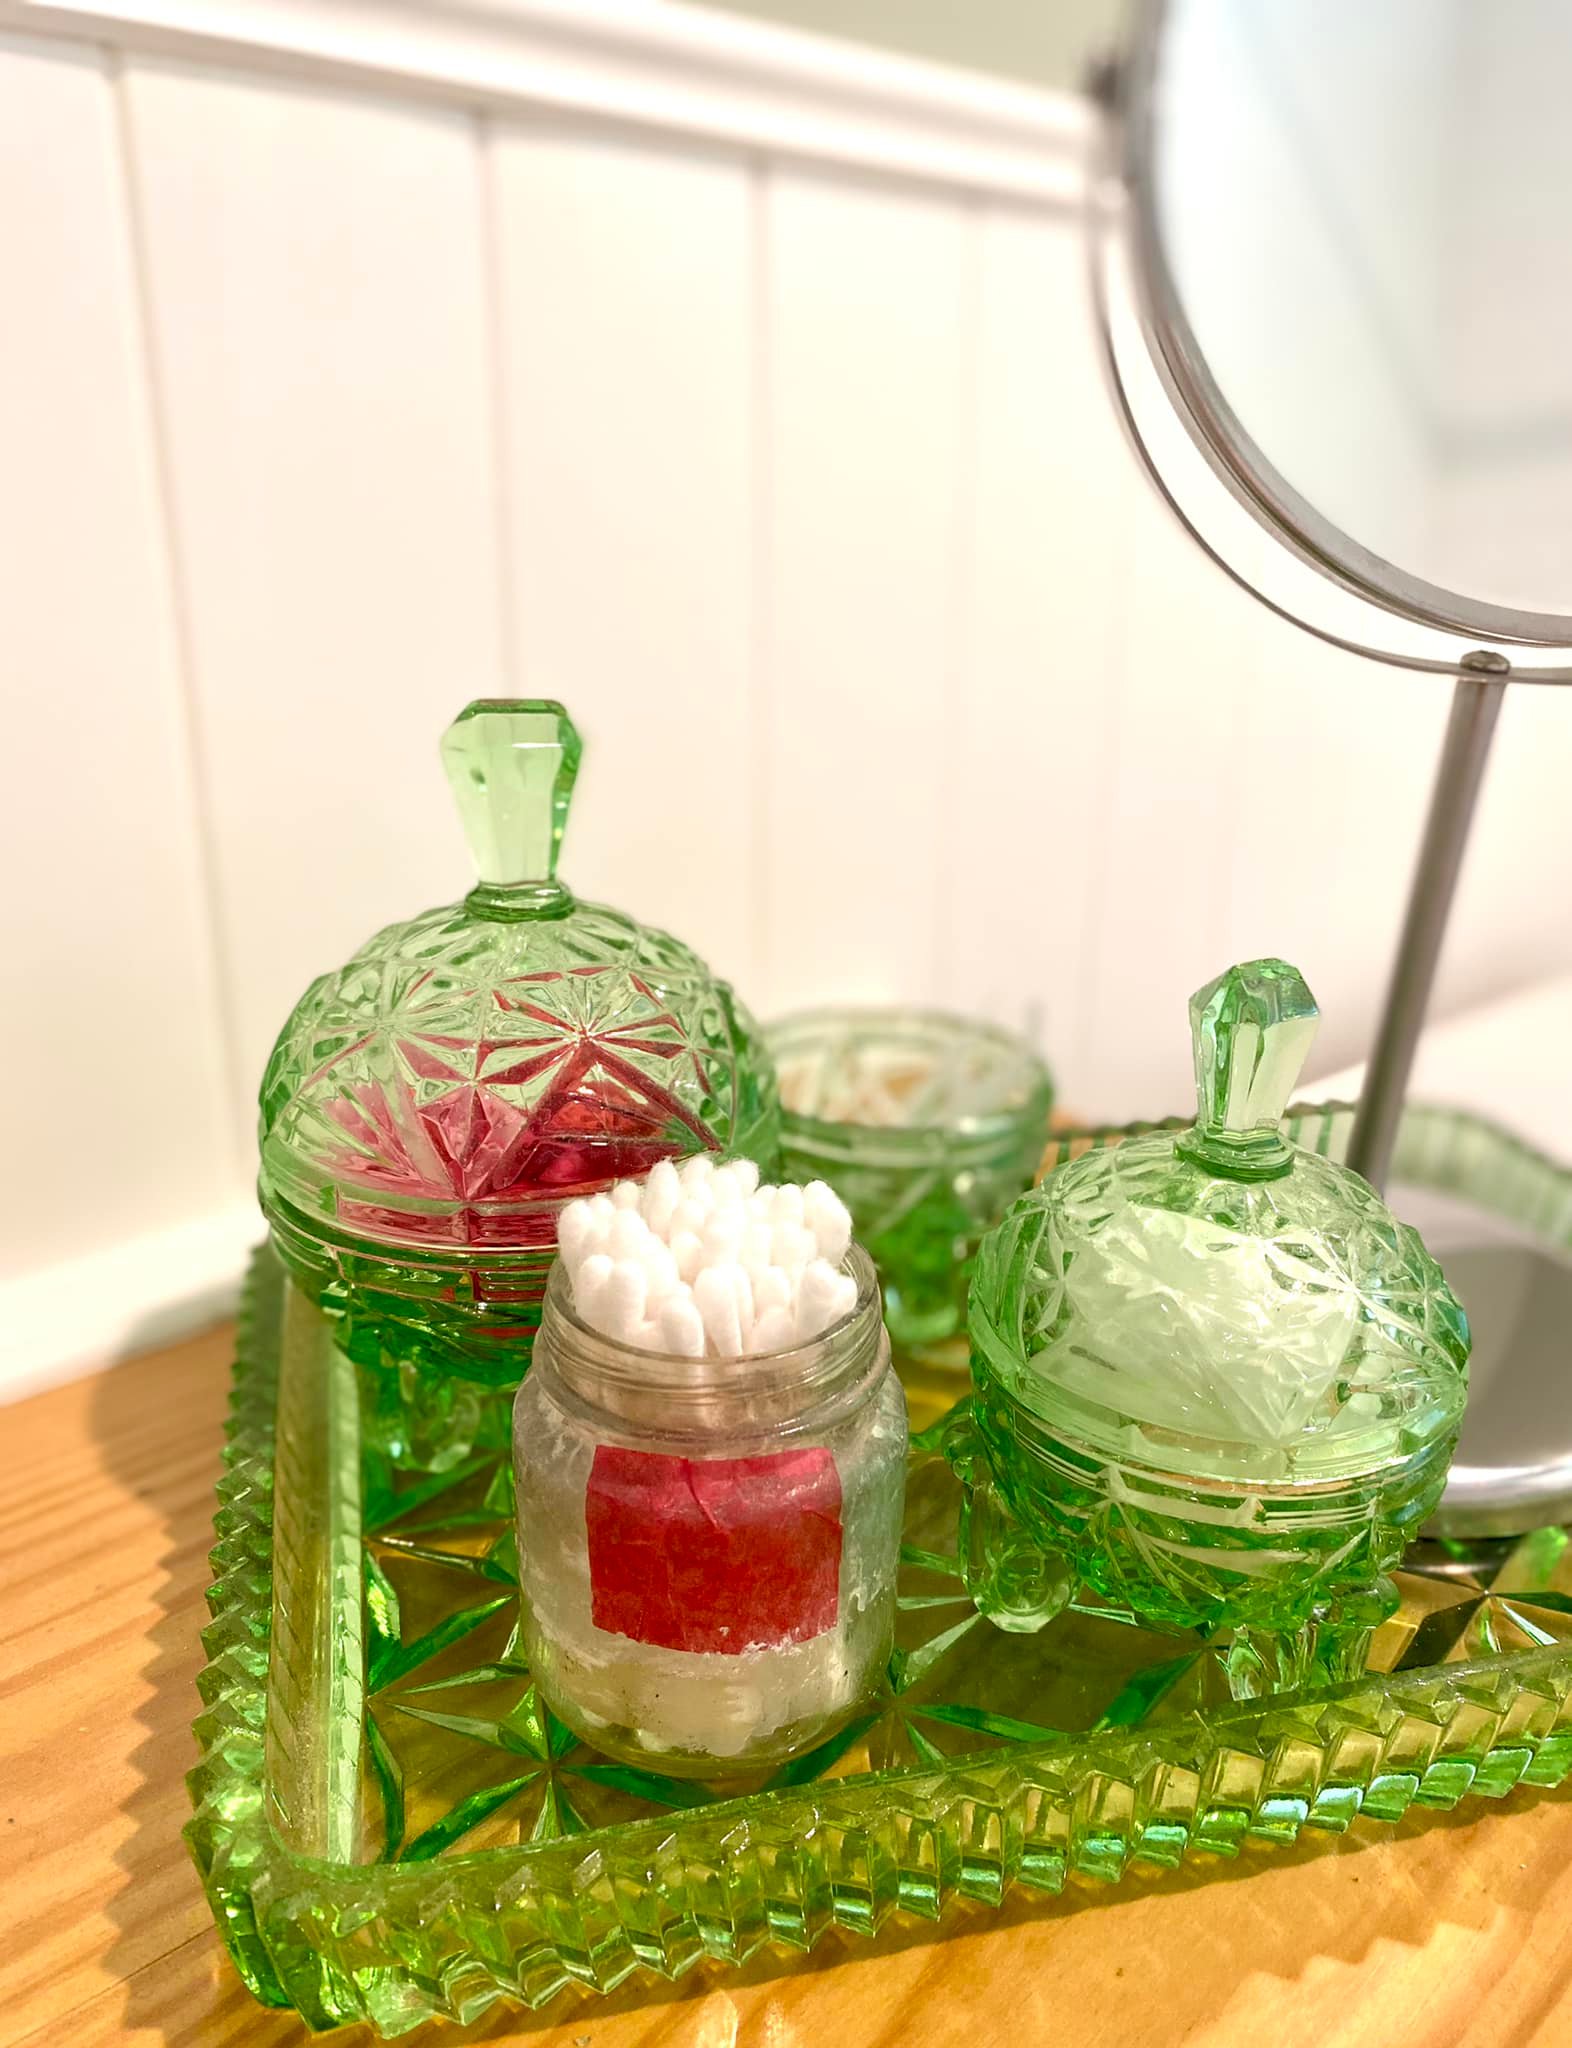

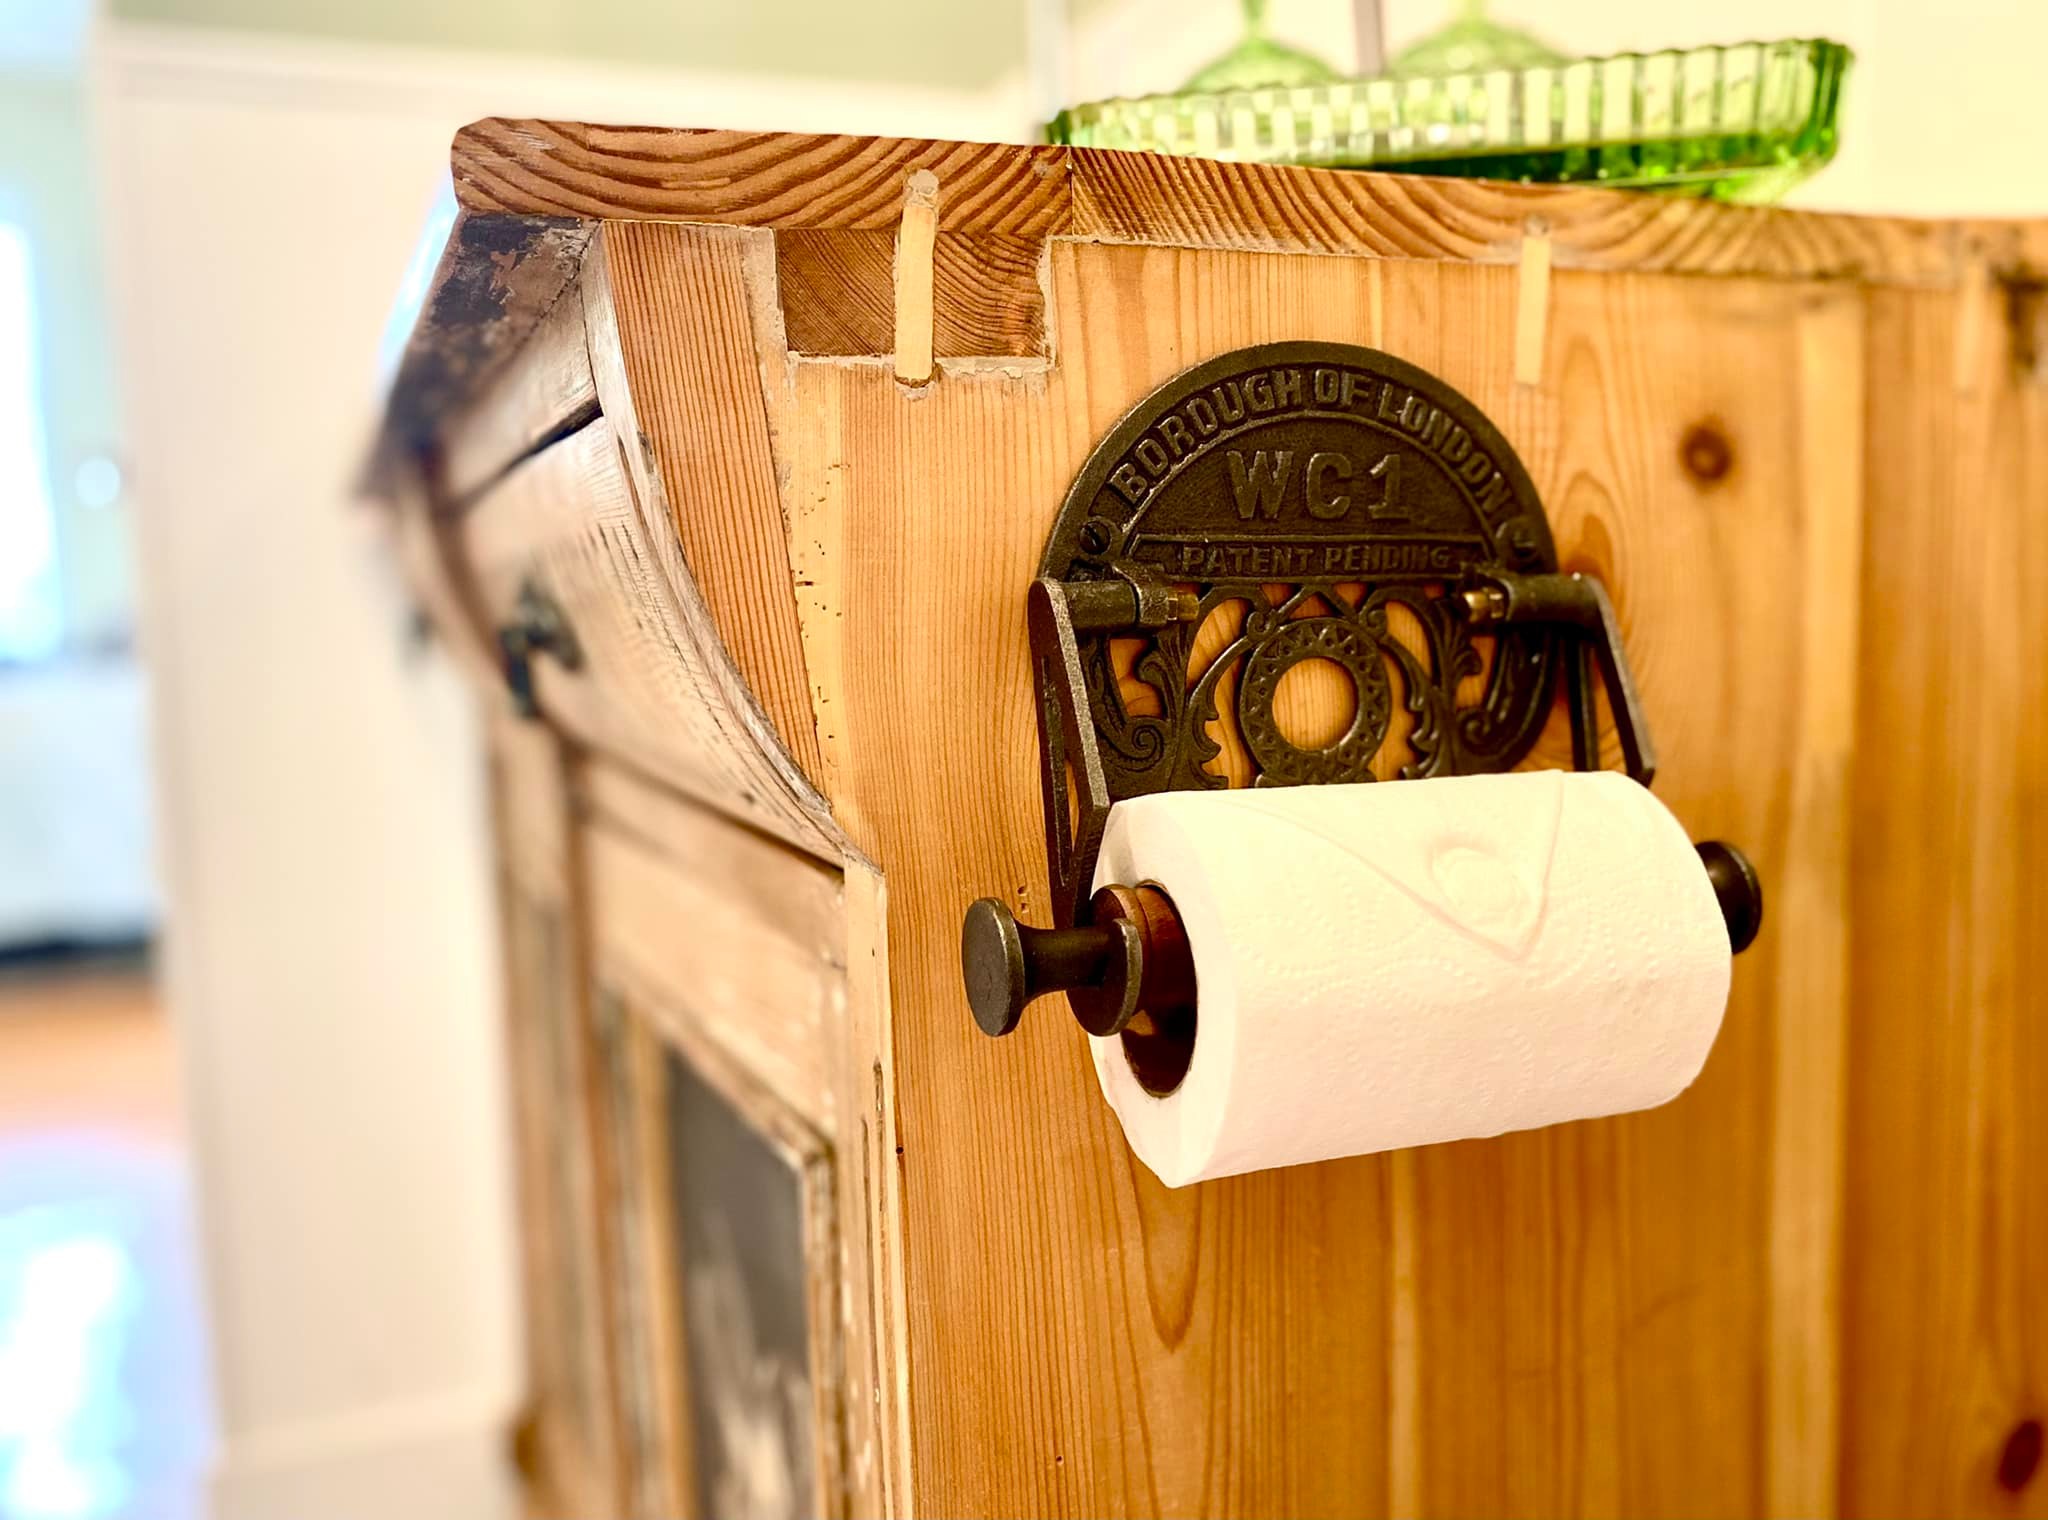
I don’t know about you but I’m totally uninspired when it comes to bathroom hardware (especially those at big box stores). This little beauty I found on Etsy. It’s solid as a rock, and adds to the quirkiness of my home and picks up the black from the image transfer on the vanity. Here’s the Etsy page, if you’re interested.
What did I learn from doing this bathroom remodel going forward to the other projects?
It will take longer than I think. It will be more expensive. Money will be spent on things that you had no idea needed to be repaired/replaced. One problem will lead to another. Learn to be flexible. Listen to your contractor. Find a contractor who will also listen and be willing to understand your vision. Know that any space can become a lovely little room in your home. Don’t be put off because you don’t have the monies for top dollar fixtures that you see on social media, there are reasonable alternatives out there. The fun is in the search! And more importantly,
There are no rules in design.
Make your home your own.
That is enough.

{insert catchy ending phrase here}
Diane aka The Paint Factory