

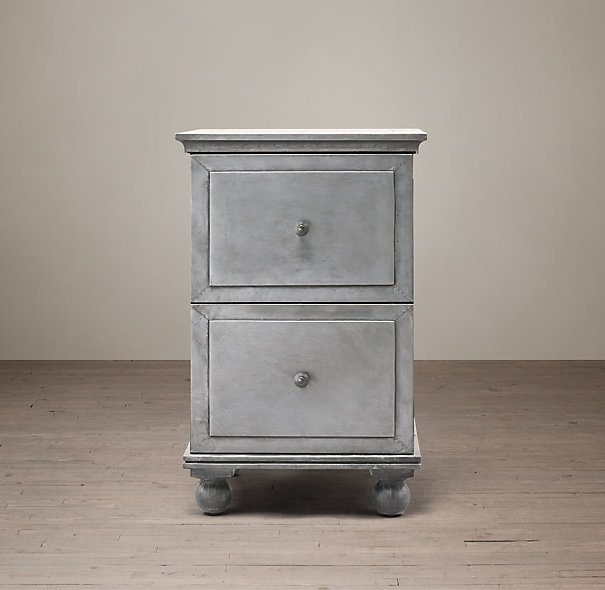
 I’ve always loved the look of zinc. Especially on a table, or in the kitchen. I will never be able to afford the real McCoy. This cabinet (from Restoration Hardware) is selling for $930 (on sale). Cray-cray. So, how difficult could it be to recreate a zinc finish? There are a thousand different tutorials on doing zinc finishes. I’ve seen
 most a lot of them. One of the things I’m finding out about myself is that I like a challenge. I like to see if I can do, what others have done before me. So, me trying to create a zinc finish was on my agenda for this week.
Let me just say that if there’s a tutorial on this blog, it’s been taken from somewhere else -or at least the general concept has. As in: I do not have an ORIGINAL creative bone in my body. I could never just ‘come up’ with something new and inventive. But – I am a great copier. So I’ve spent time looking on various websites/pages etc and I’ve filed everything in my brain (I wish I could remember all the names of the sites I visited over the last few months looking at this, but you know how one site leads to another site, and to another and before you know it you haven’t showered in days). So, please, share anything you want from this blog. This knowledge doesn’t ‘belong’ to me, it’s supposed to be shared.
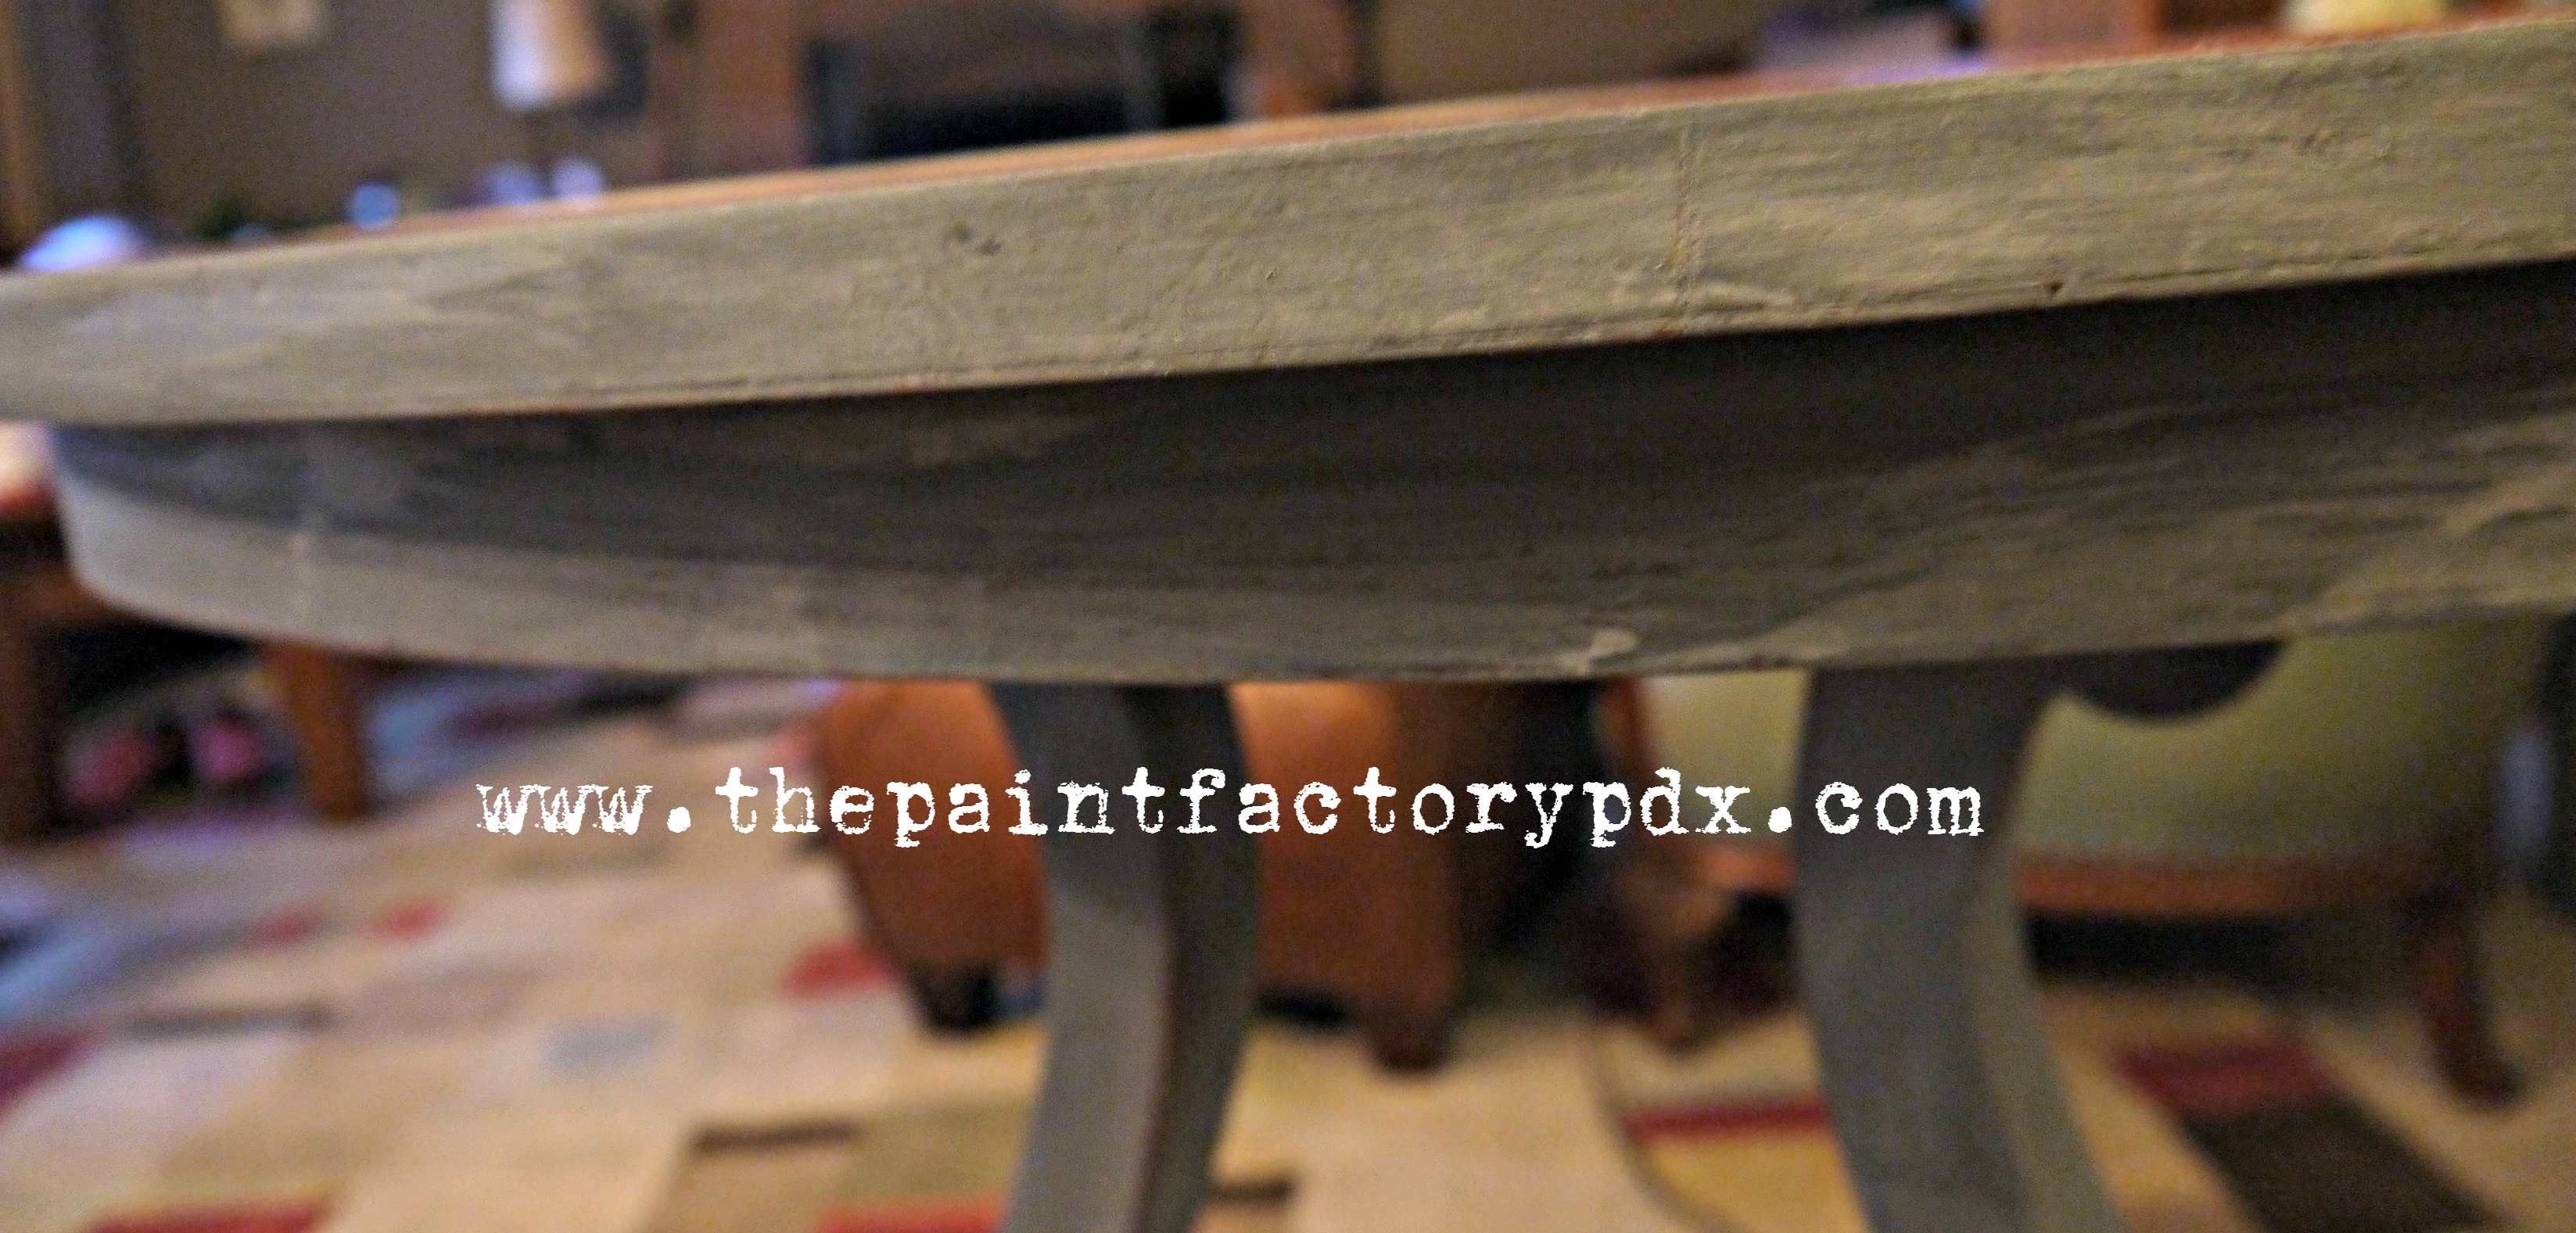
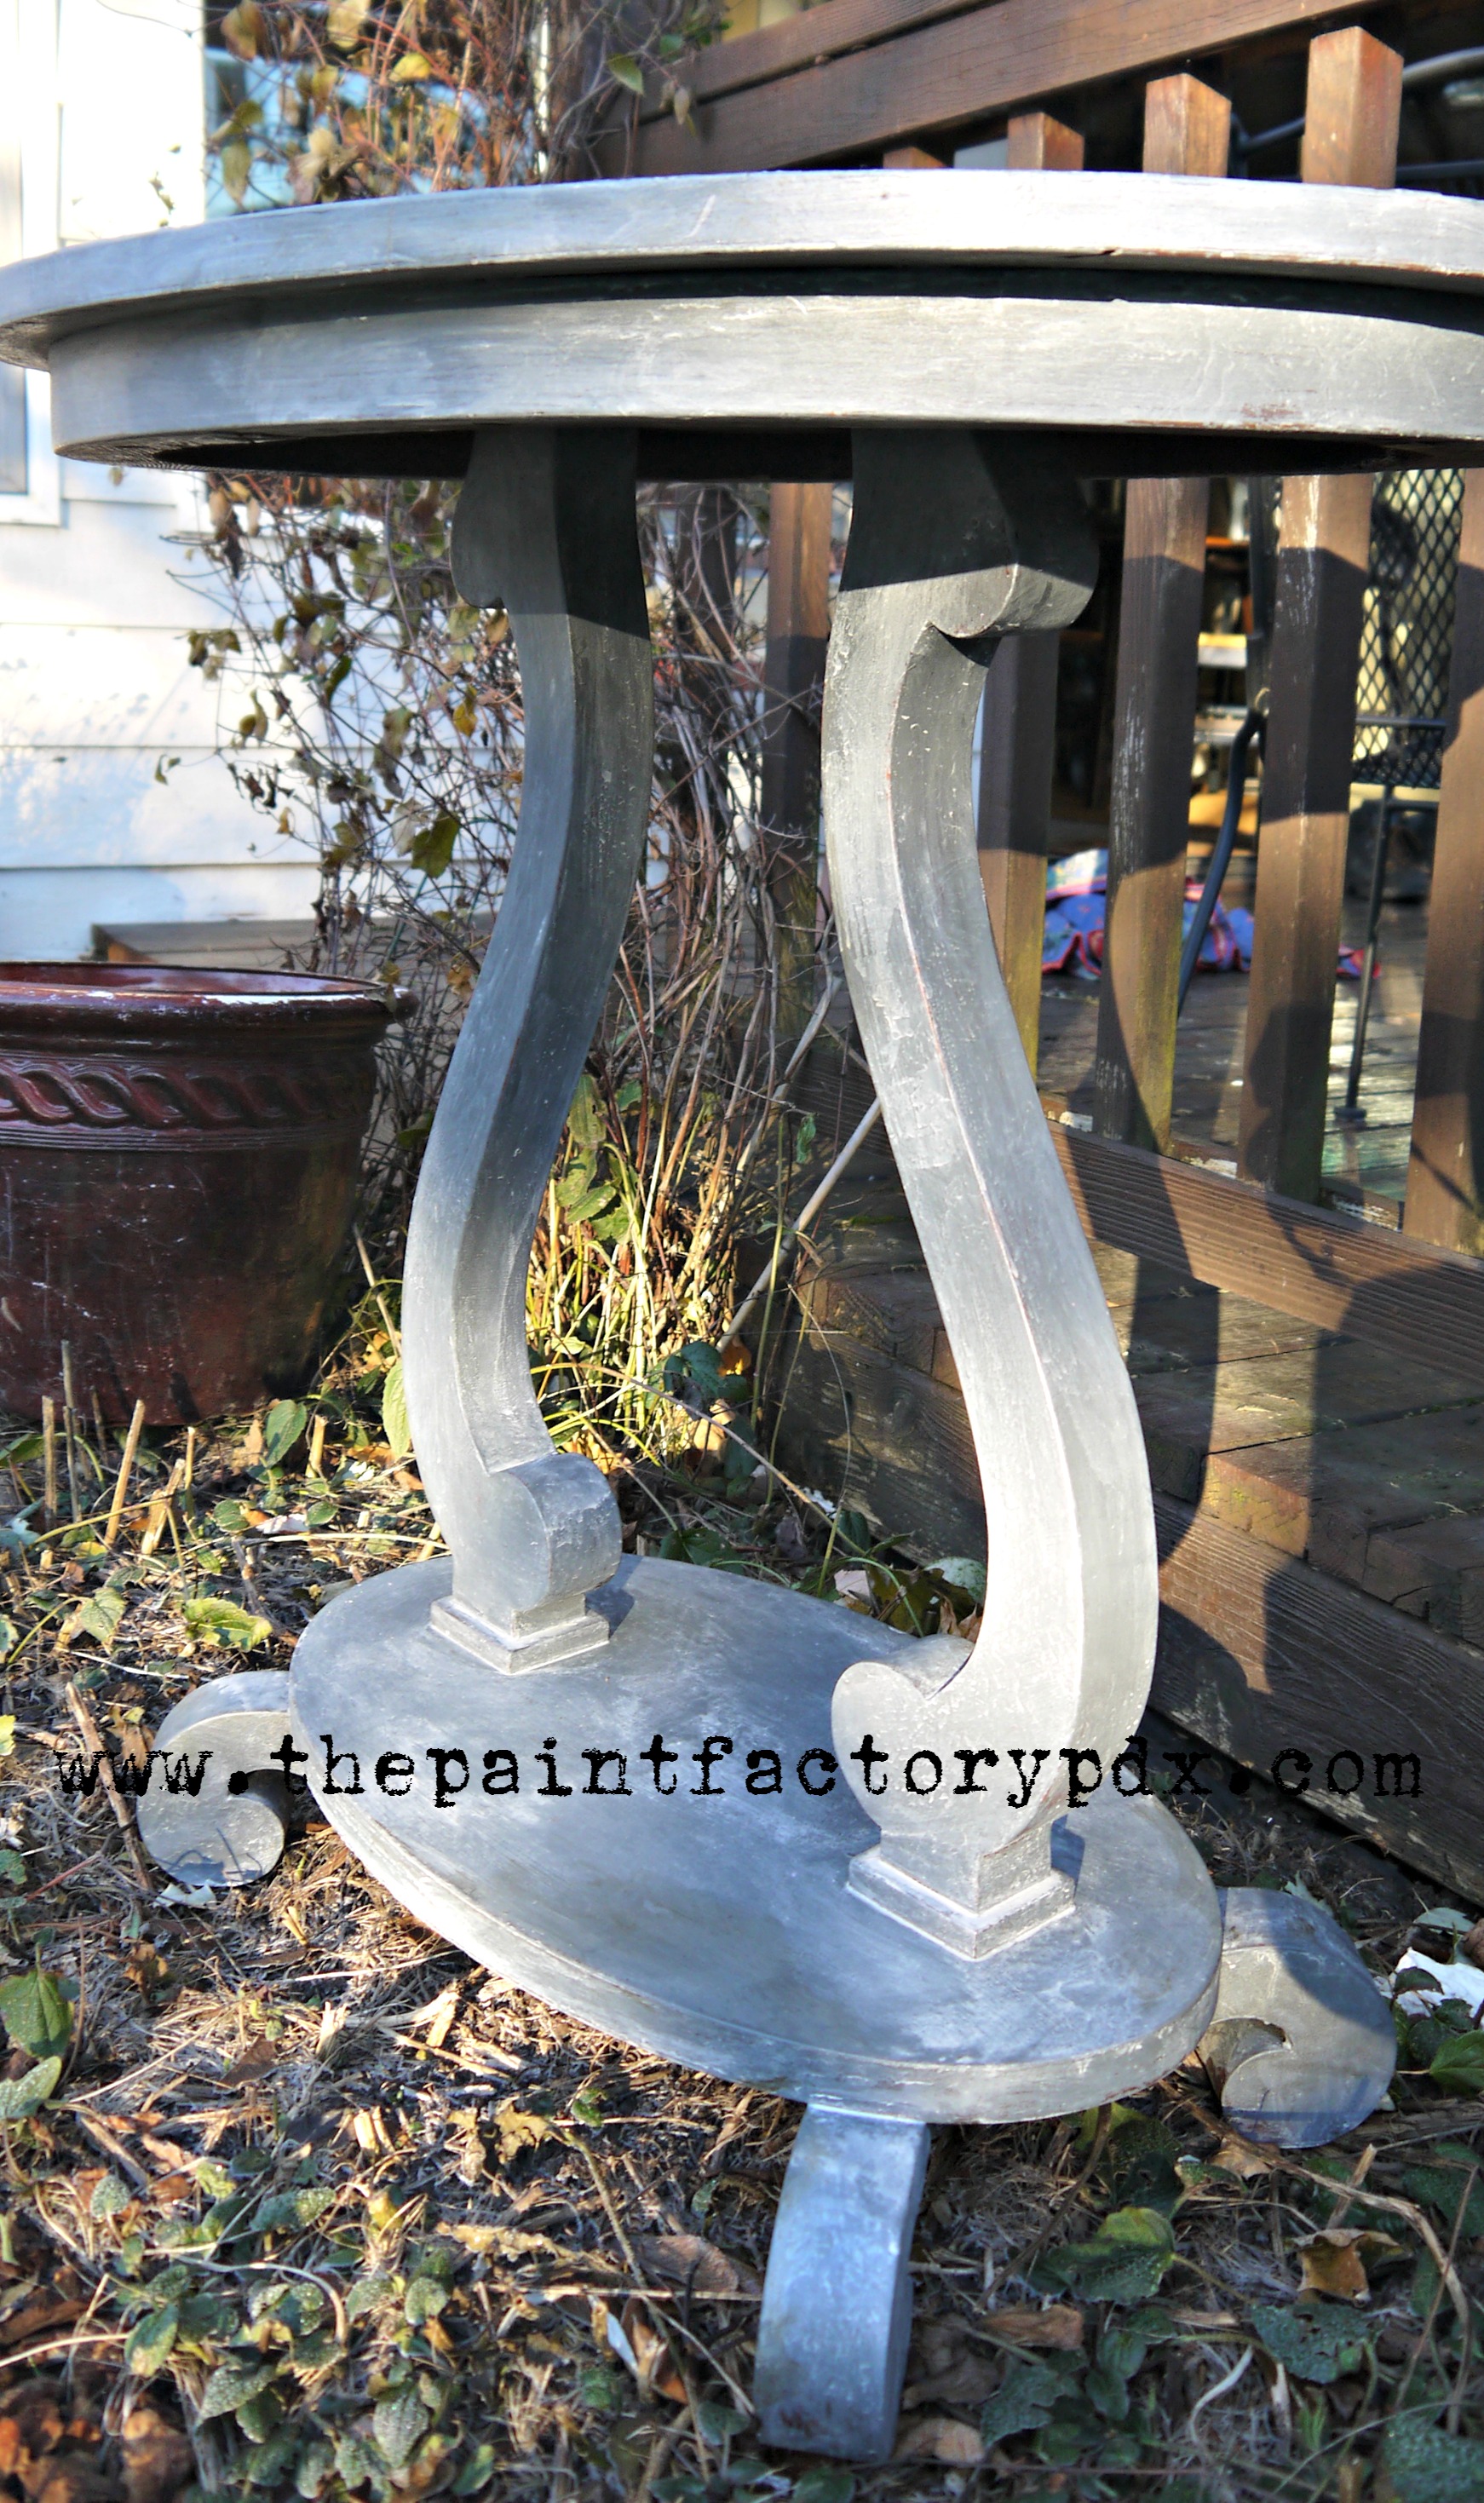
So Step 1. Find your piece. 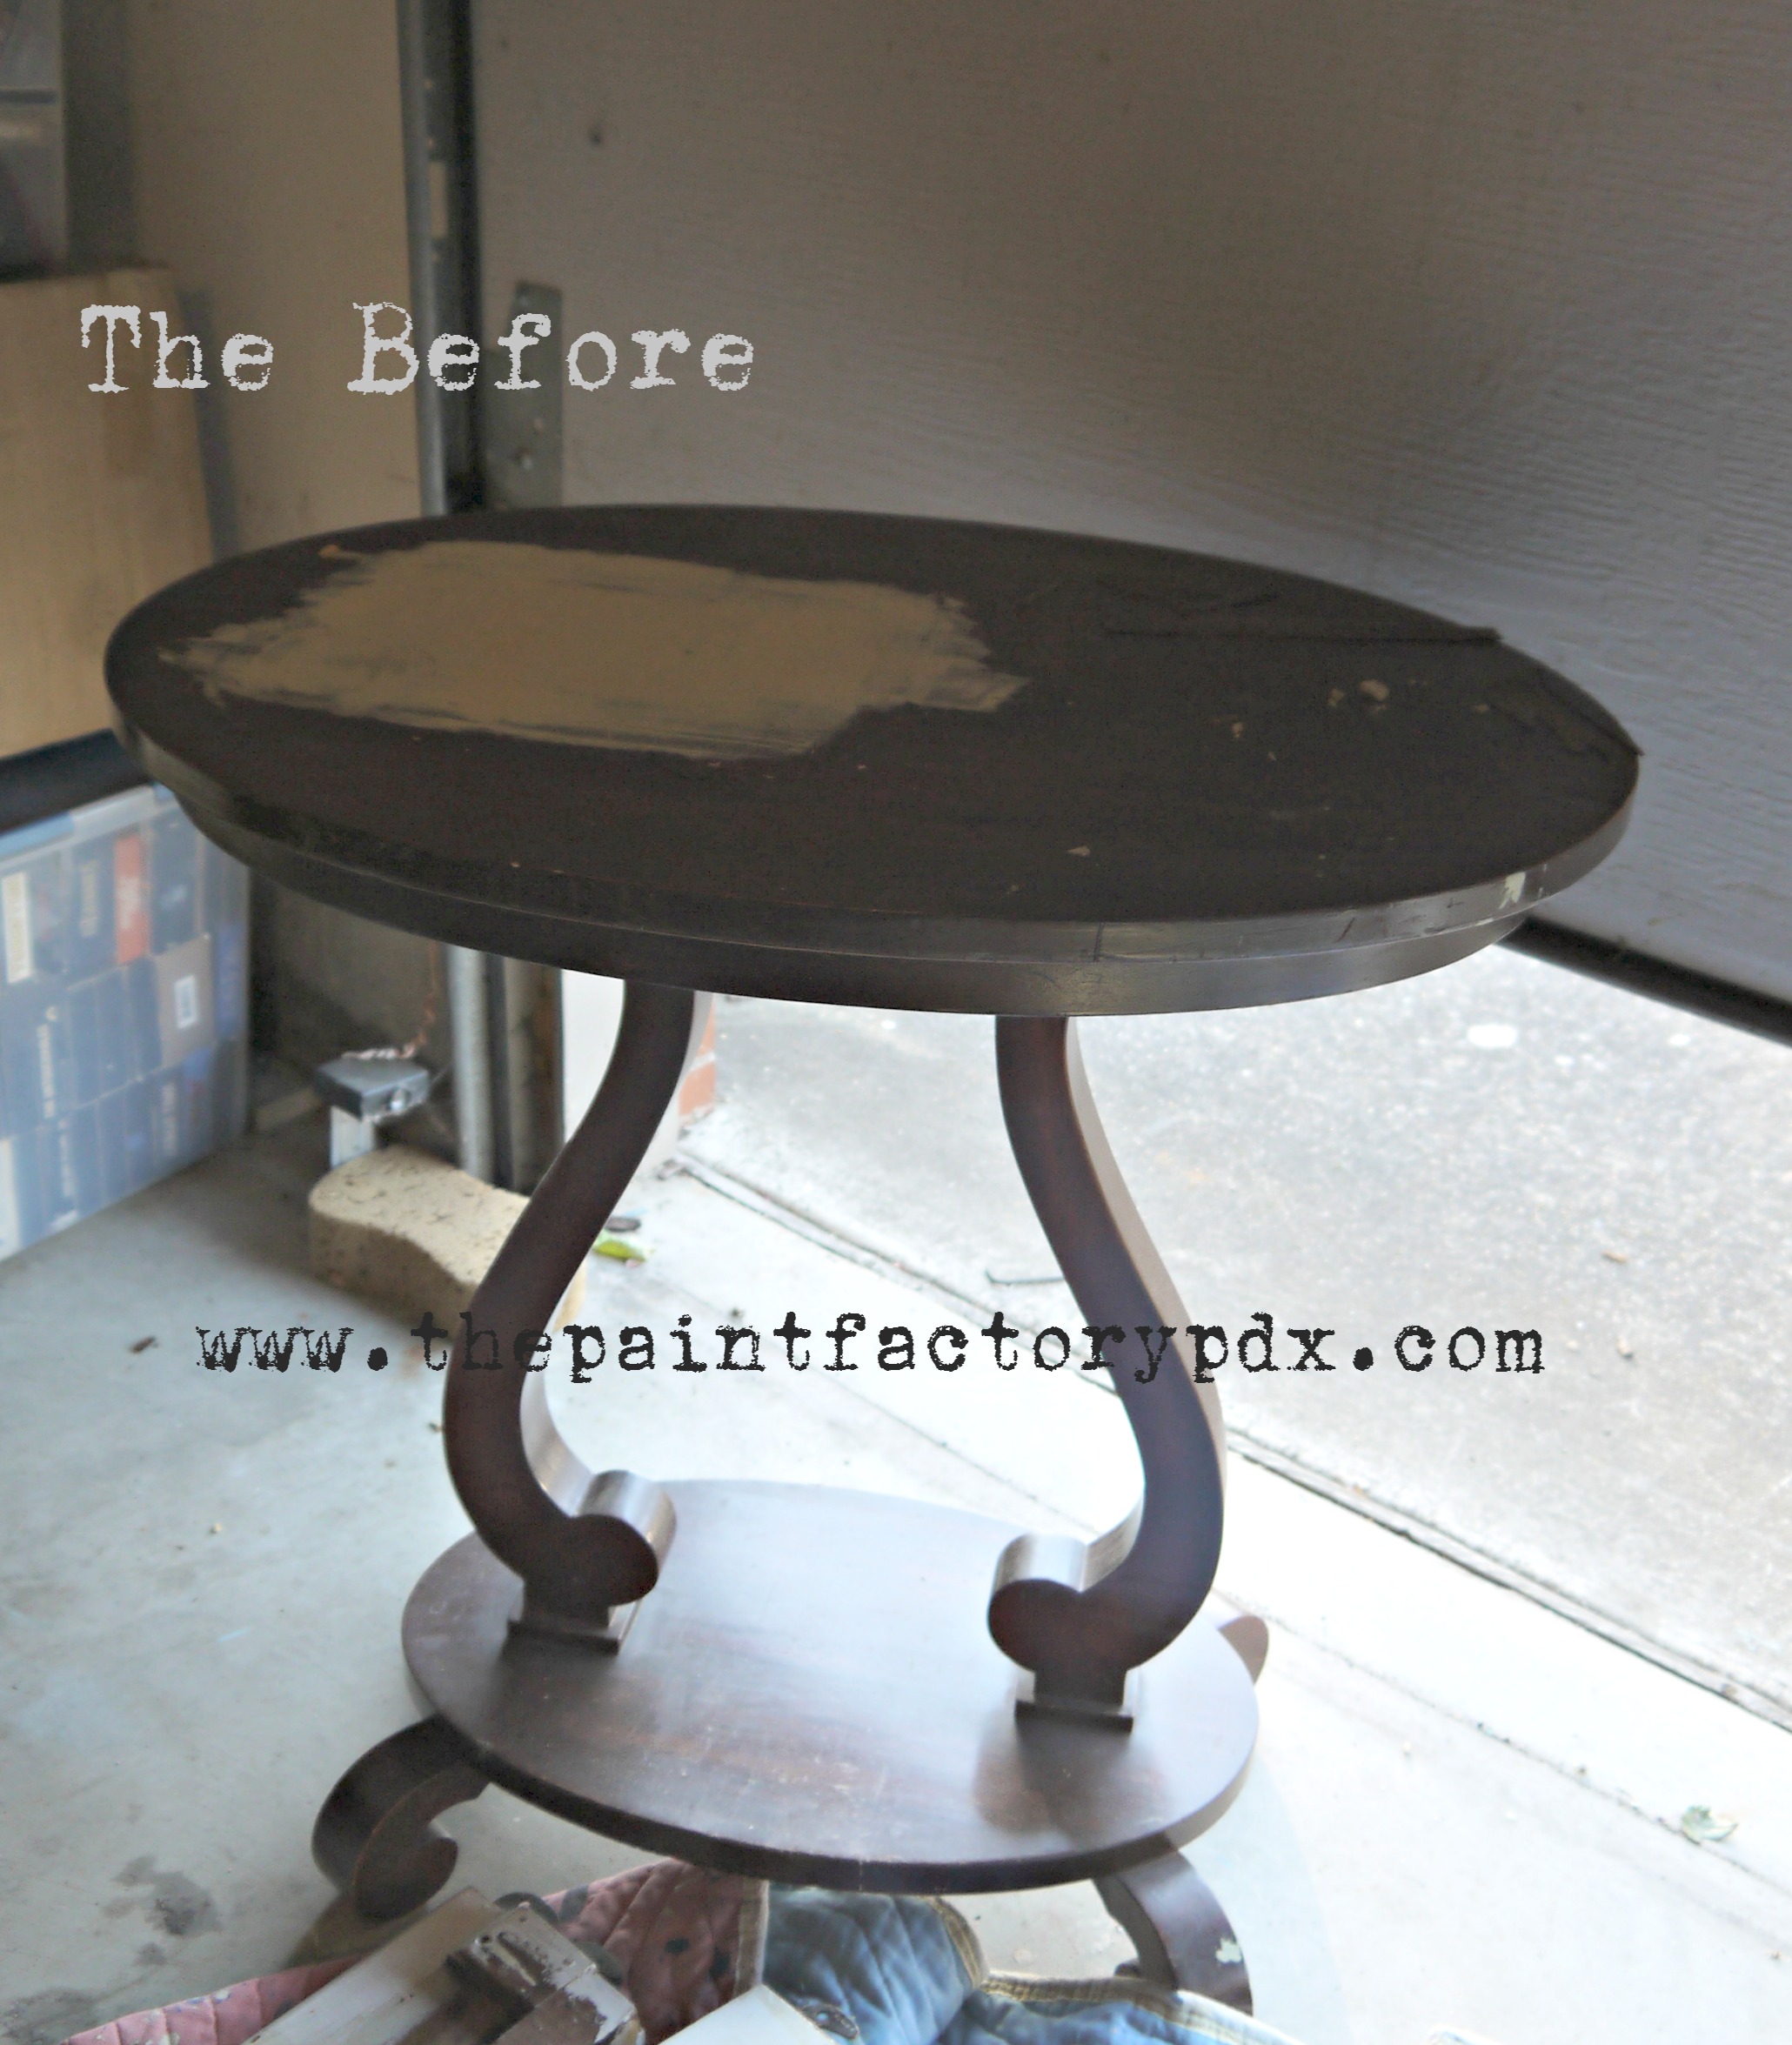 I choose this table, primarily, because I liked the shape. It had a shape that would look good being made of zinc. It also had some major damage. It’s beautiful, but the veneer had been damaged and repaired – and it showed. This is my attempt at repairing the original repair. But, see – lovely sexy curvy lines.
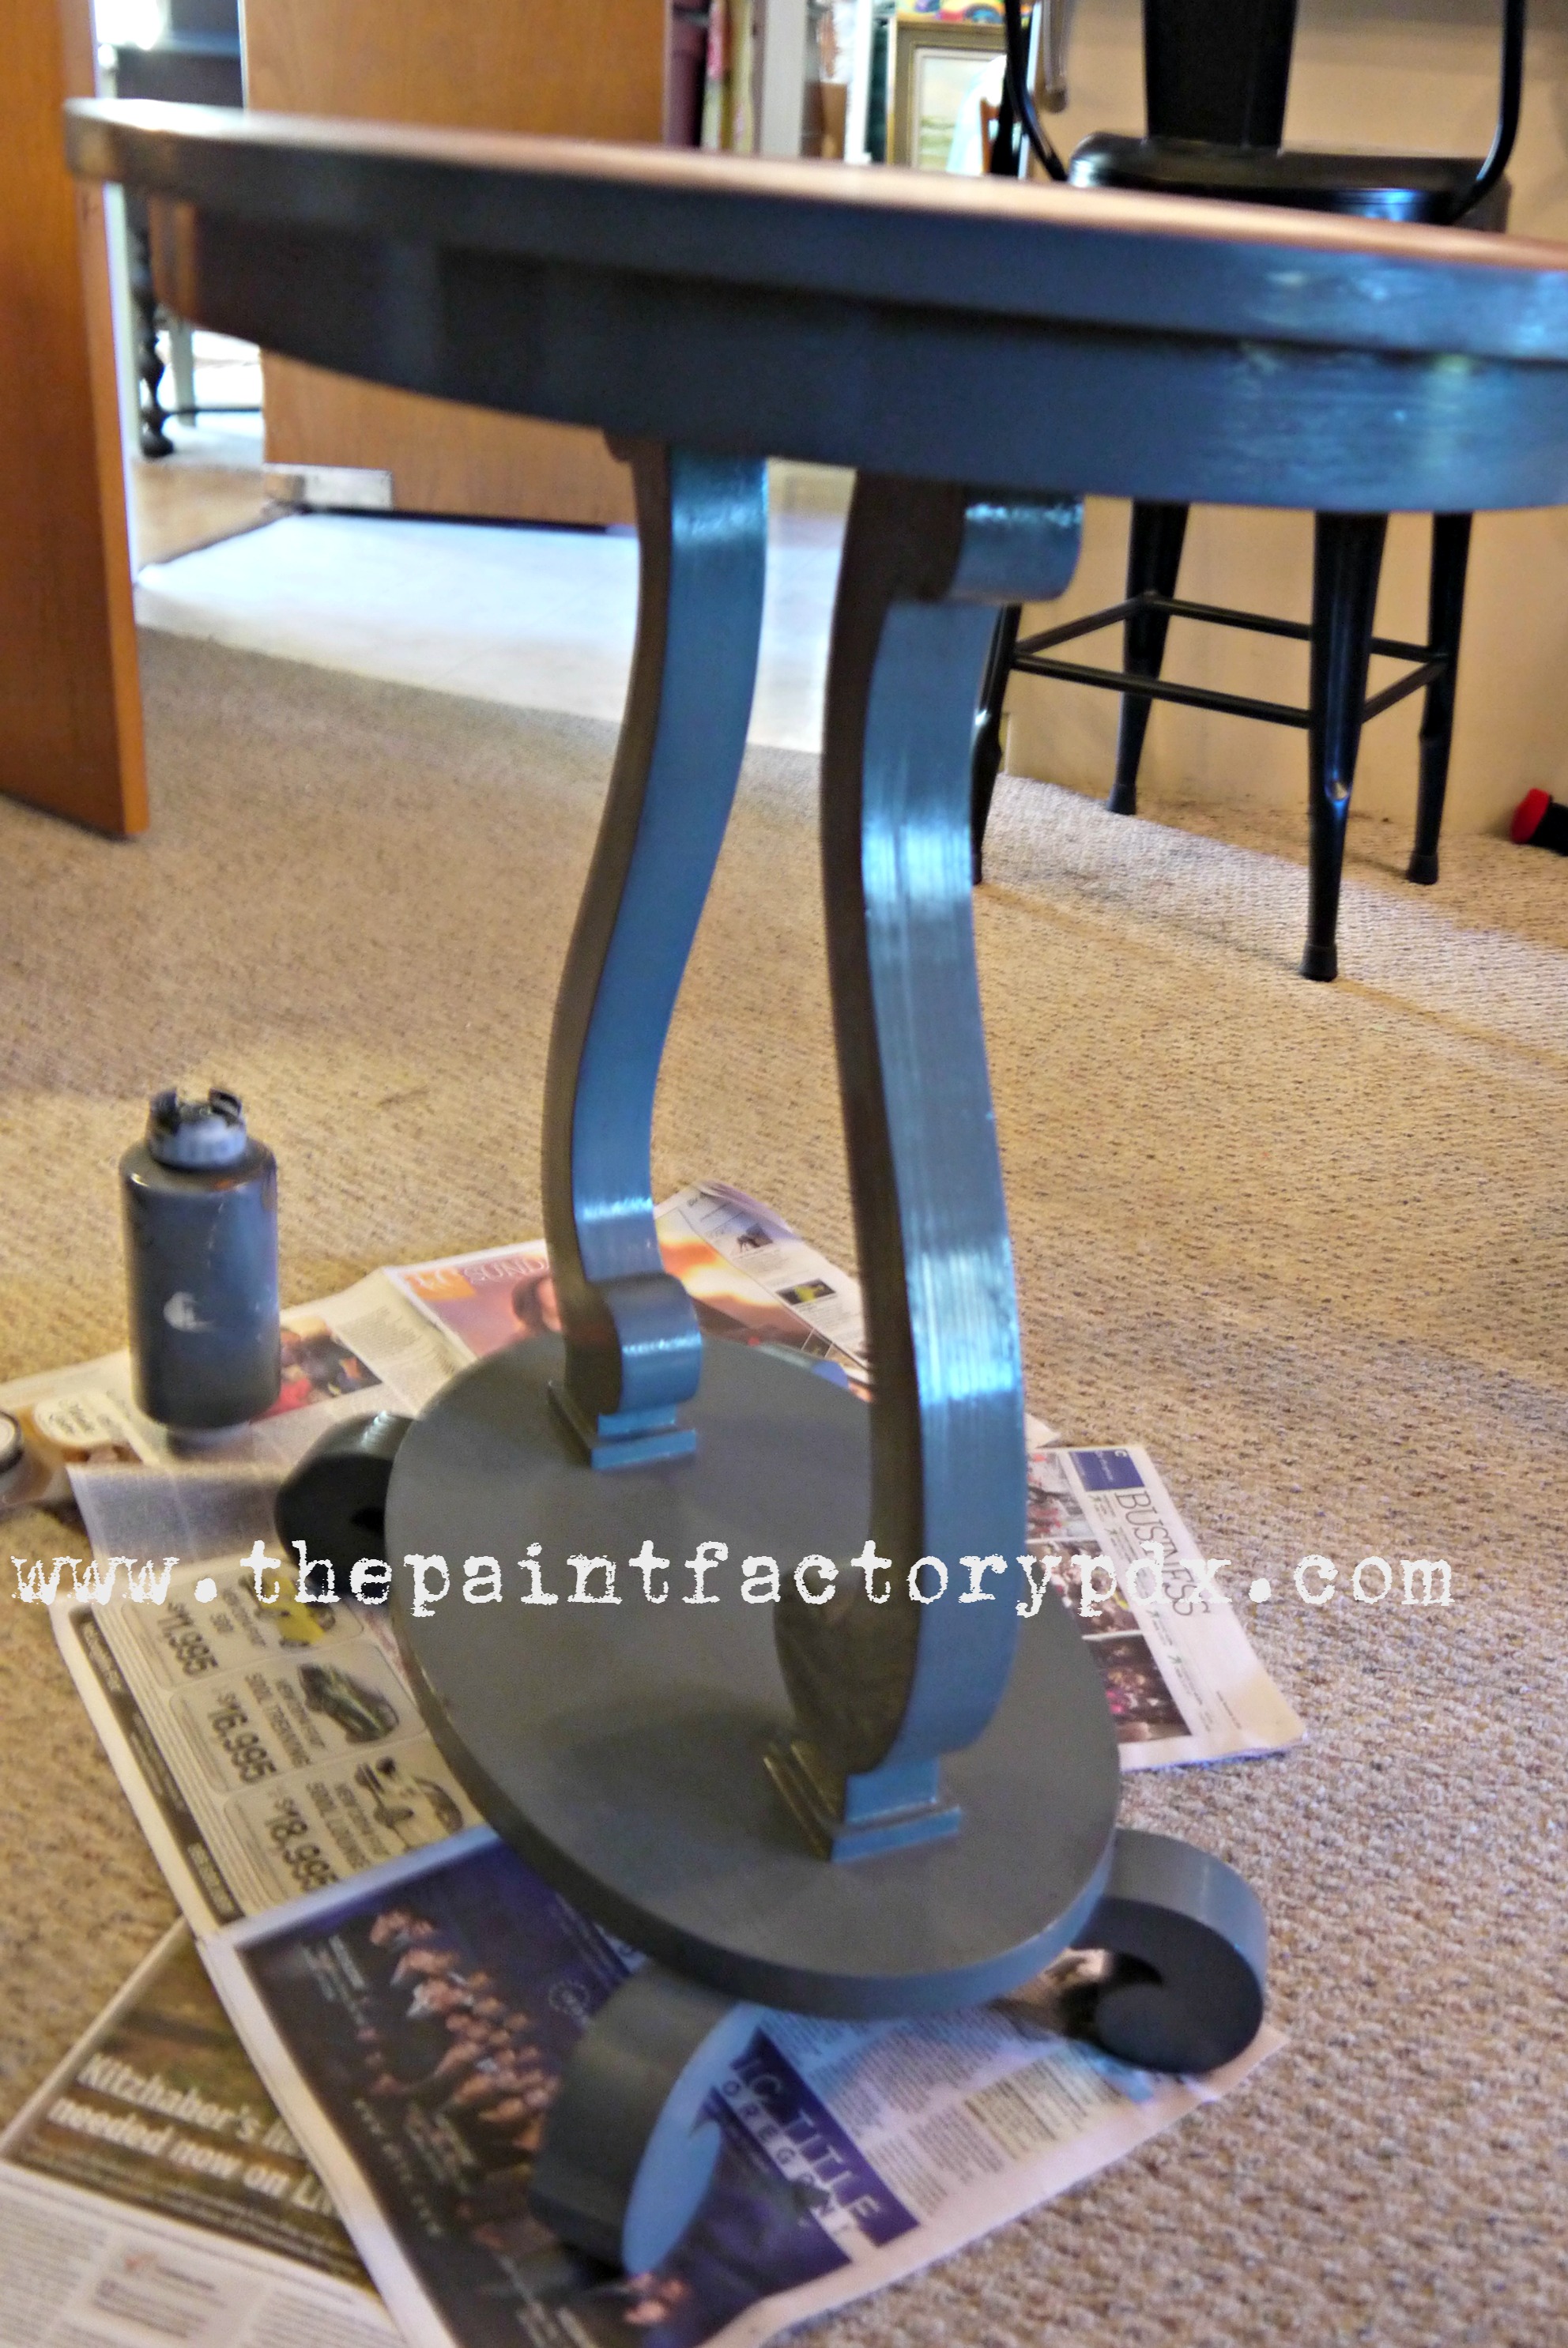
 Step 2. Paint your base coat. All over. I used Annie Sloan Graphite chalk paint. You could, I guess, use a dark blue (maybe Napoleonic Blue/Graphite), because zinc has a blue hue to it. Originally I was only going to do one coat of the graphite, but I would advise doing two. And let it dry. Easy.
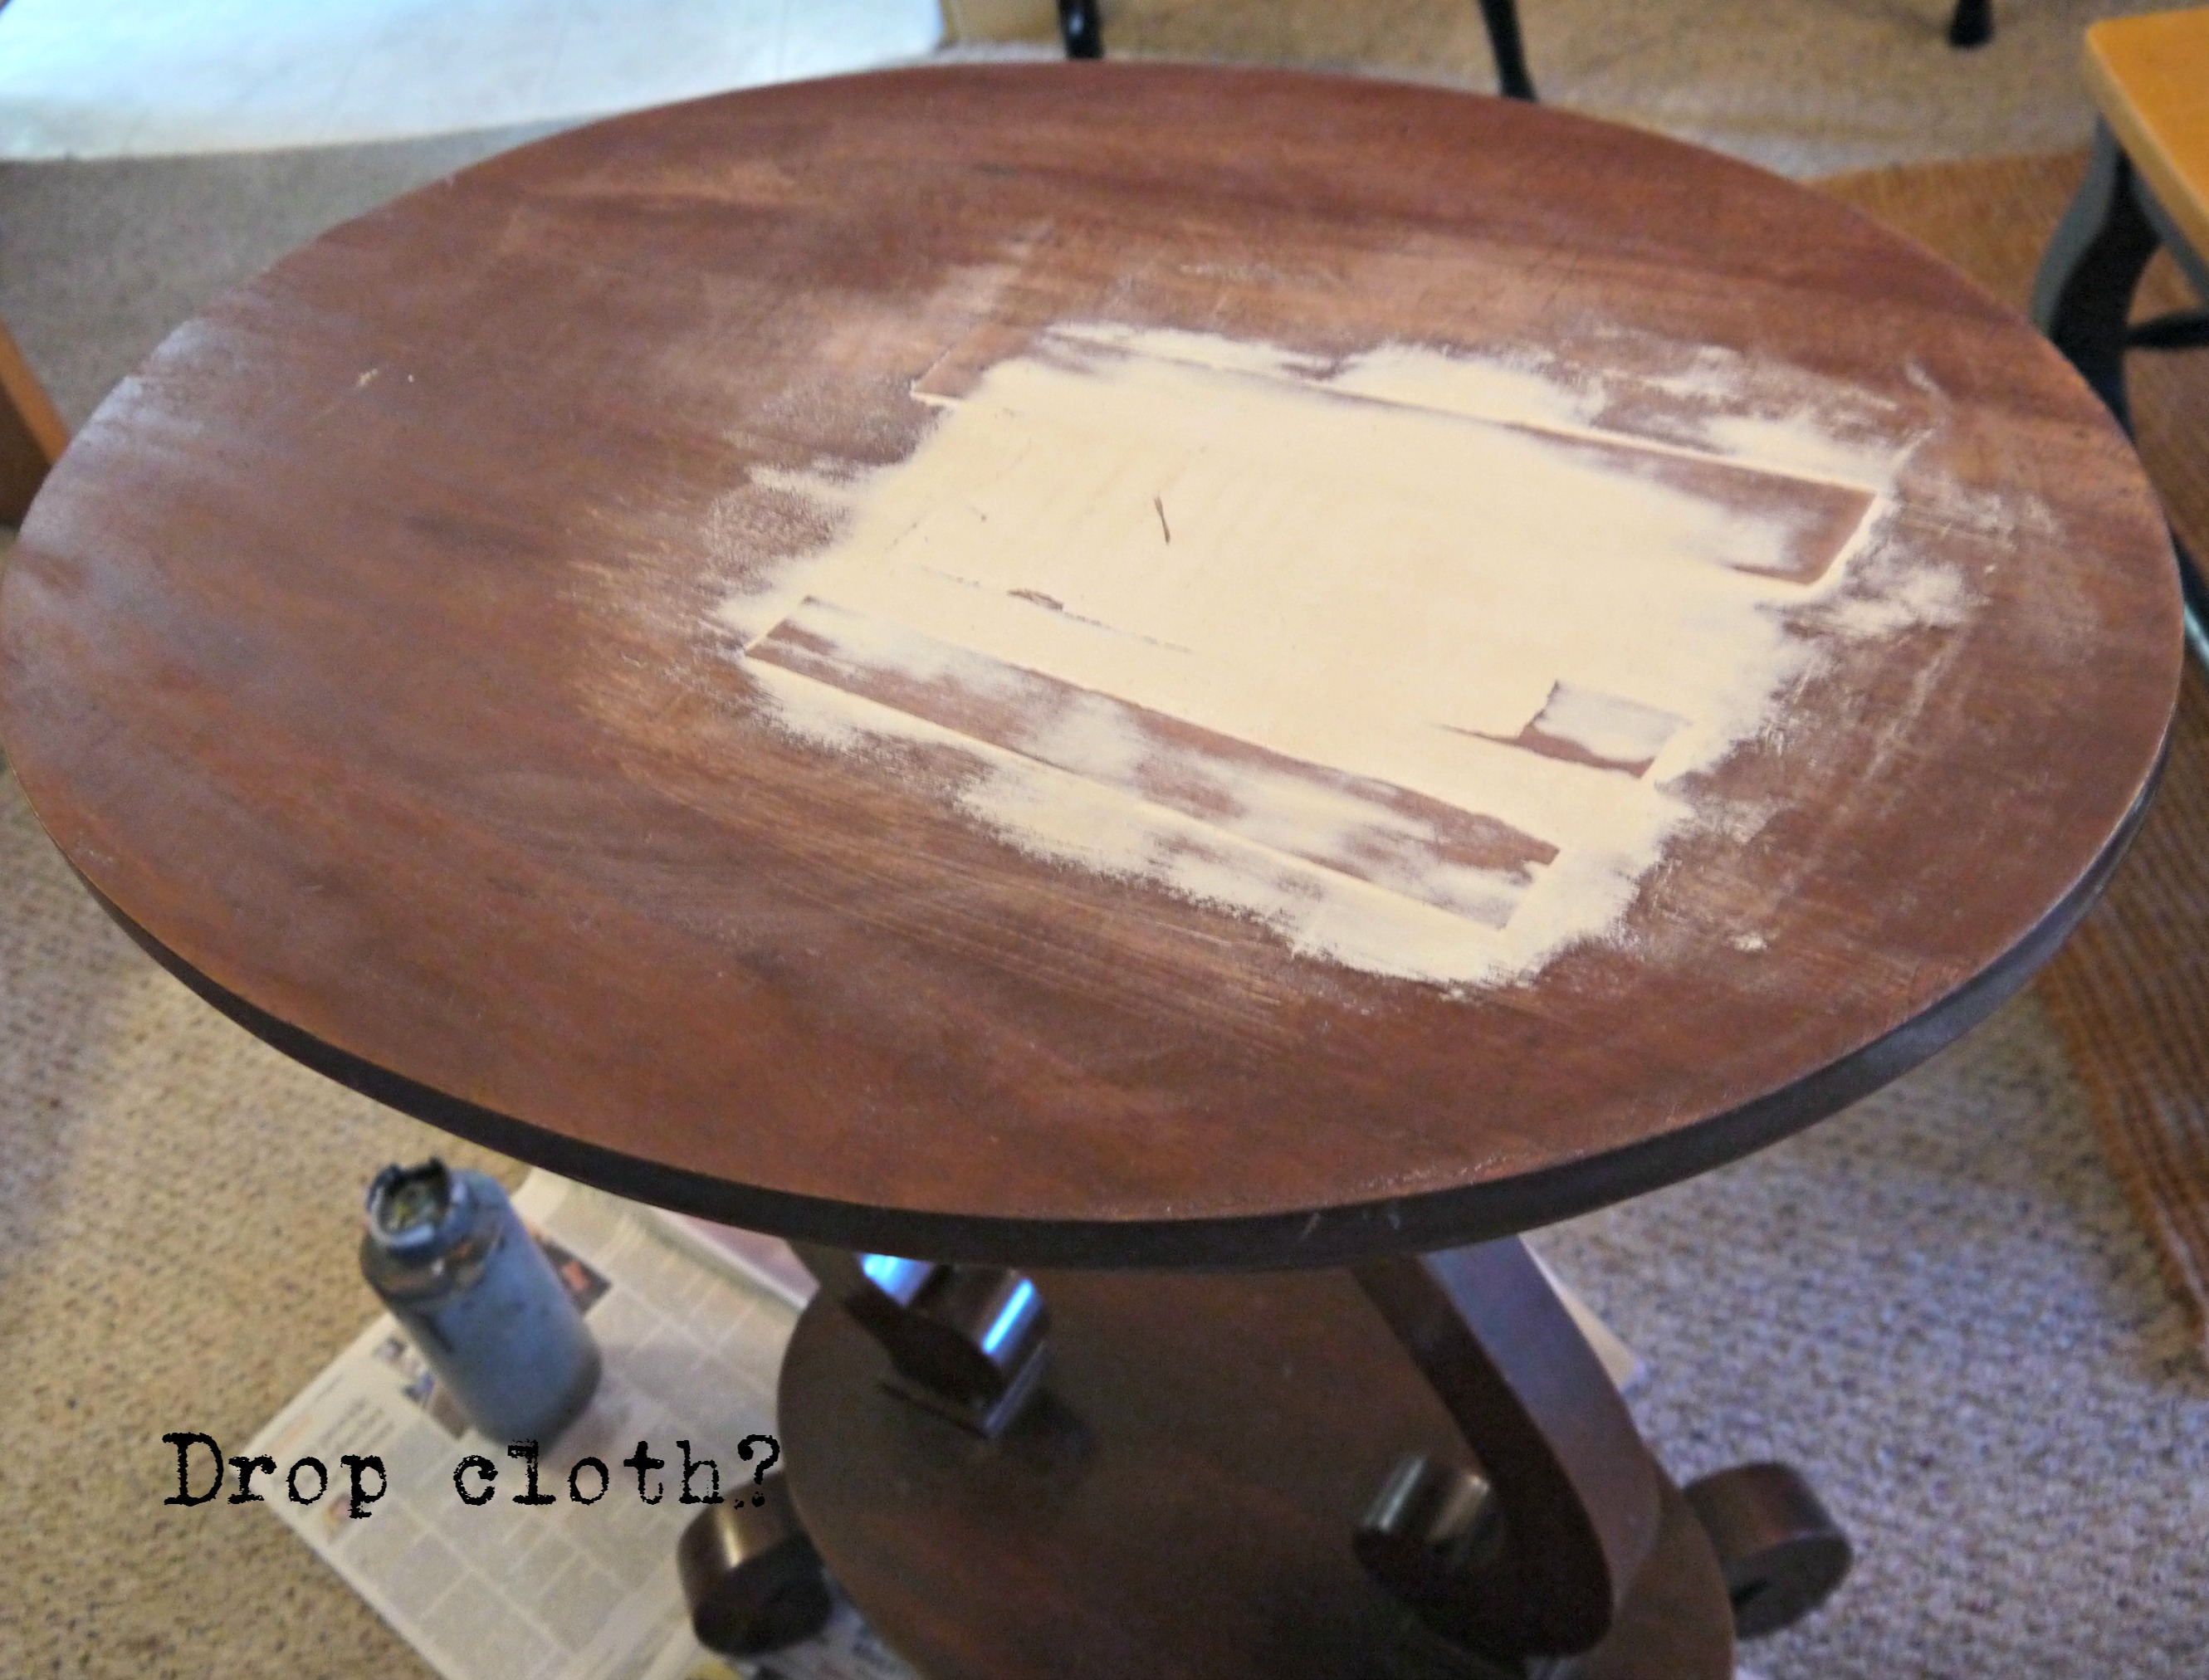
 Step 3. Mix a color wash. I mixed Graphite with Old White, just a tiny amount into a small bowl of water. This is where, I think, you need two coats of the basecoat. When you do a color wash over a basecoat, there’s a chance that you will wash/wipe away some of the color. Normally, that wouldn’t be a problem if you were going to distress it afterwards. Because I wanted this piece to appear to be metal, I didn’t want ANY wood showing through. If you look at the top of the leg detailing, you will see that some wood is showing through. You don’t want that to happen! I touched it up after this photo.
(A color wash is basically water and paint mixed together. Brushed on over a basecoat, and then wiped off with a cloth/paper towel). 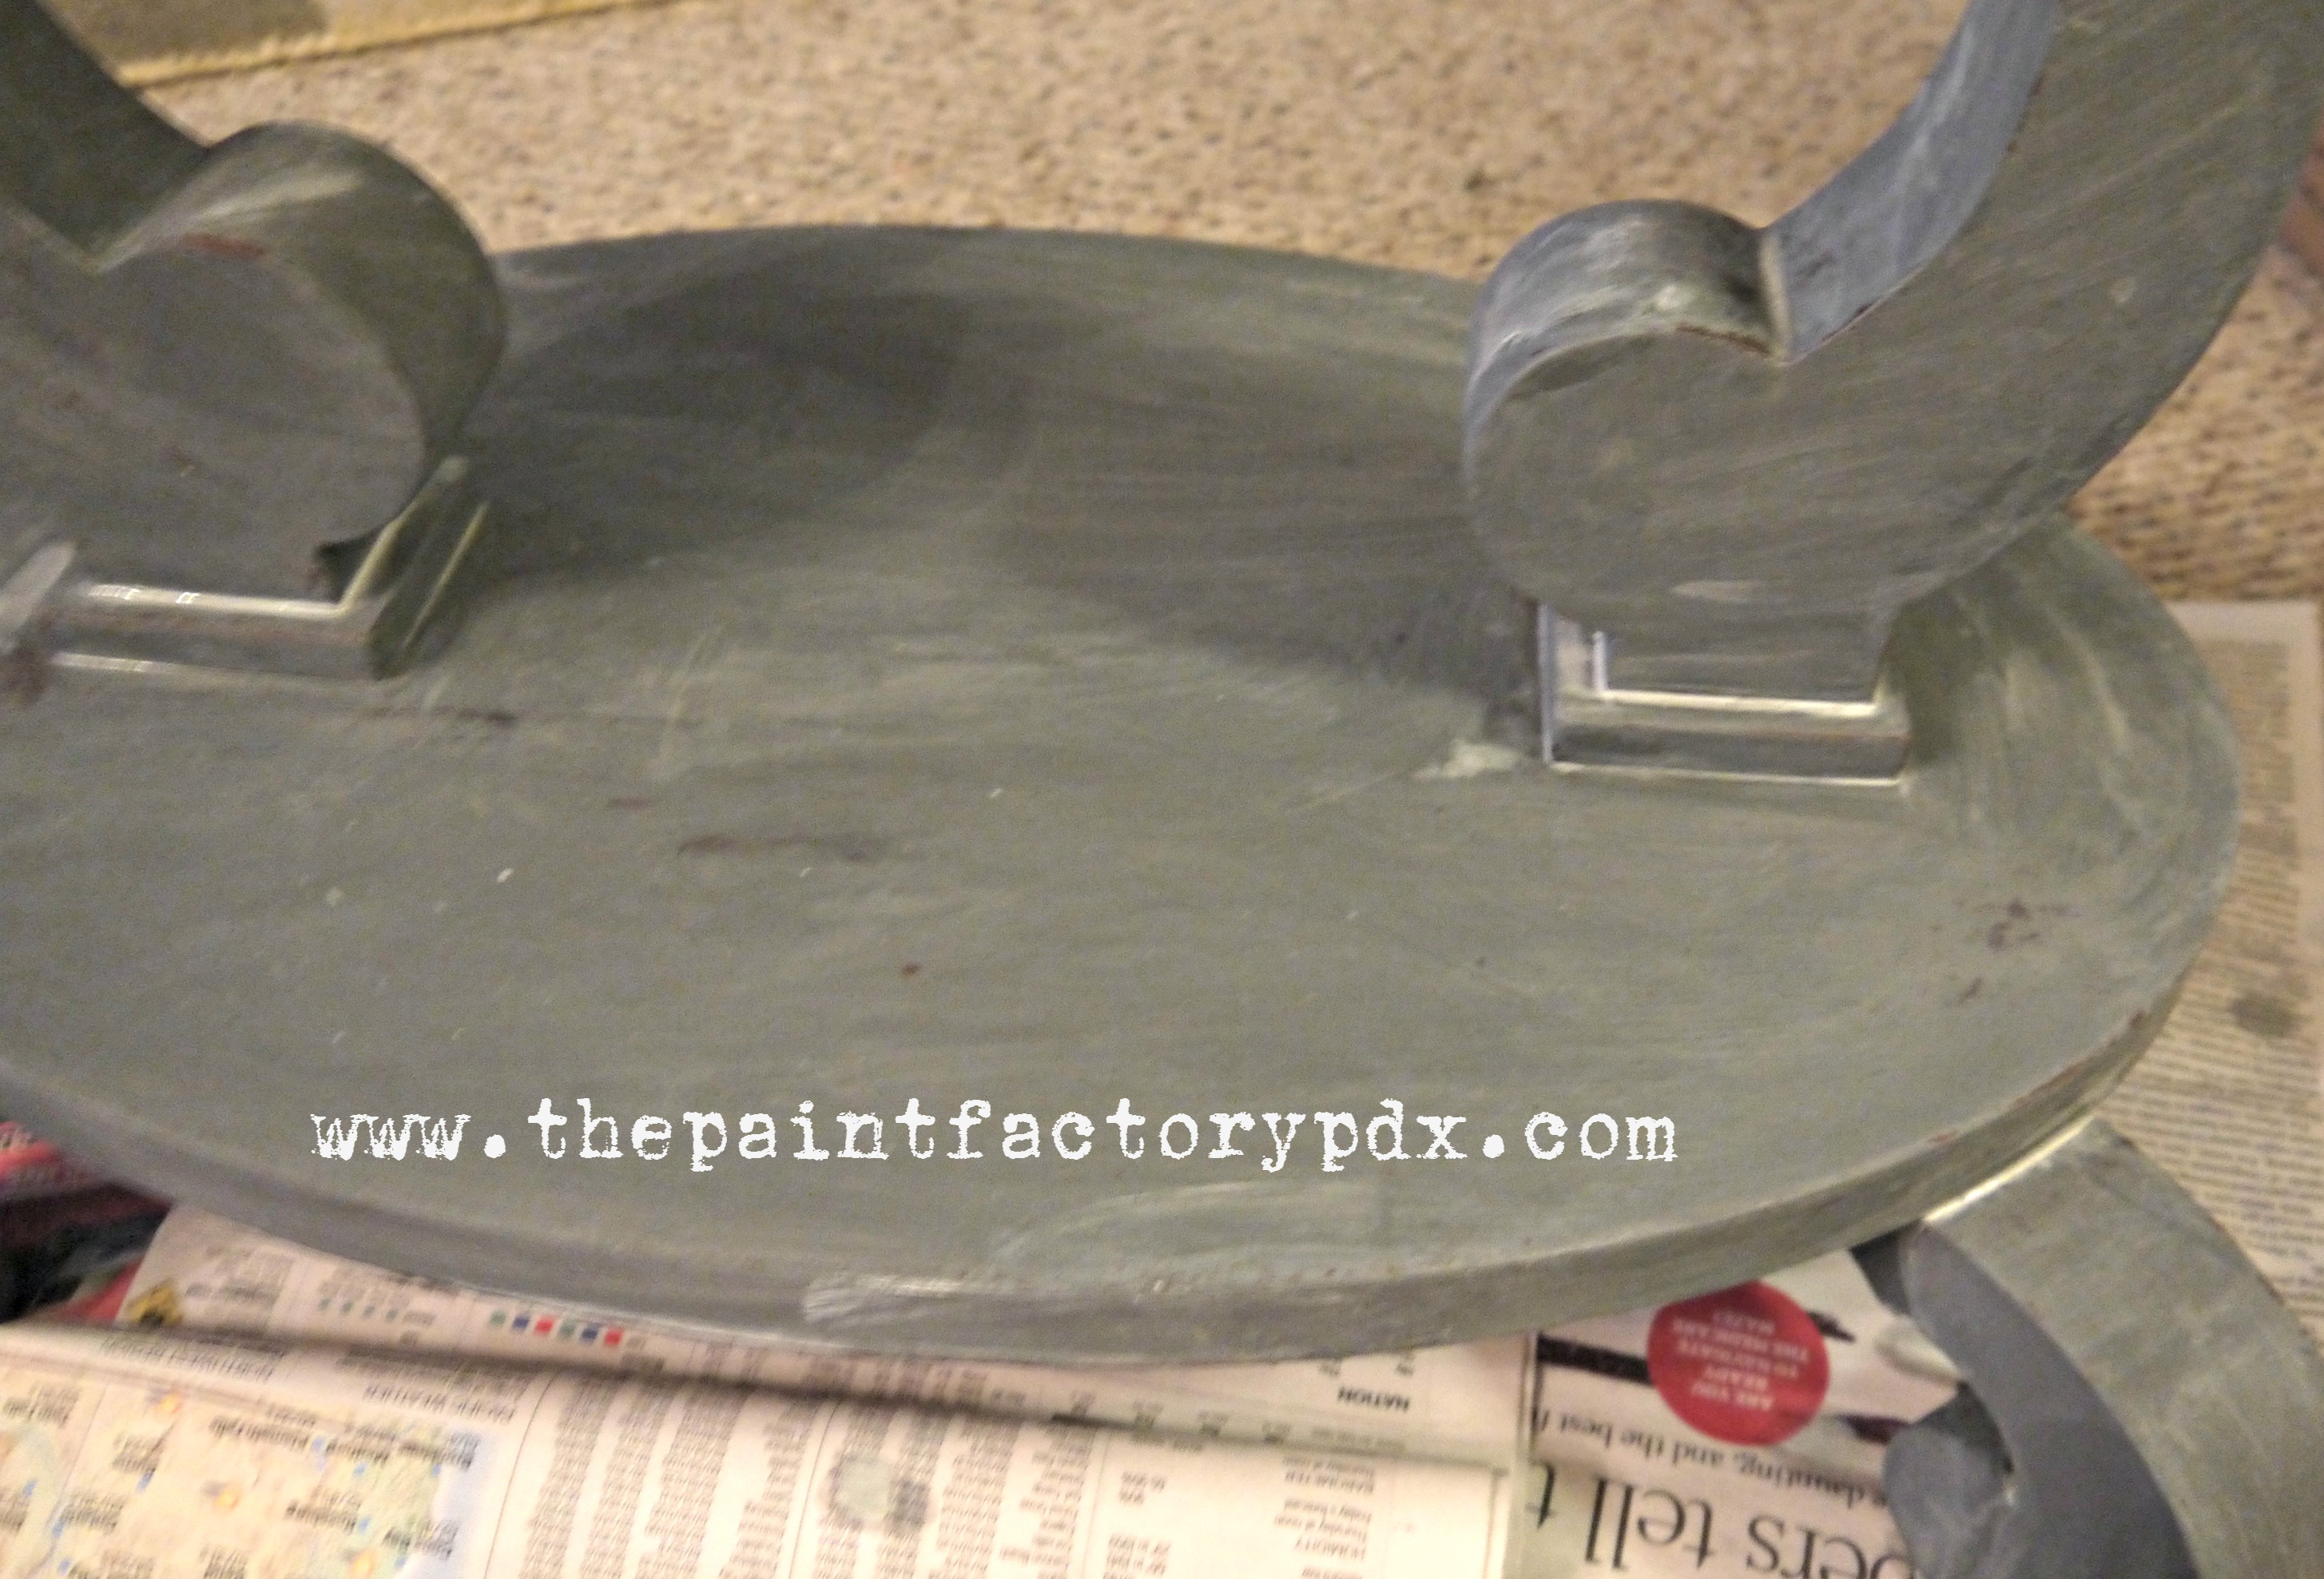
 Already, because of the deep contrast of the colors it’s already starting to look like zinc. Well, it’s actually starting to look like slate, but wait….there’s more.
Step 4. Let the color wash dry. This sometimes takes longer than regular chalk paint, because it’s mainly just water. But it does have to be completely dry. Now it’s time to put a clear coat of wax over it. I have both Annie Sloan wax and Maison Blanche wax. For this I used the AS wax, because it’s a far superior wax (no – truth be told it was the first one that I picked up off the shelf). I can not lie to you guys. 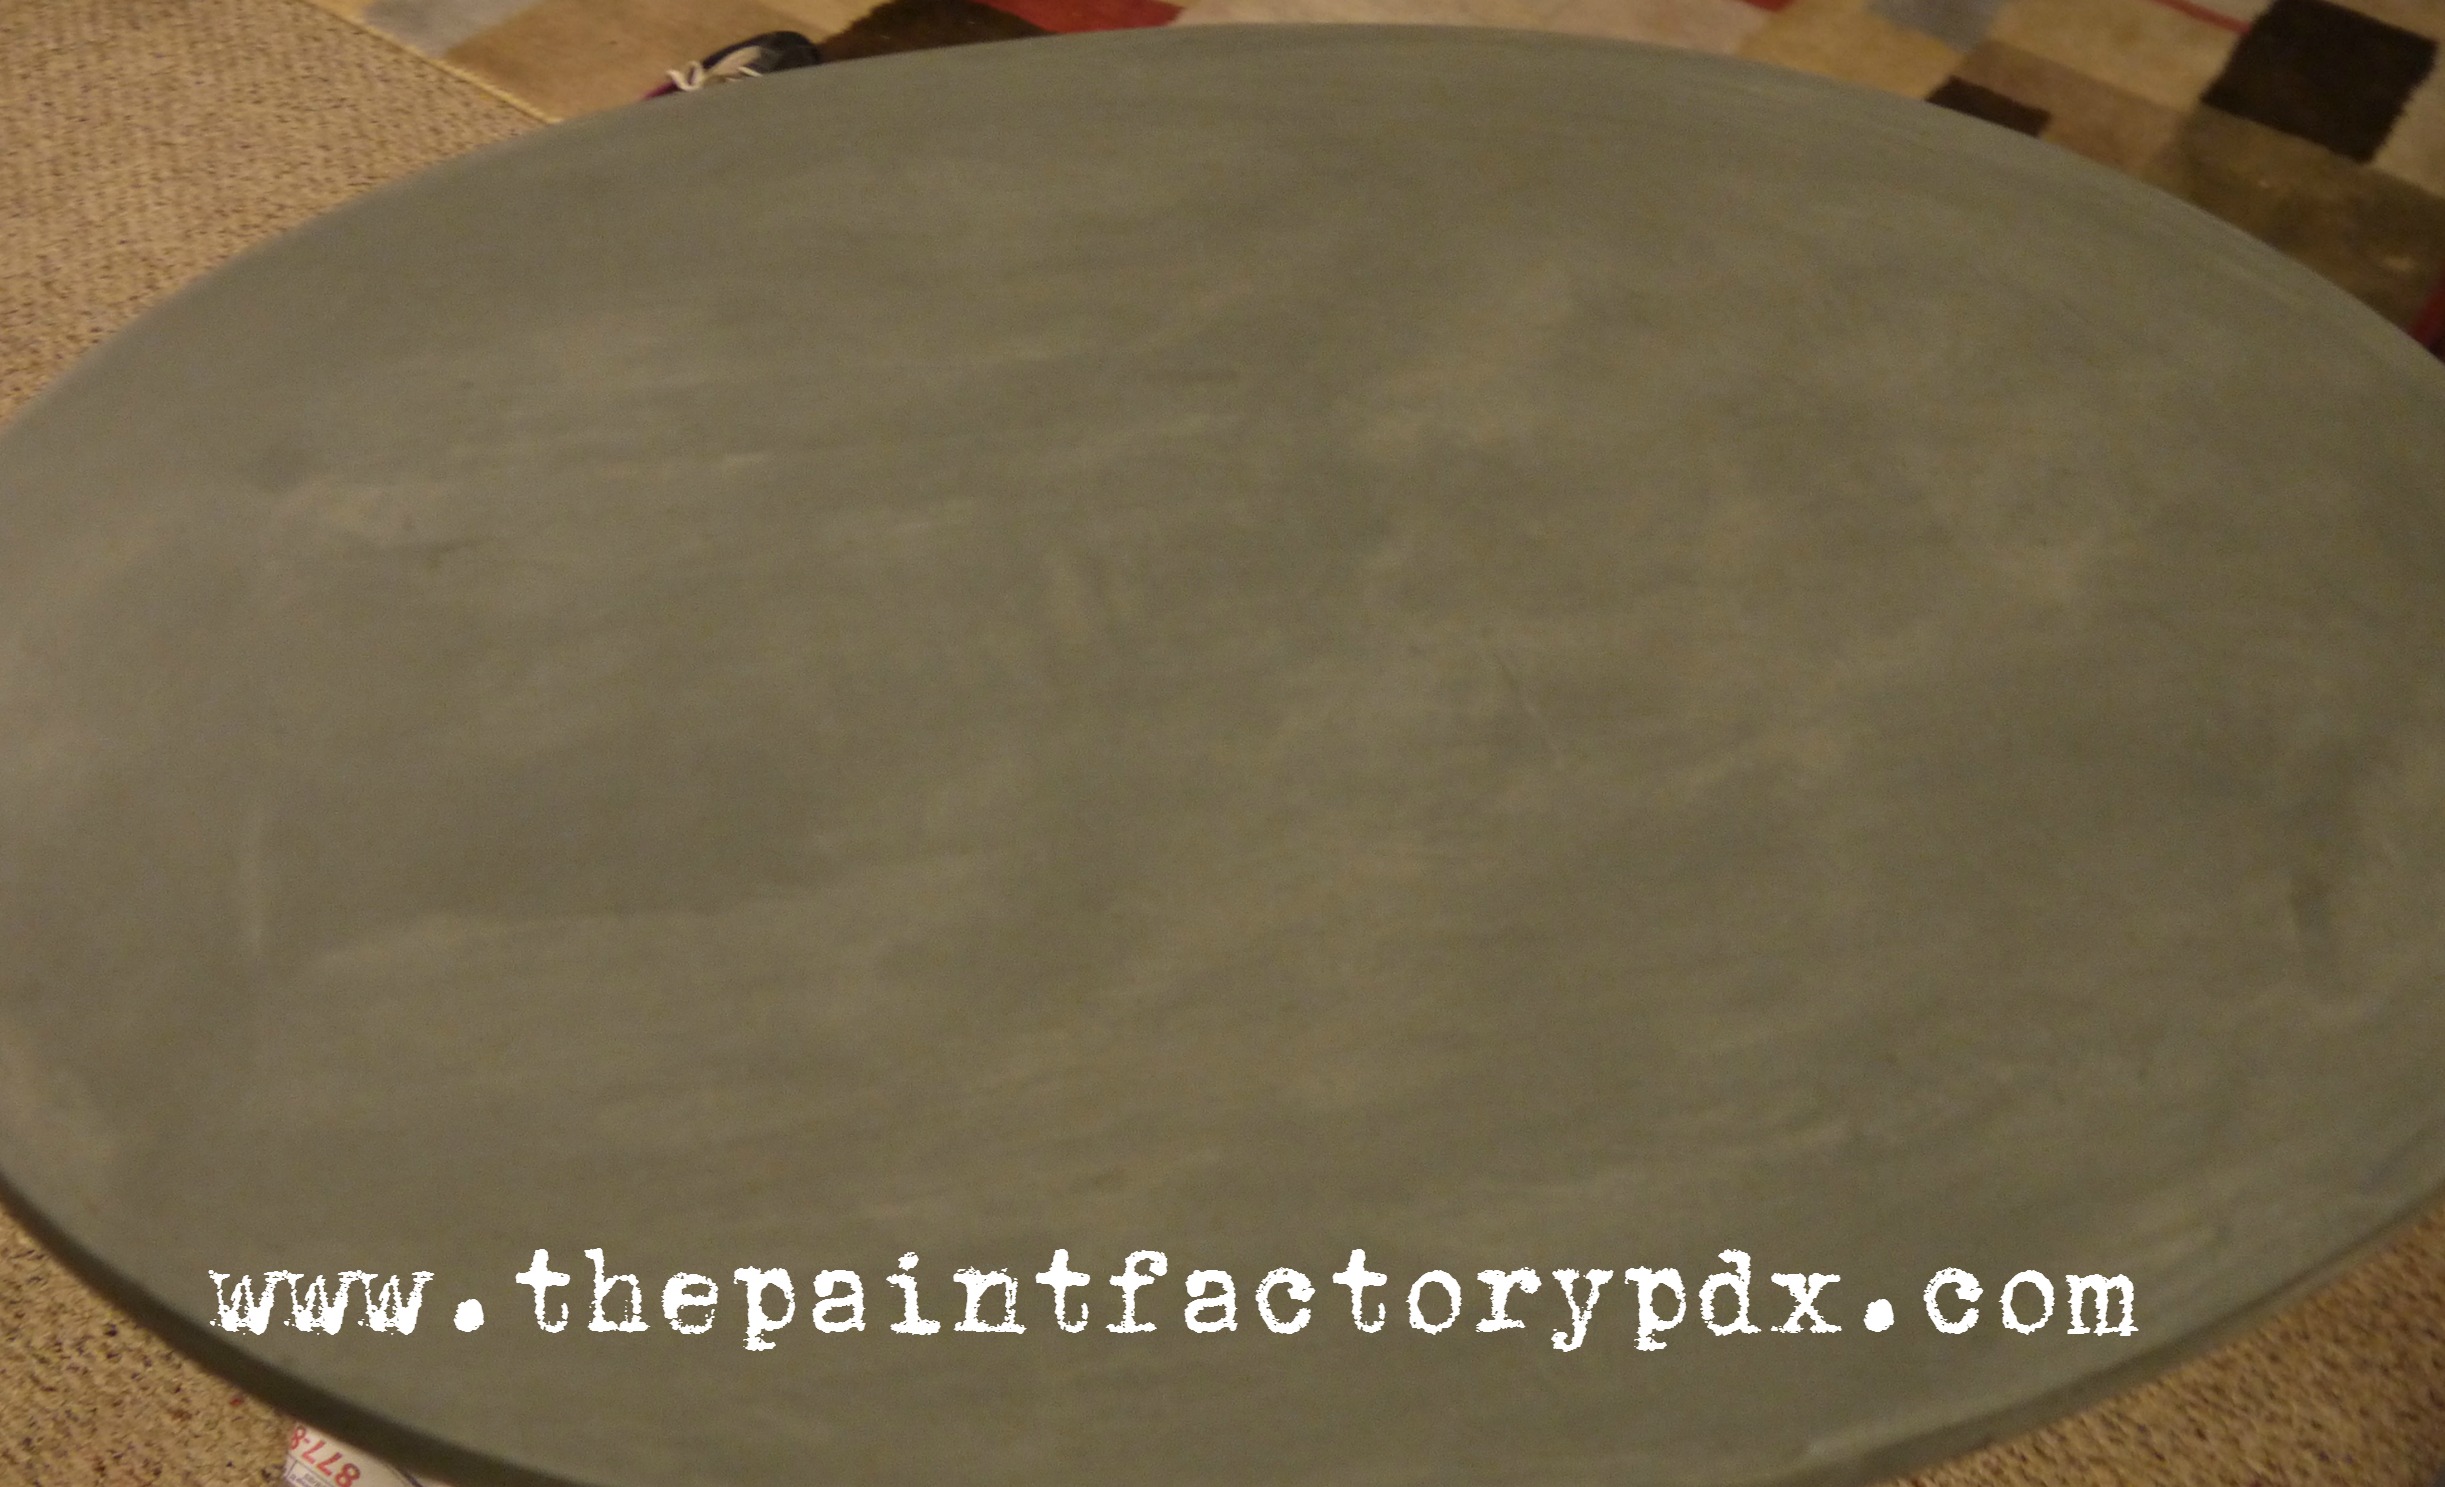
Step 5. Time for another wash! This time you need a small amount of mineral spirits (not much, a tablespoon or so, water, and a small scope of gilders wax in silver. I bought mine from Michaels. I think as long as it contains wax, any brand will work. Mix them all together, and brush the mixture over your painted surface. The mineral spirits will help break down the gilders wax.
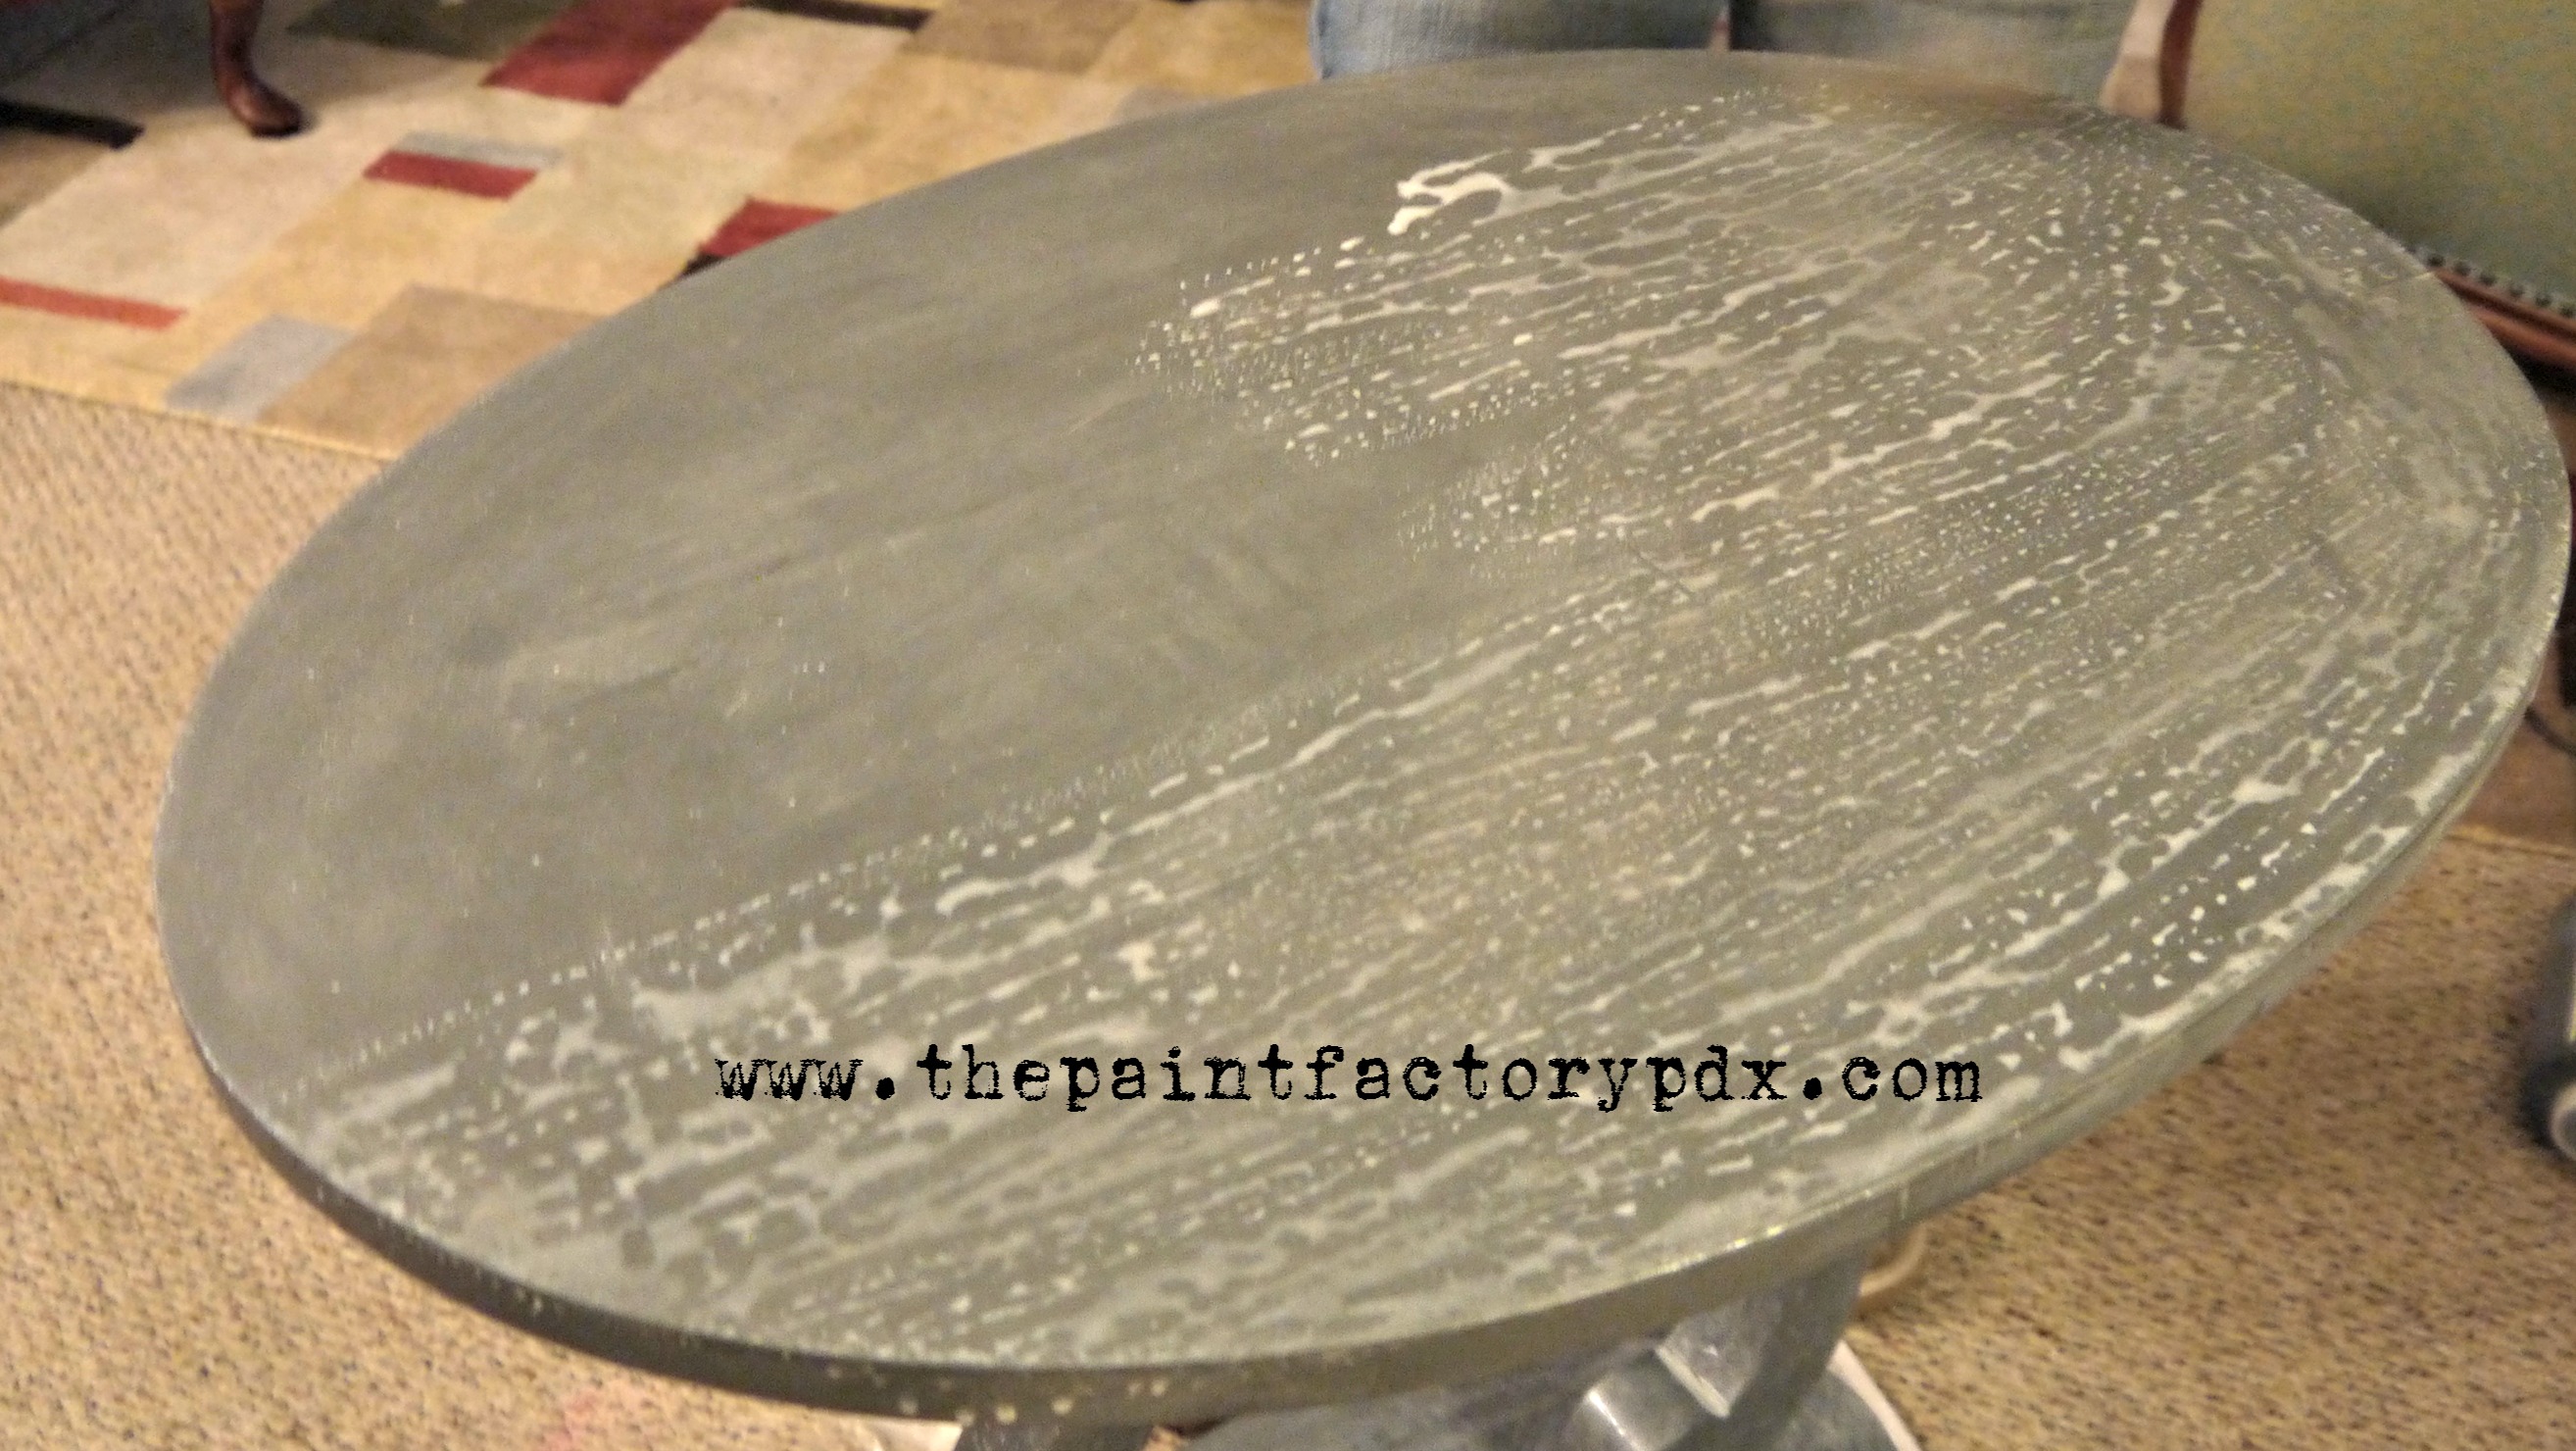
It’s going to look like this. The gilders wax is going to separate from the water. If you notice on my photo, there’s some bleed through from original stain. I was OK with this, because (well, I’ll tell you when we get to that step). I added a little more water to the table because I didn’t want a lot of spots. You want the mixture from the table to dry, naturally. 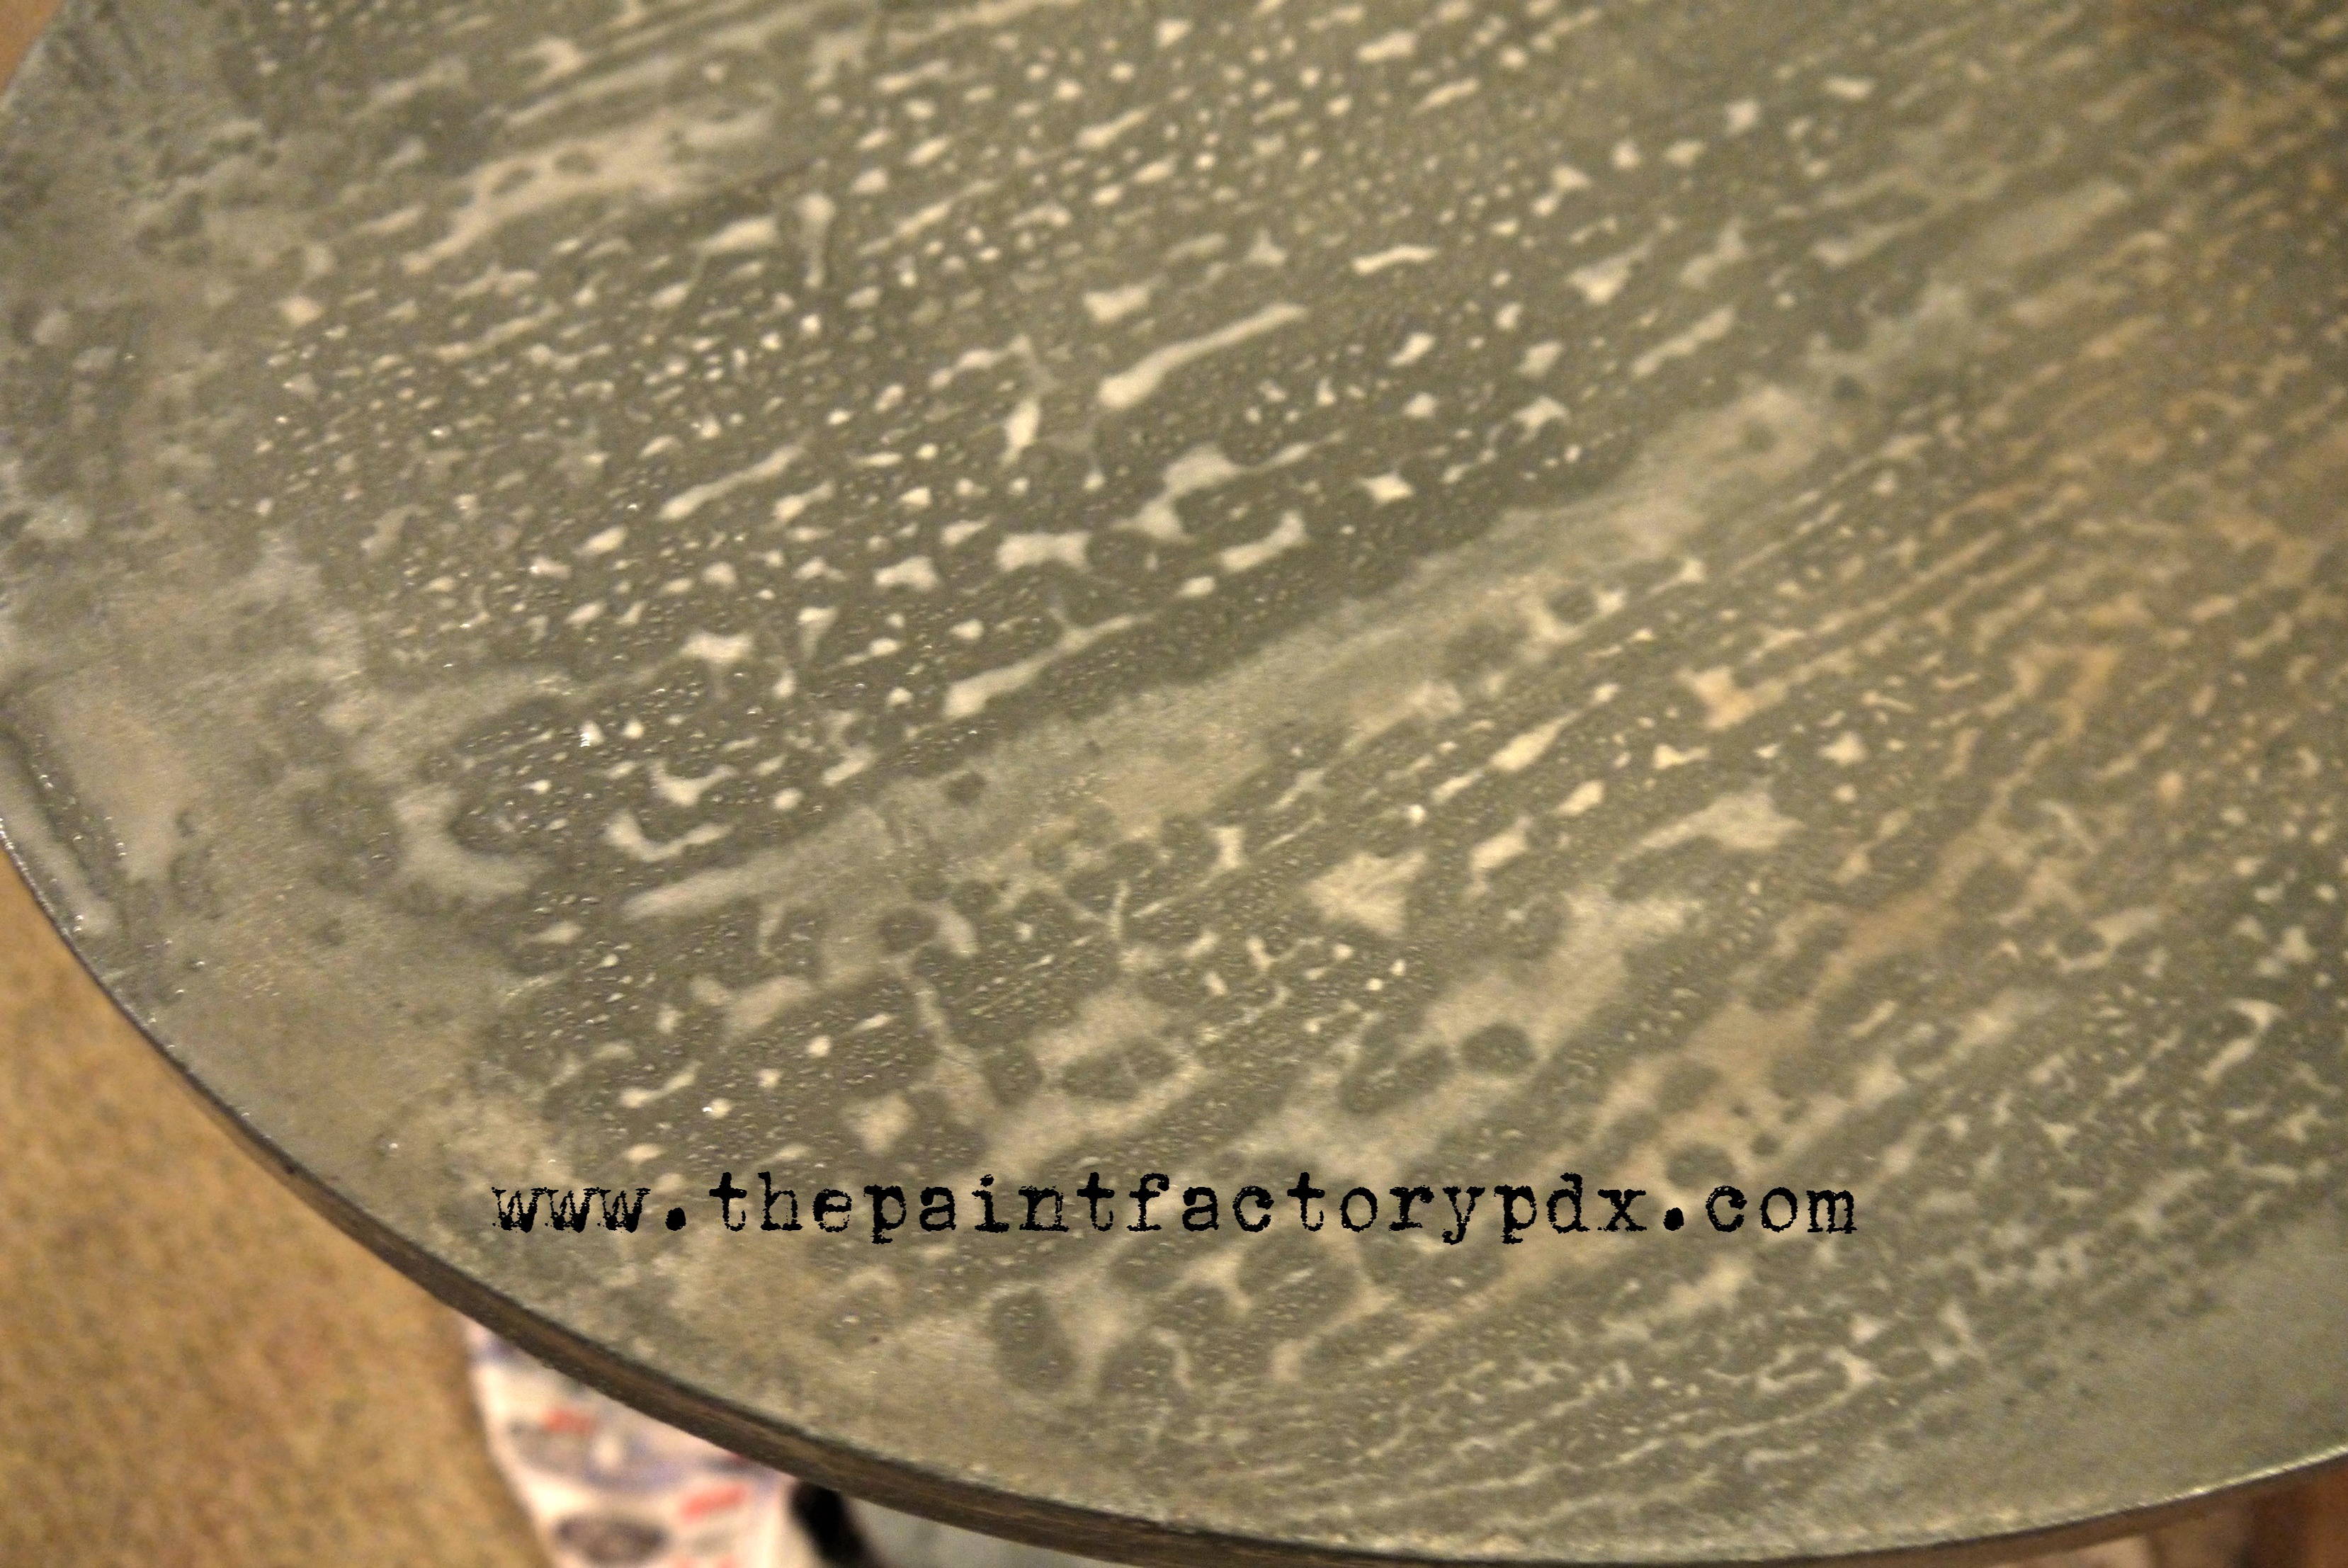 Now, you step away from the project. Chill. Have a glass of wine. Go to bed.
Step 6. I left the table overnight to dry. This is what it looked like. It still had way too many spots on it (which I expected). At this point, I don’t want to talk to the kids, or the husband. I’m not interested in feeding anyone, other than feeding my creativity. I want to get to work on this.
 Now, clearly it would look ridiculous if I left it like this. Look over your piece and see which marks (spots) you like and the ones you want to get rid of. At this point, the marks are just dried paint. Easily removed.
Step 7. Another wash! Same procedure. If you have a grey you can use that, if you want to add a little blue, that would work also. This is where you need to tread carefully. Brush some of the wash over the spots you want to remove, and wipe gently away. I used a soft t-shirt. I wanted a smooth, oxidized look to the surface of the table.
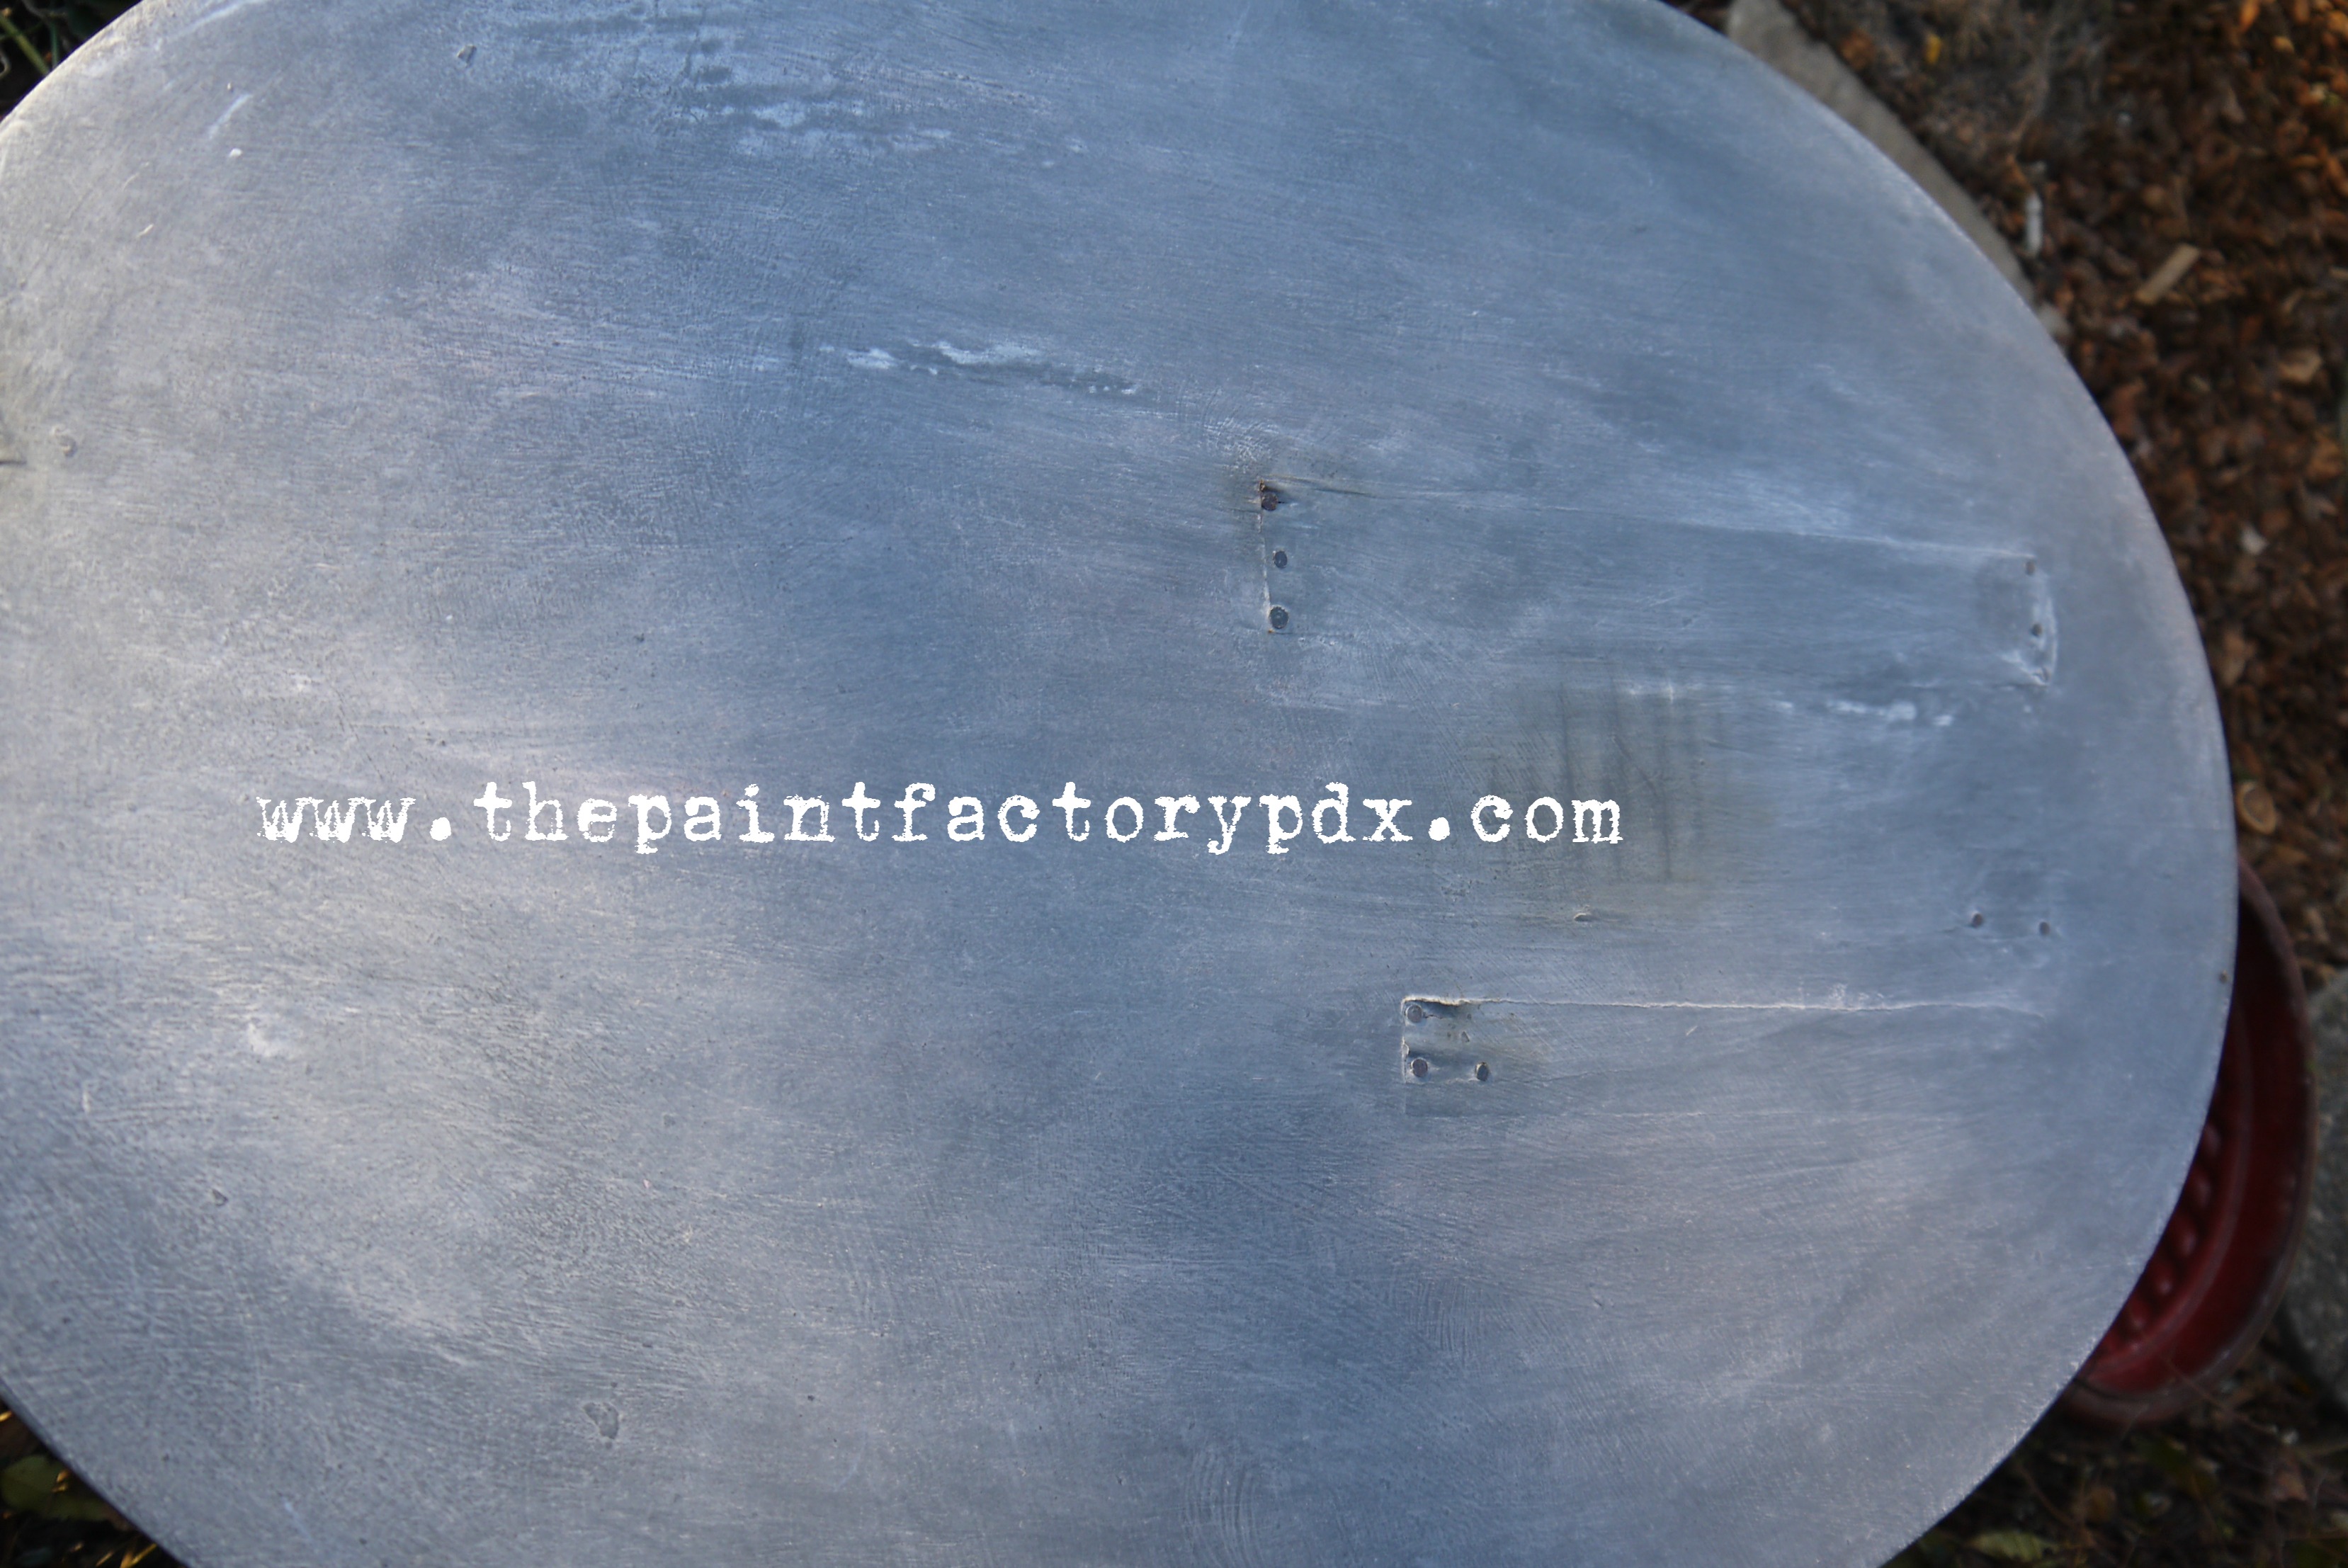
Step 8. This what happened to my piece. Basically, the Universe hates me sometimes.  Because the finish had required so many ‘washes’, the water had seeped into my utterly fantastic repair job, raising the veneer. The close up shows the zinc finish I was looking for. Now, I could have picked up the table and thrown it out of the window. But – no – I showed some restraint, this time. I made it work to my advantage. Given that I wanted to go for an industrial, zinc look anyway – it would be look perfectly acceptable to have iron detailing. So, I ran out to grab some of my upholstery tacks!!
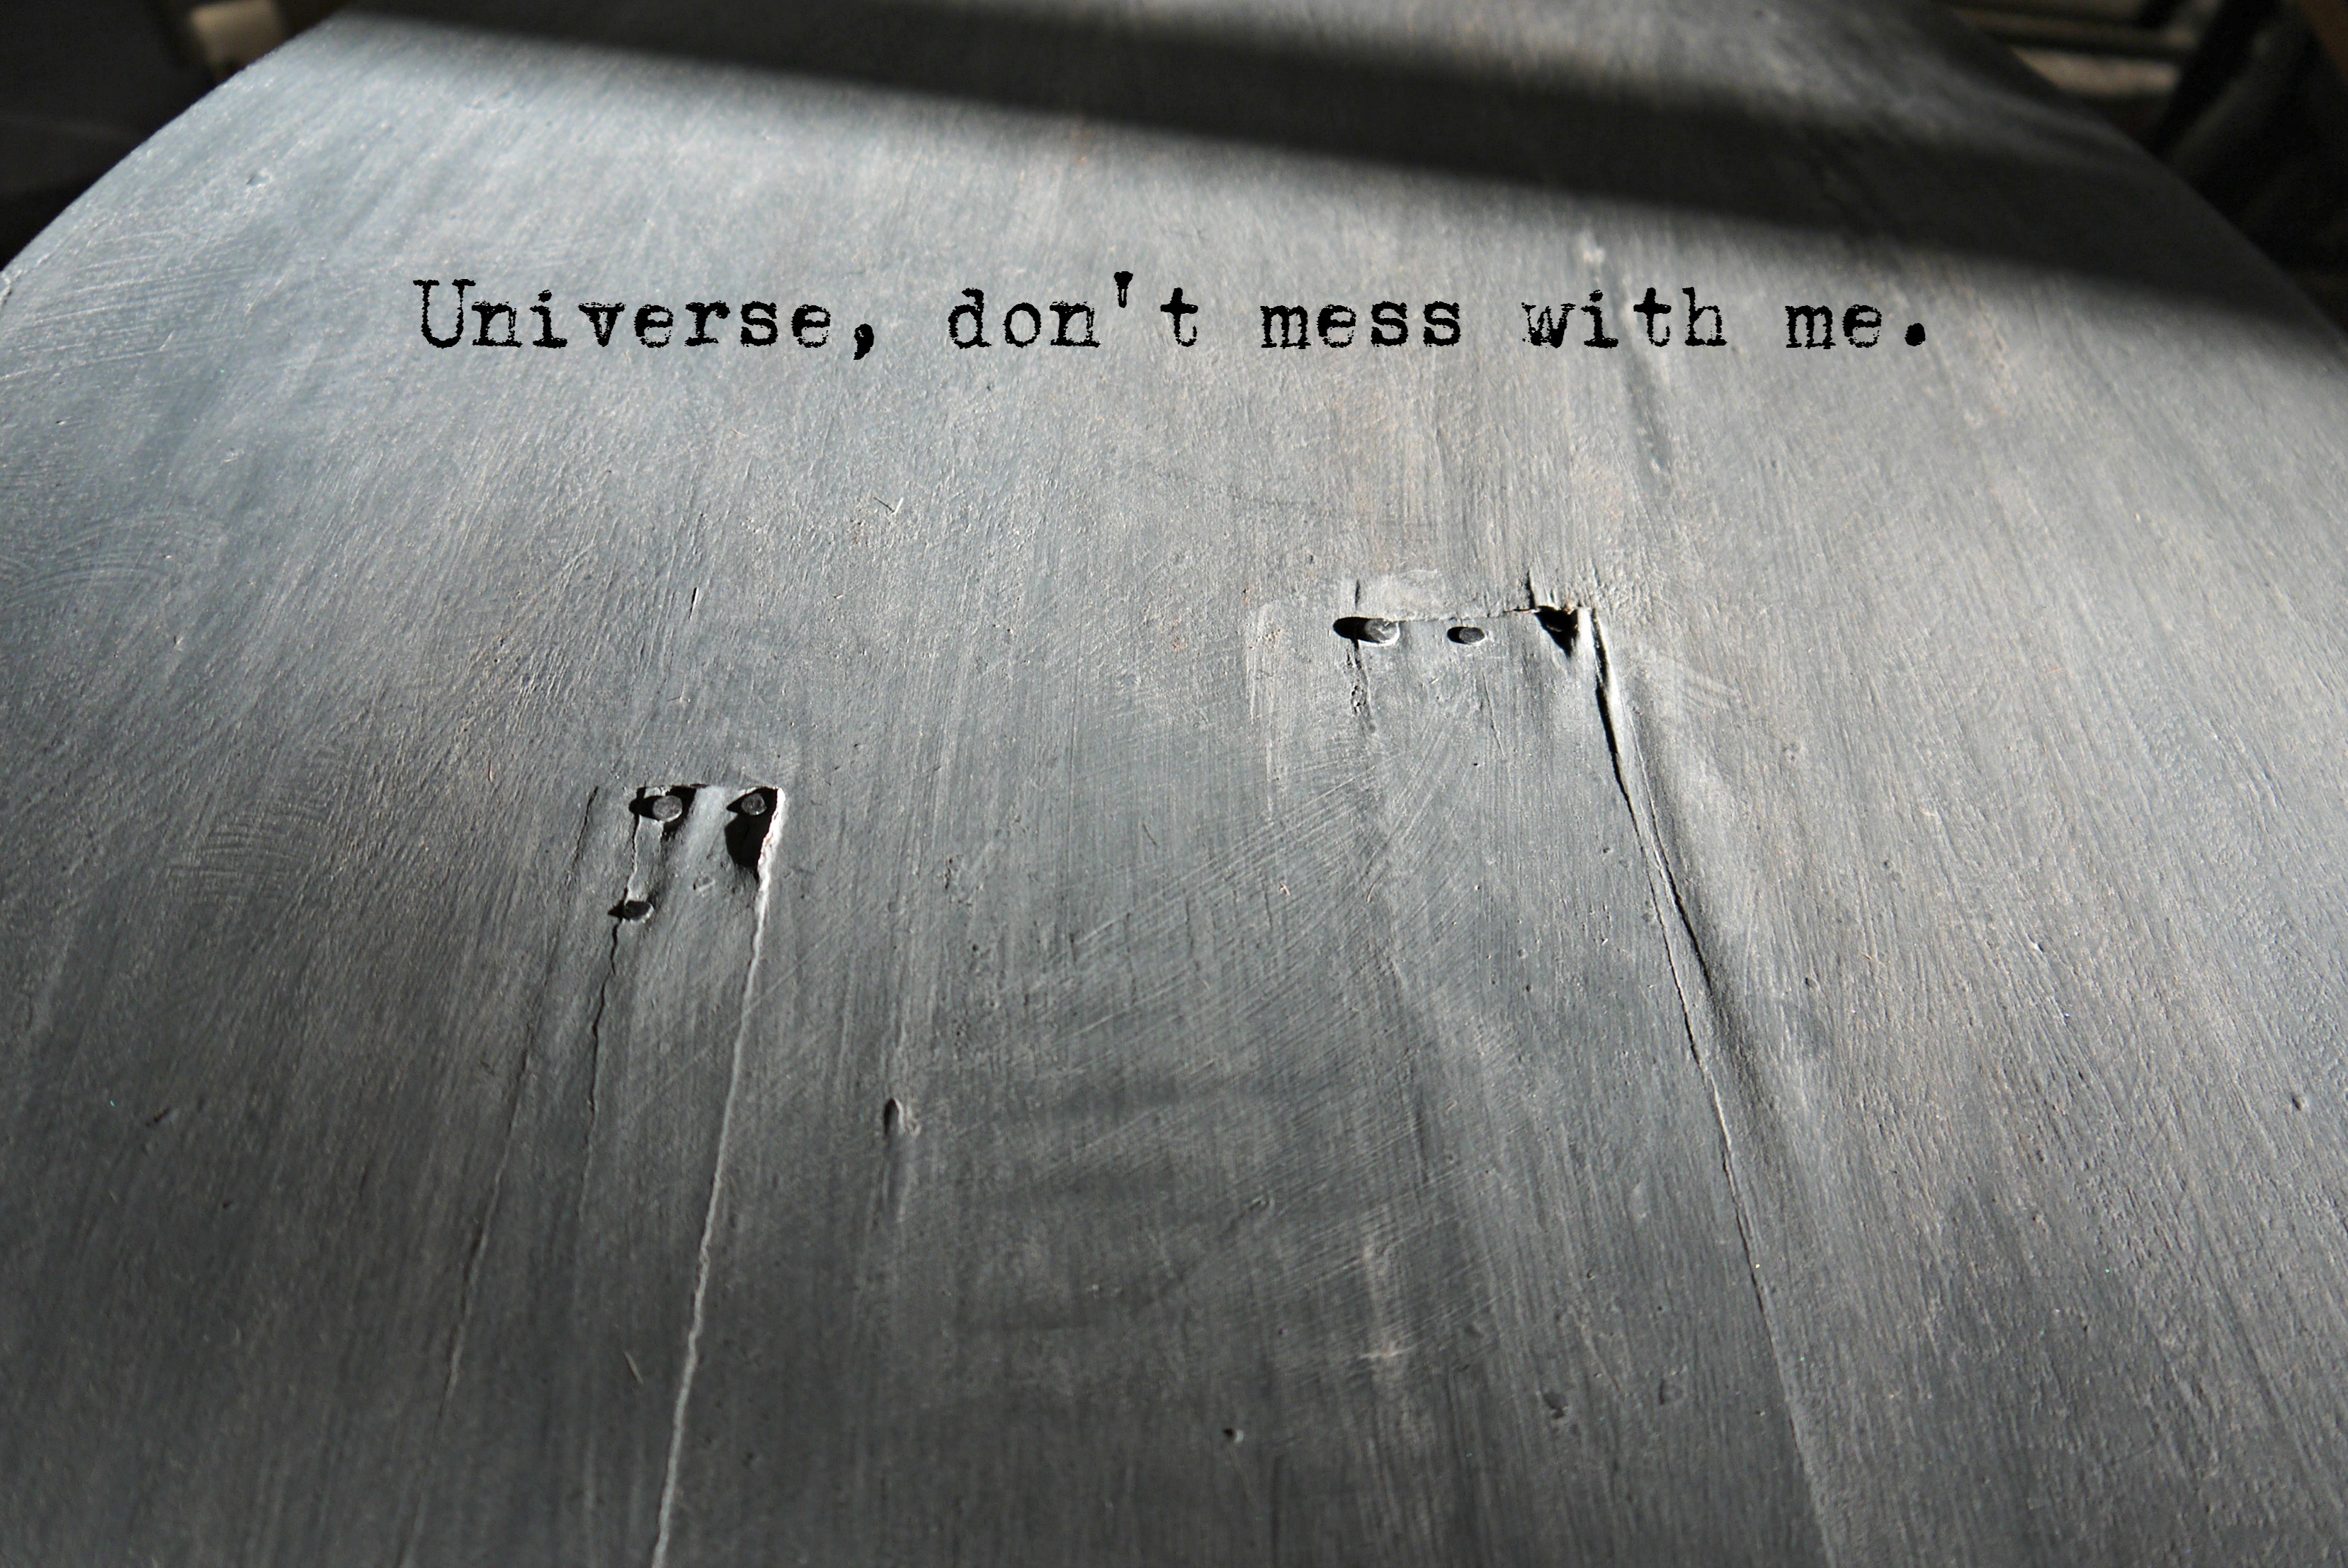
Step 9. Had the veneer ‘issue’ not happened, I probably would have kept more spotting on the top. But, sometimes less is more, when it comes to detailing. Time for another waxing. Mix clear wax with a small amount of the silver gilding wax. Work in small areas, because the silver wax will dry quick. Once you have the entire surface waxed, go over any areas that you want to ‘dirty’, with dark wax (this is the reason why I didn’t care too much about the bleed through that I mentioned earlier). You’ll end with something like this.
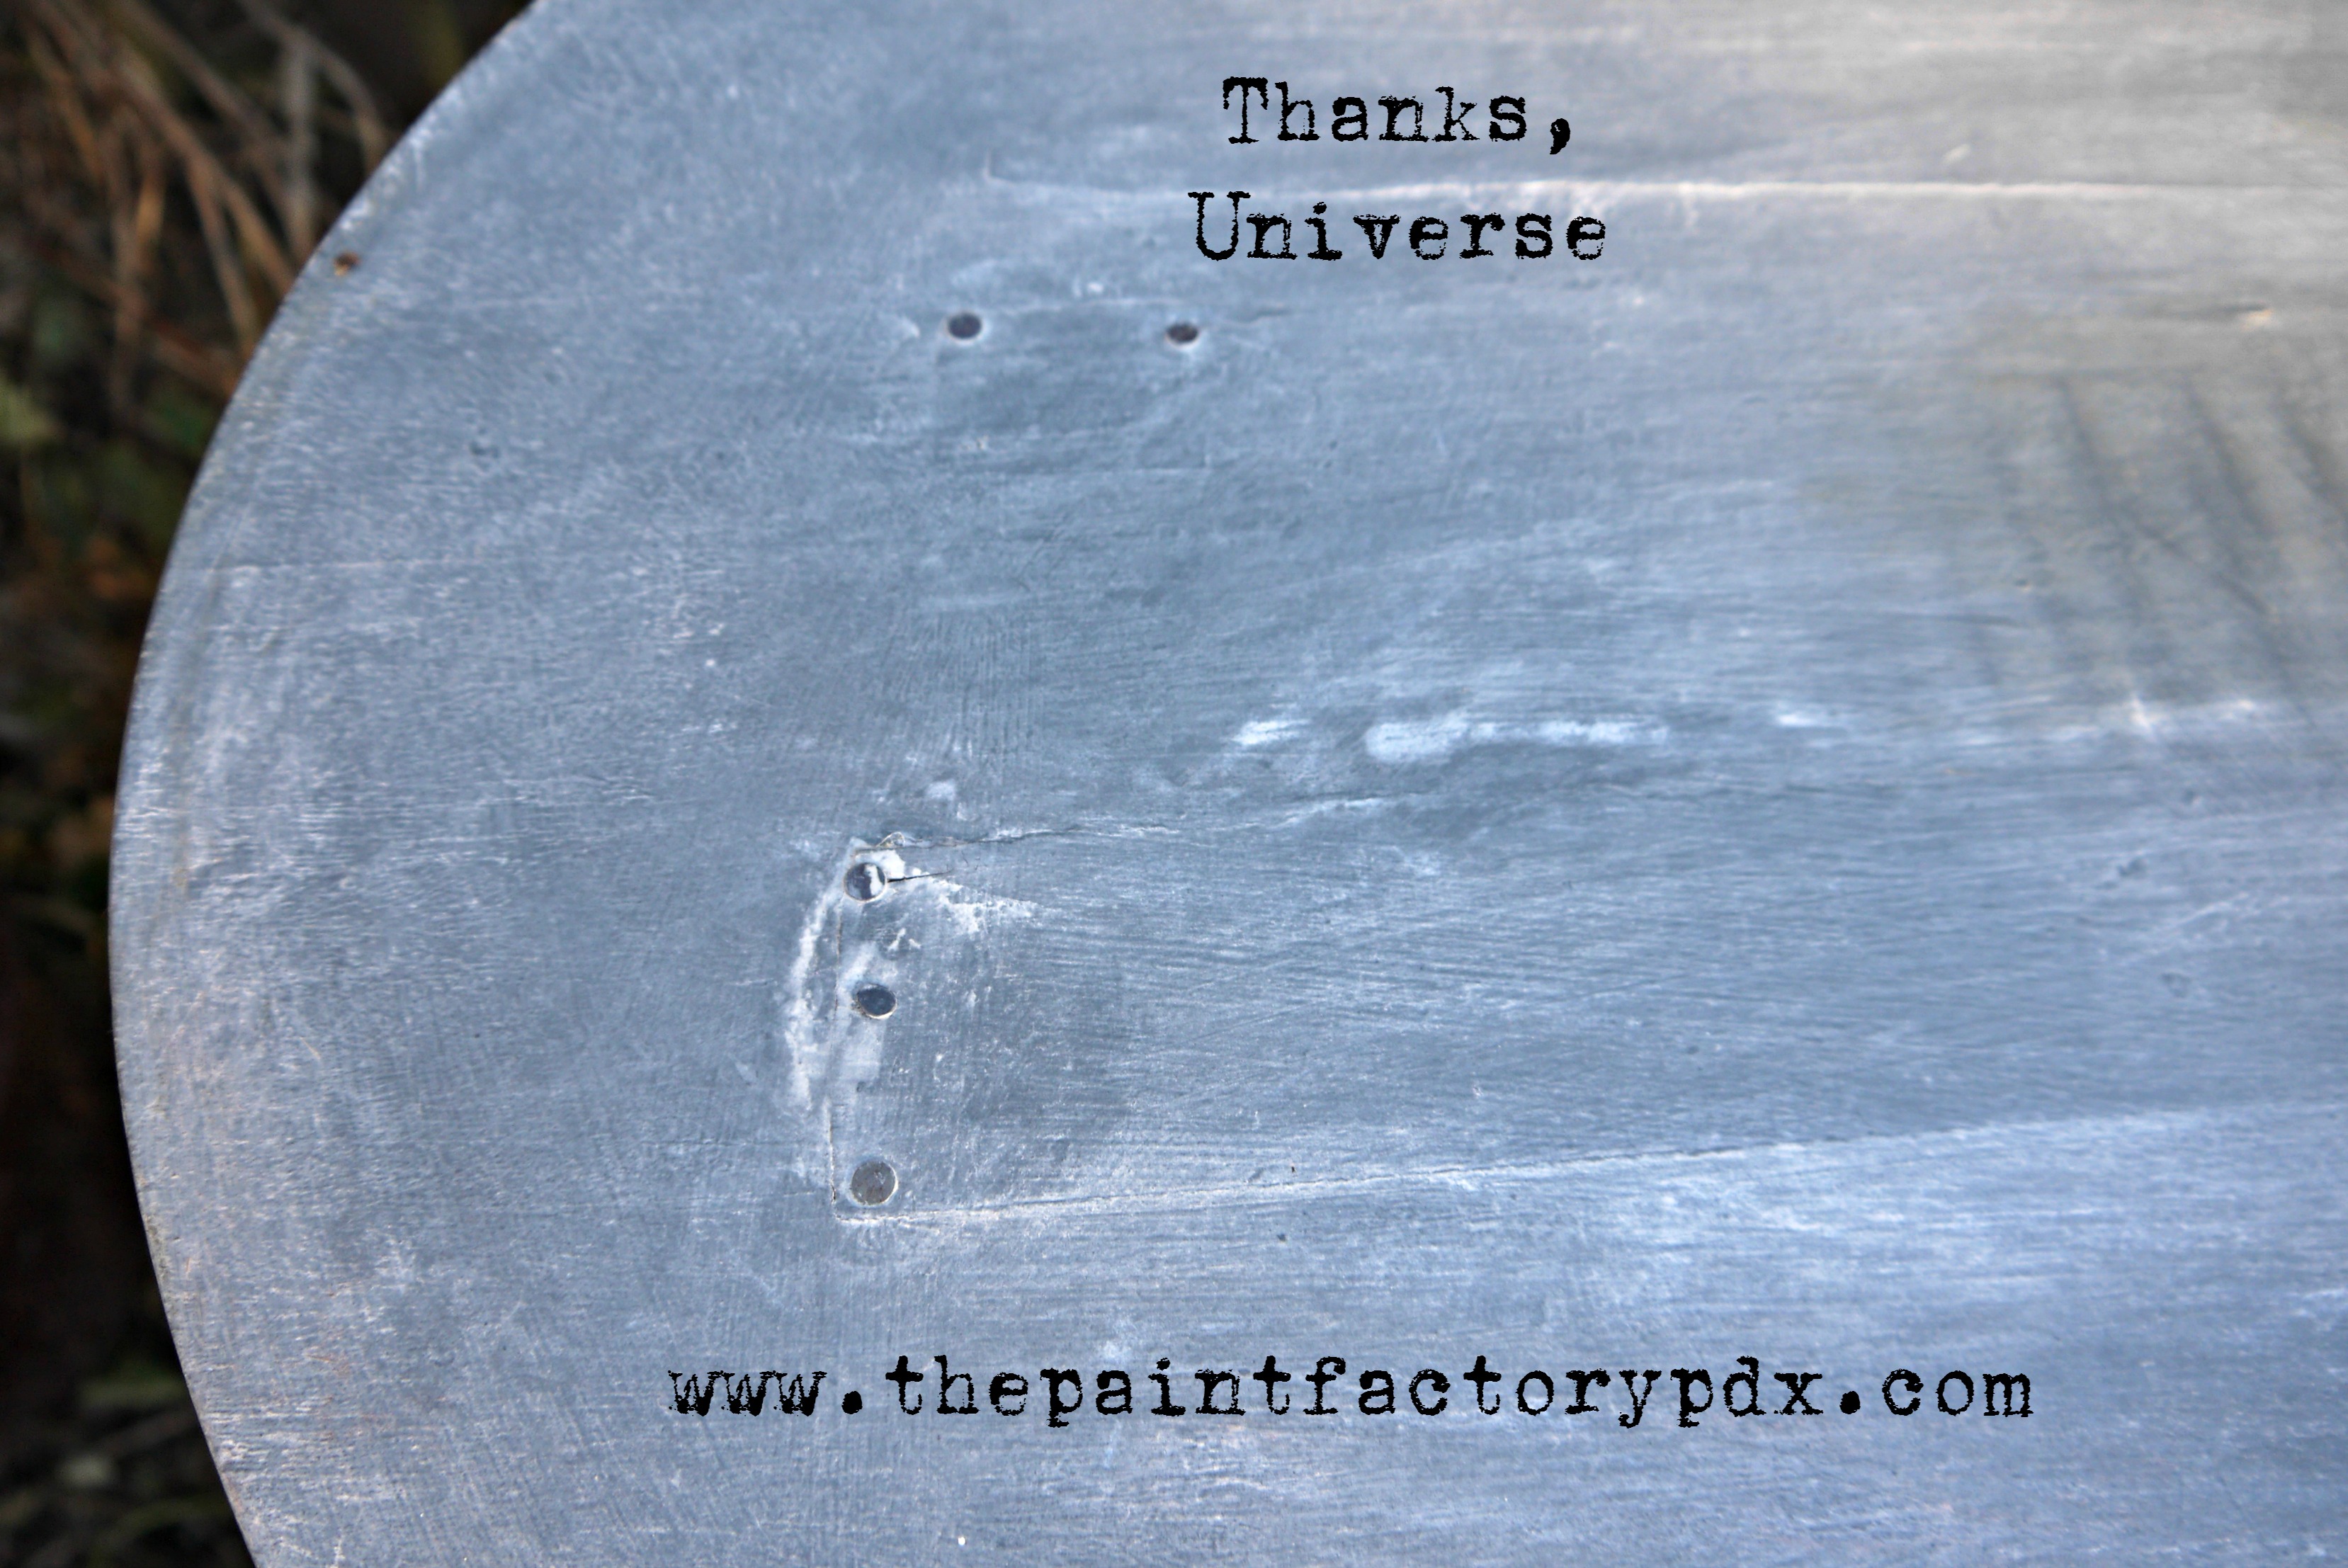
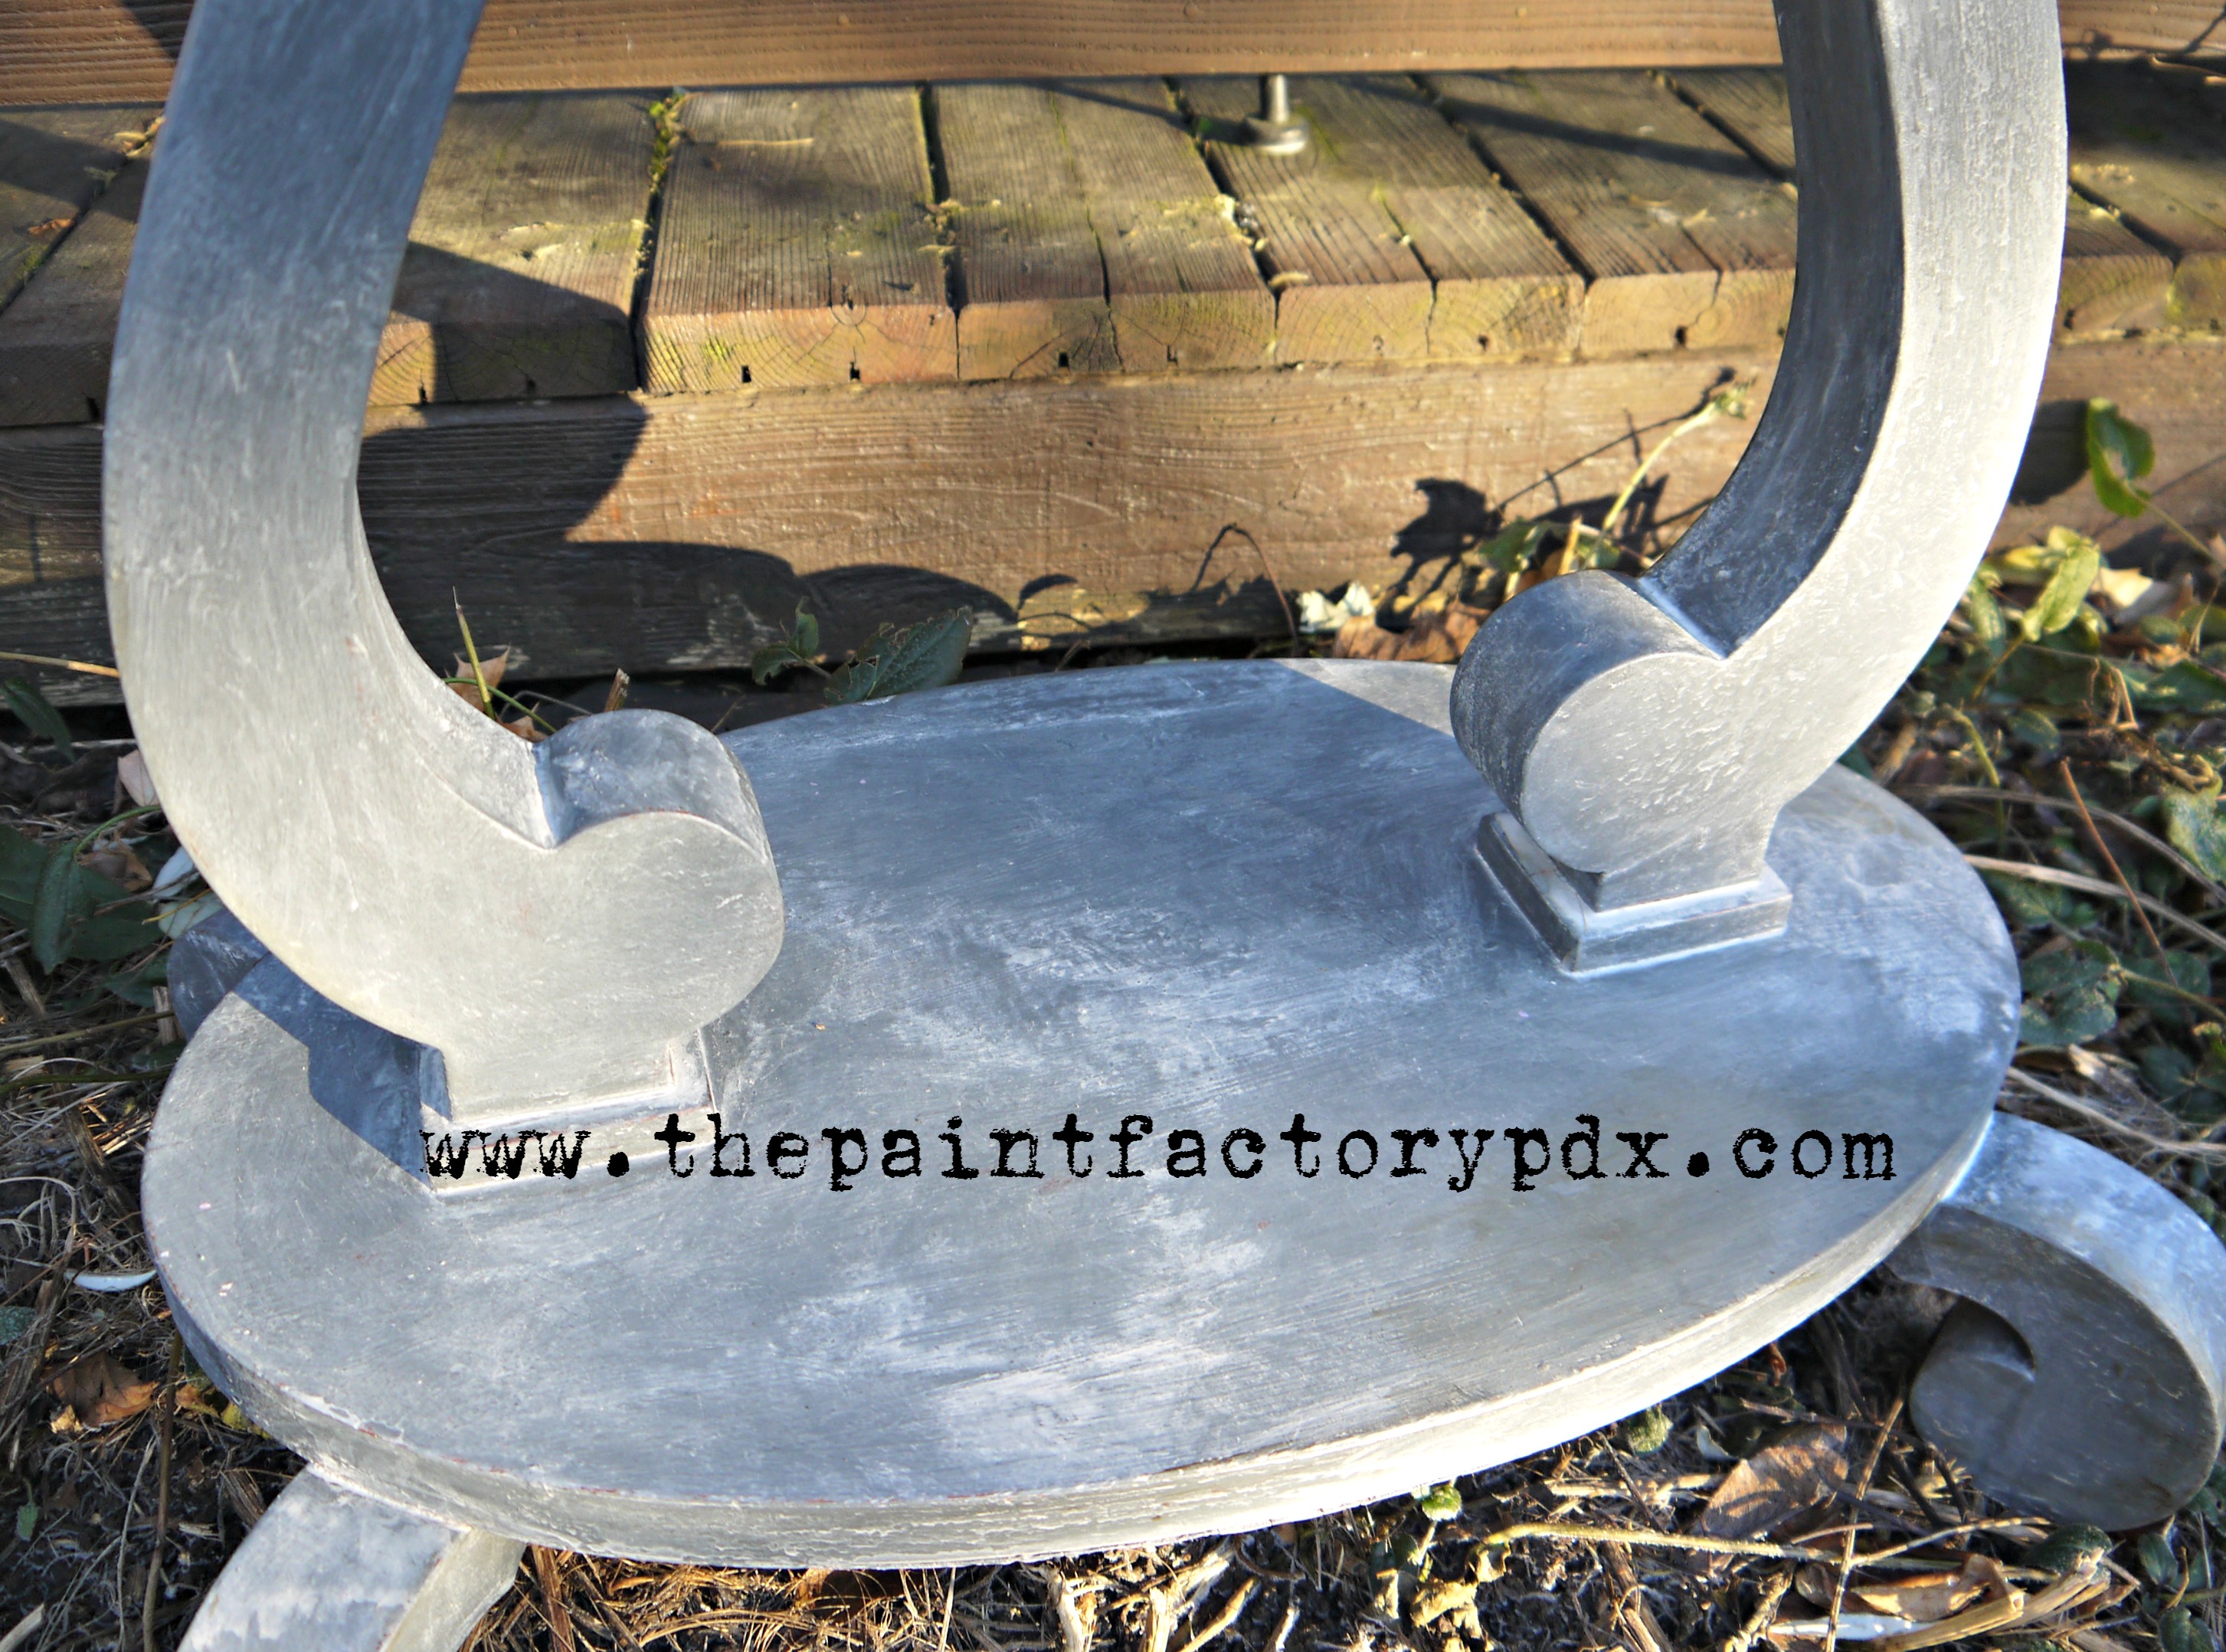
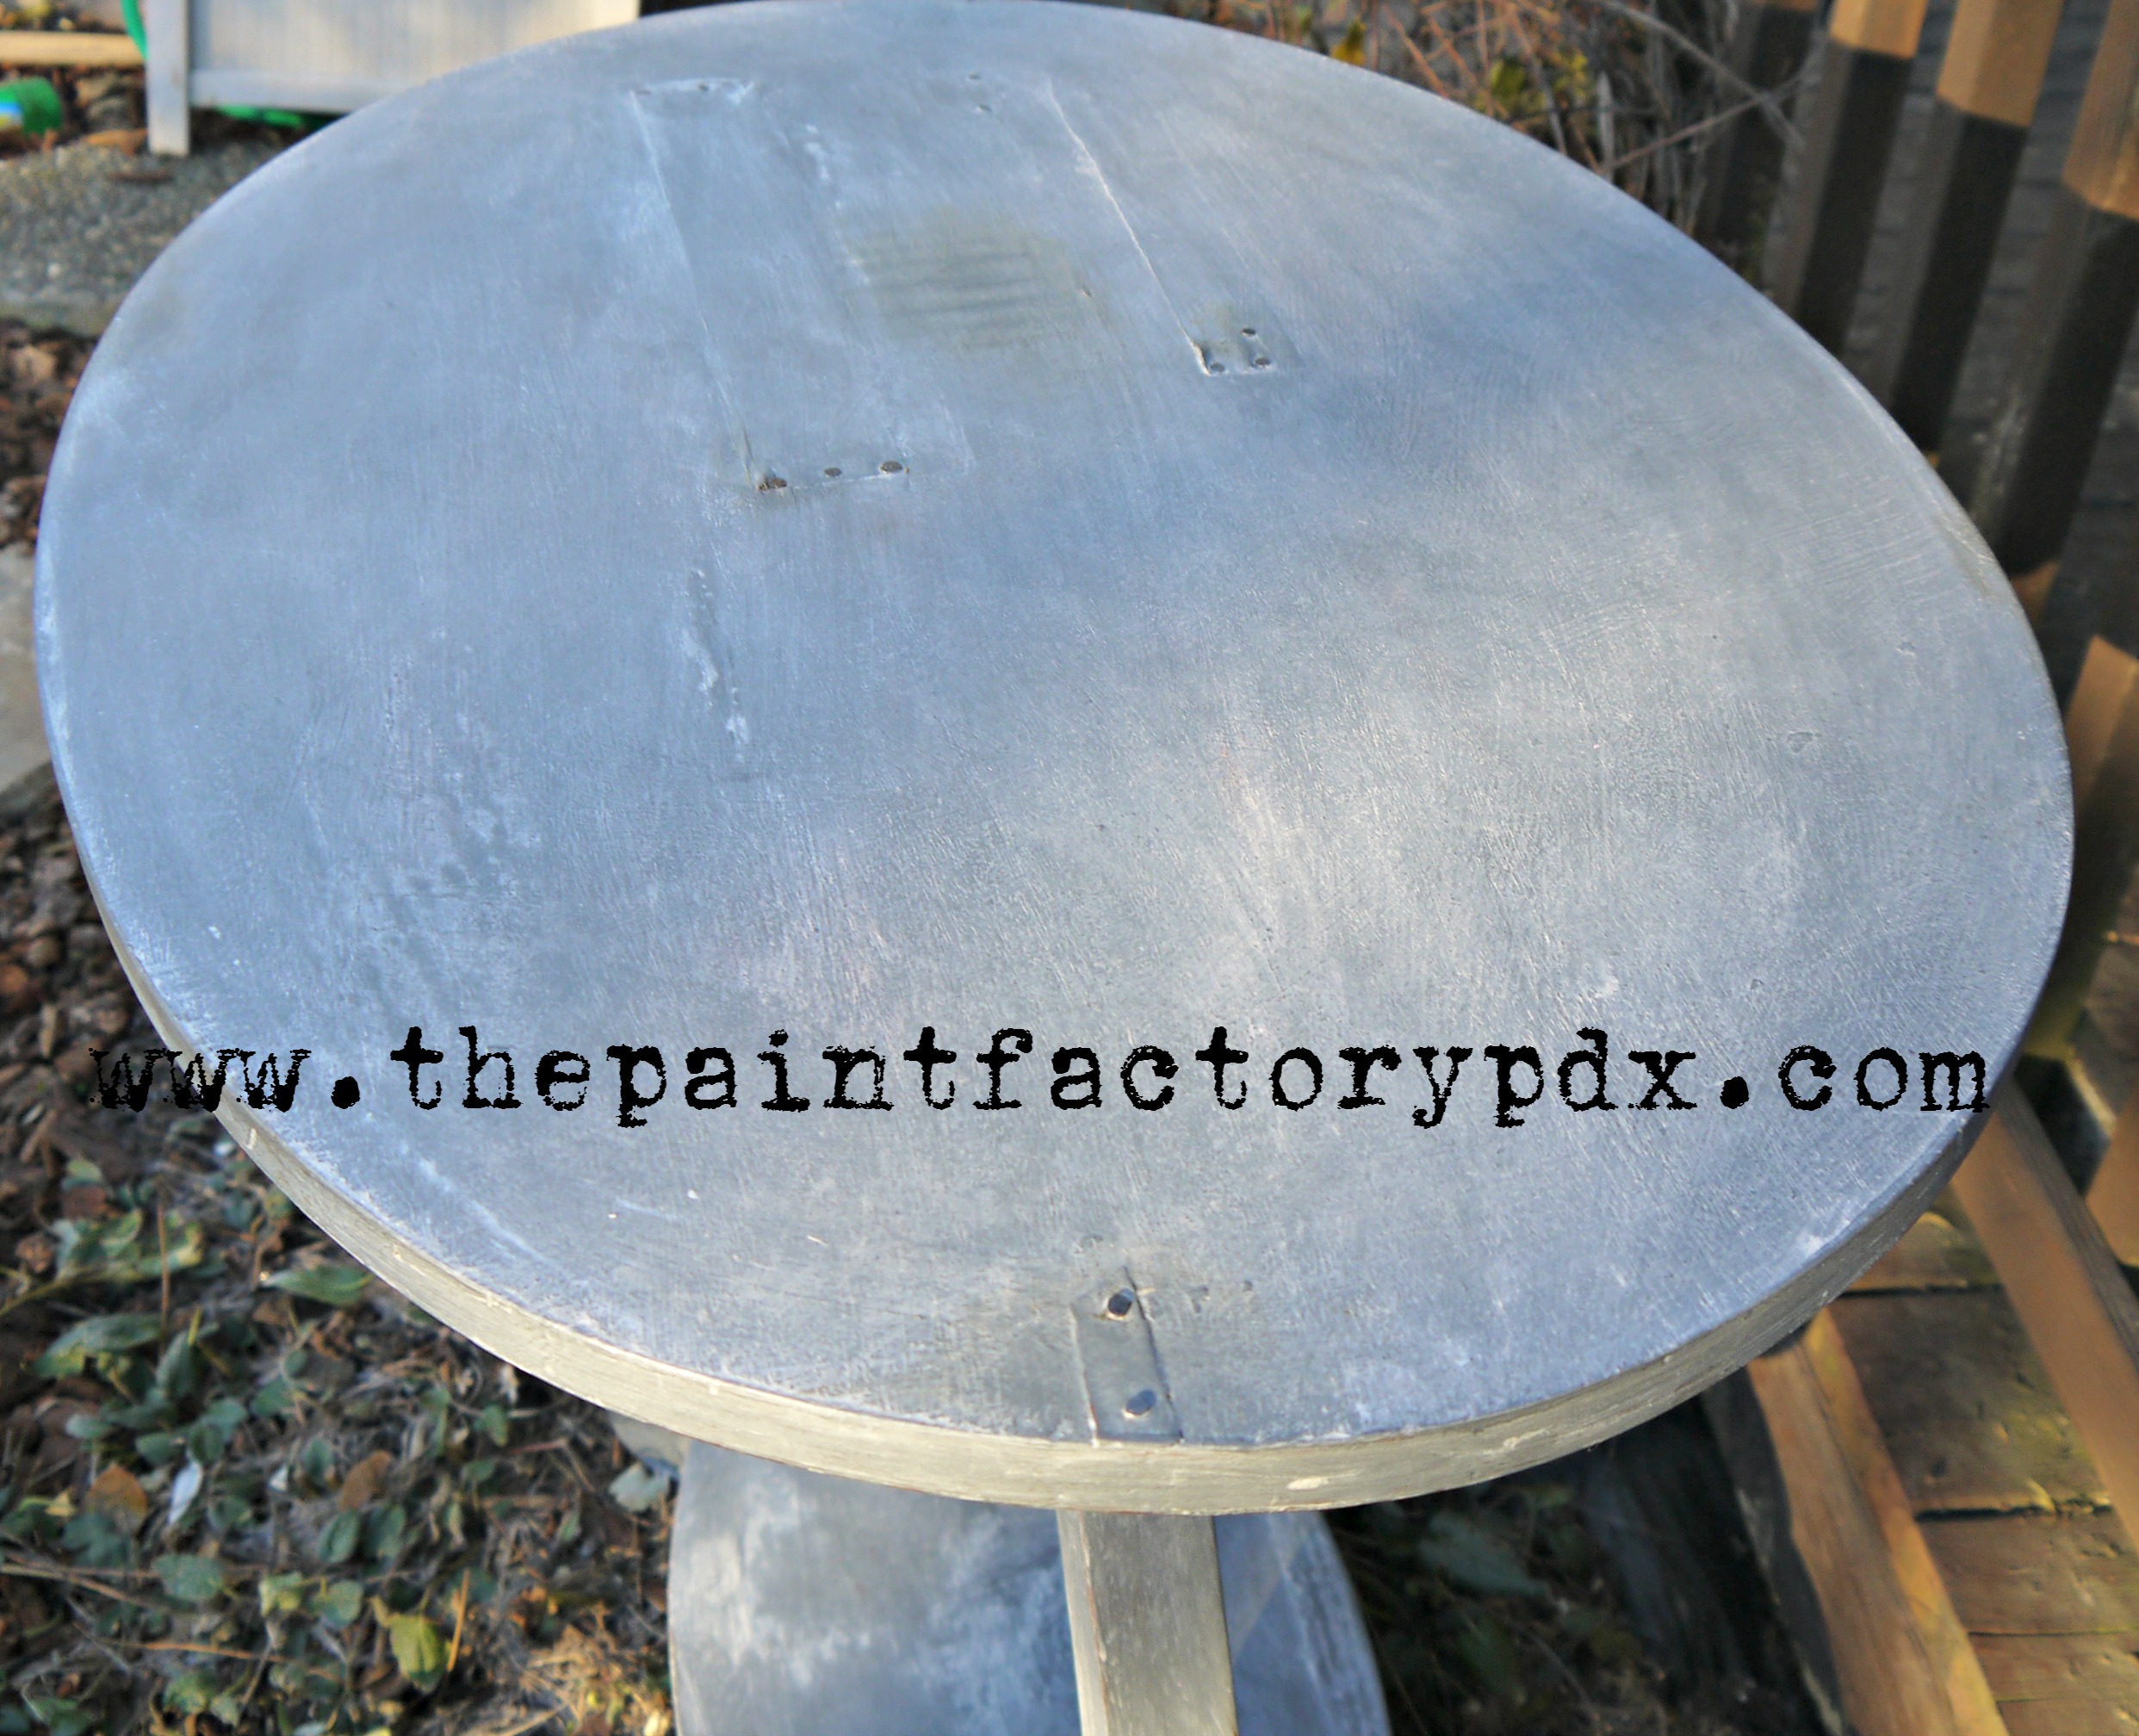
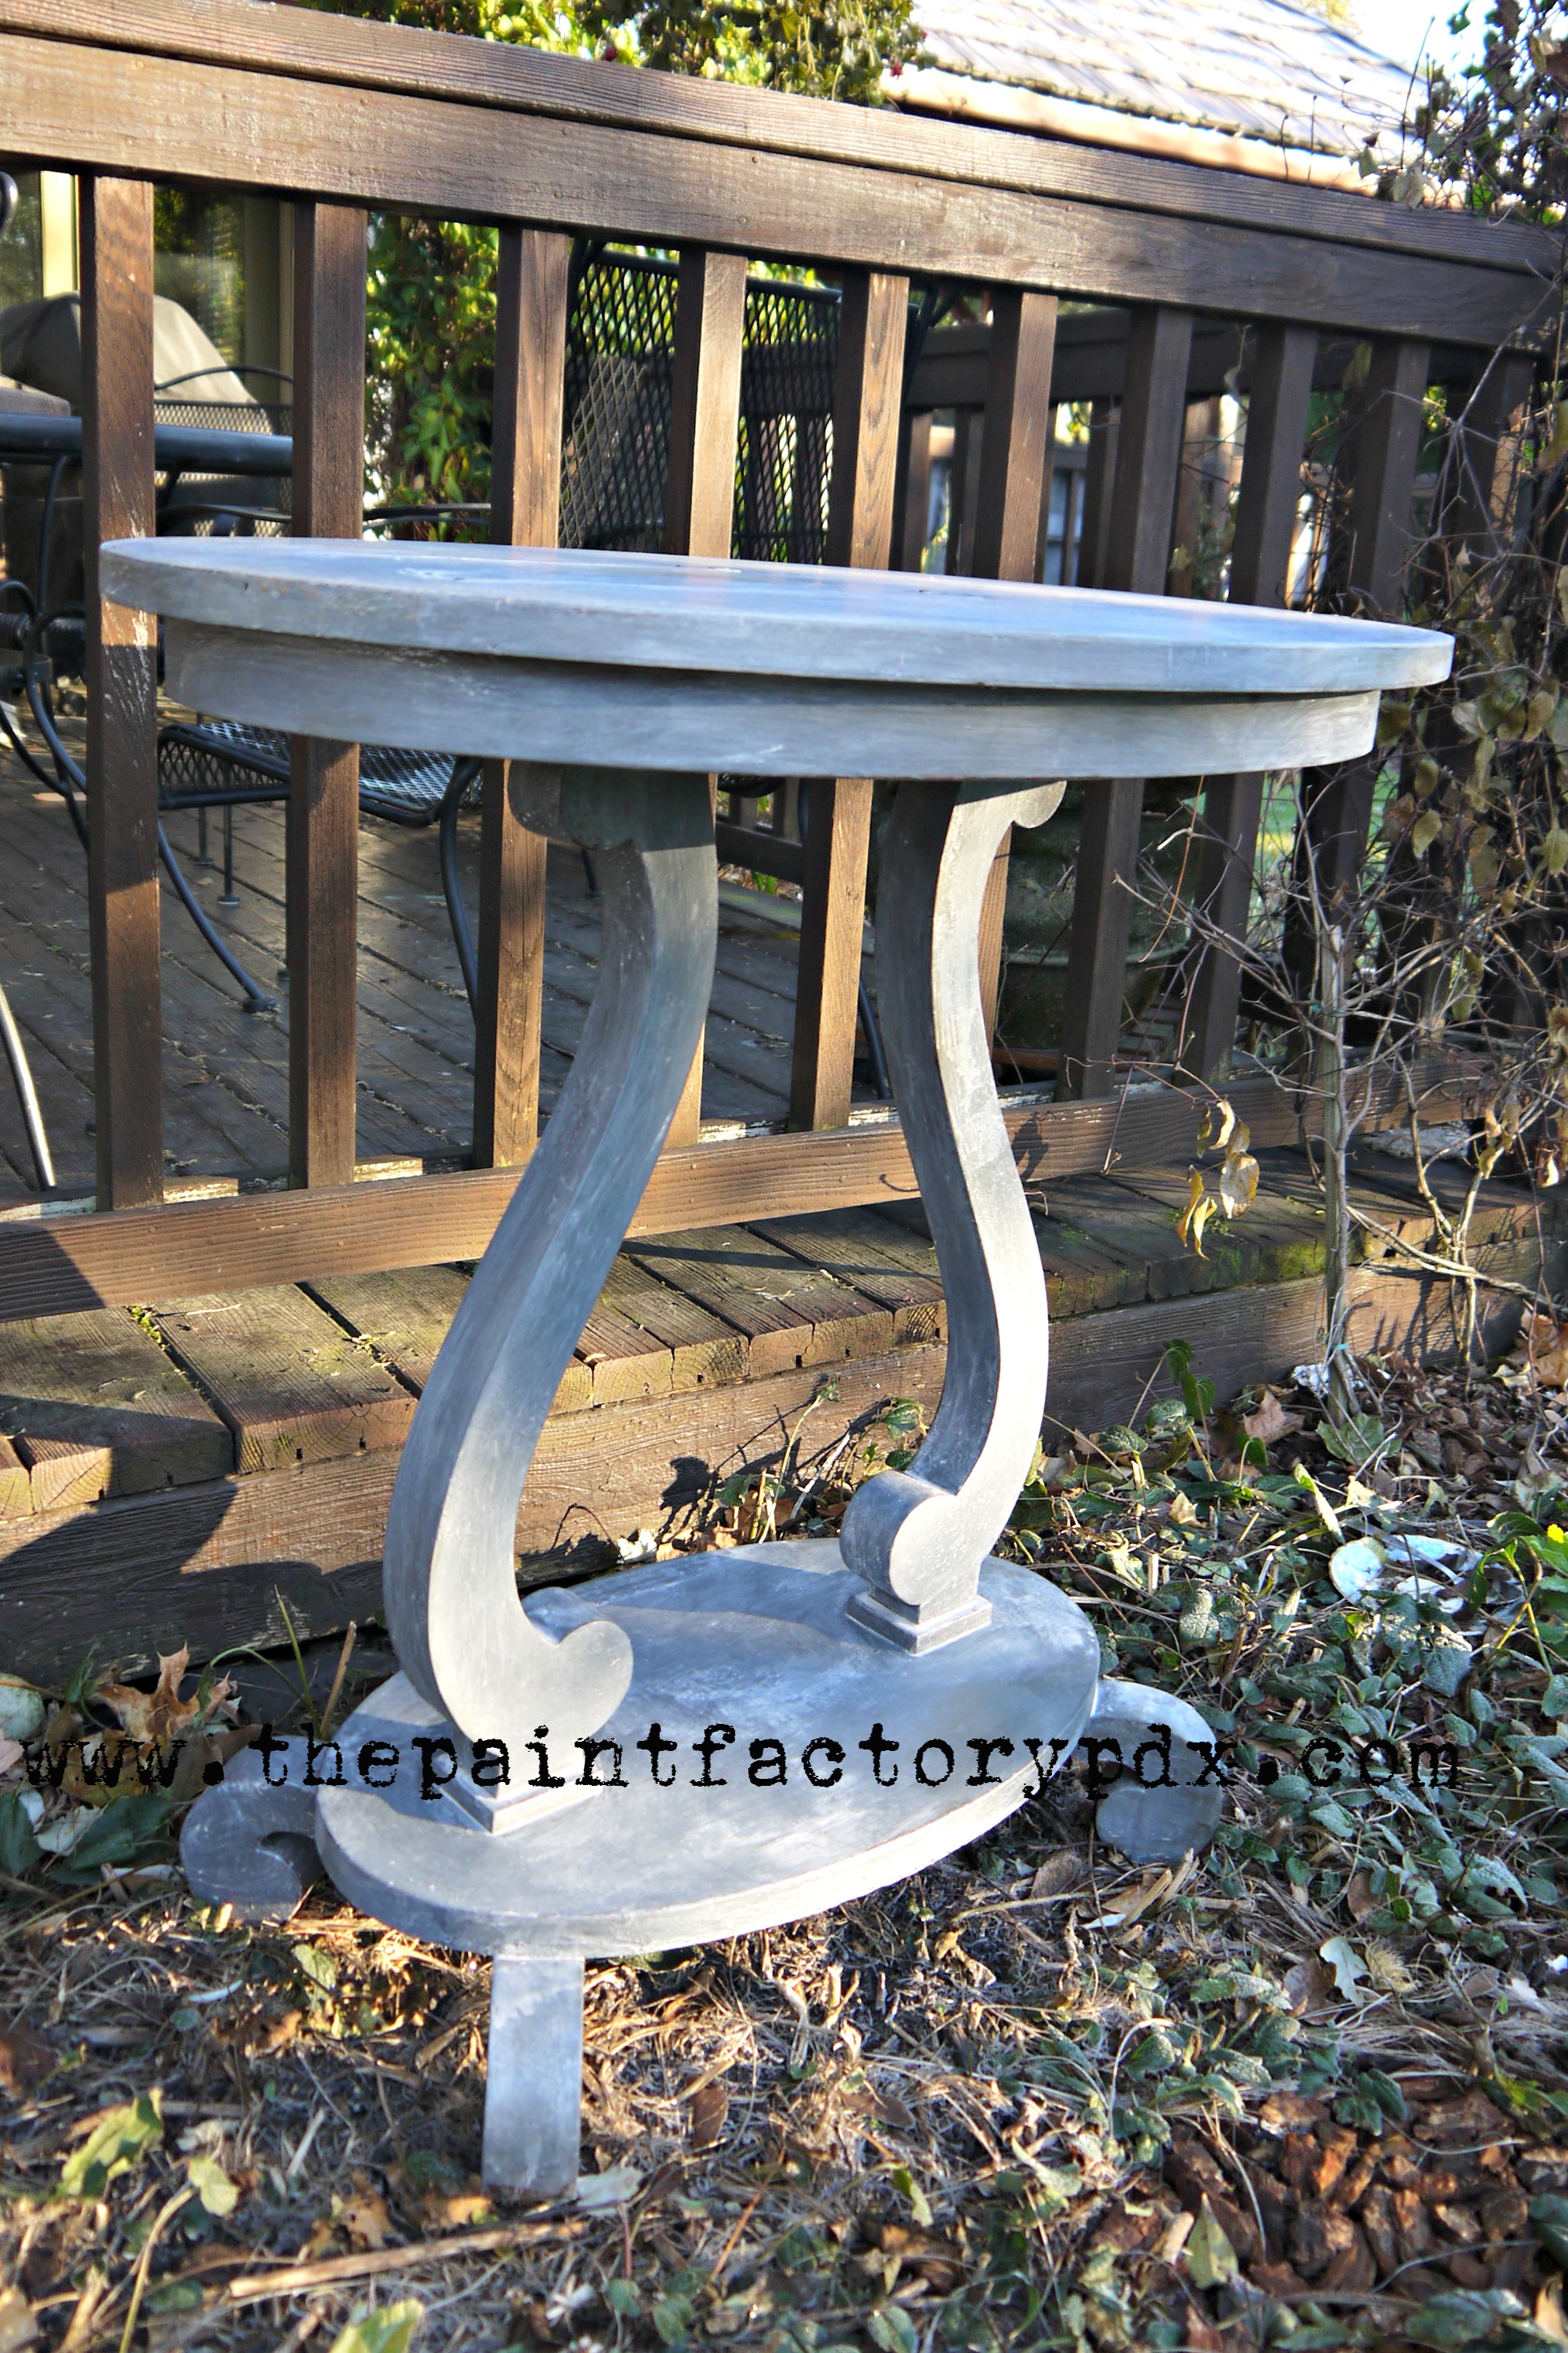
 And there you have it. Your faux zinc finish. Restoration Hardware never looked so good!
Easy.
{insert catchy ending phrase here}
Diane aka The Paint Factory
(Remember, don’t forget to enter for the GIVEAWAY!)